Deploy VAs in Amazon Web Services
Deploy Cisco Secure Access Virtual Appliances (VAs) in Amazon Web Services.
Note: You must deploy at least two Virtual Appliances (VAs) in a Secure Access Site. It is critical that these VAs are not cloned or copied in any way. Configure and set up each VA manually.
Table of Contents
Prerequisites
- Full Admin user role. For more information, see Manage Accounts.
- For information about the network requirements for deploying VAs, see Prerequisites for Virtual Appliances.
- If you are using the VA on Amazon Web Services as a DNS server for your on-premise endpoints, then DNS traffic from these endpoints should not traverse through a Network Address Translation (NAT) device en route to the VA. The VA should receive DNS packets with the source IP as the internal IP of the endpoints. An AWS Direct Connect or dedicated MPLS or VPN connection from your on-premise environment to AWS will meet this requirement.
- Only VAs running version 2.6 or above can be deployed in AWS.
Configure Authentication for the Virtual Appliances
Before you can download the Virtual Appliance images in Secure Access, you must configure your Secure Access API keys for the Virtual Appliances in your organization. Secure Access enables the Download Components button only after the API keys for the VAs are configured. For more information, see Configure Authentication for Virtual Appliances.
Procedure
- Prepare the Virtual Appliance Amazon Machine Image. This is a one time task.
- Launch the Virtual Appliance on Amazon Web Services. Perform this task for each VA after you have performed the one-time task of preparing the VA image.
Step 1 – Prepare the Virtual Appliance Amazon Machine Image
Note: This is a one-time task to create an Amazon Machine Image (AMI) that can be used to launch multiple VAs.
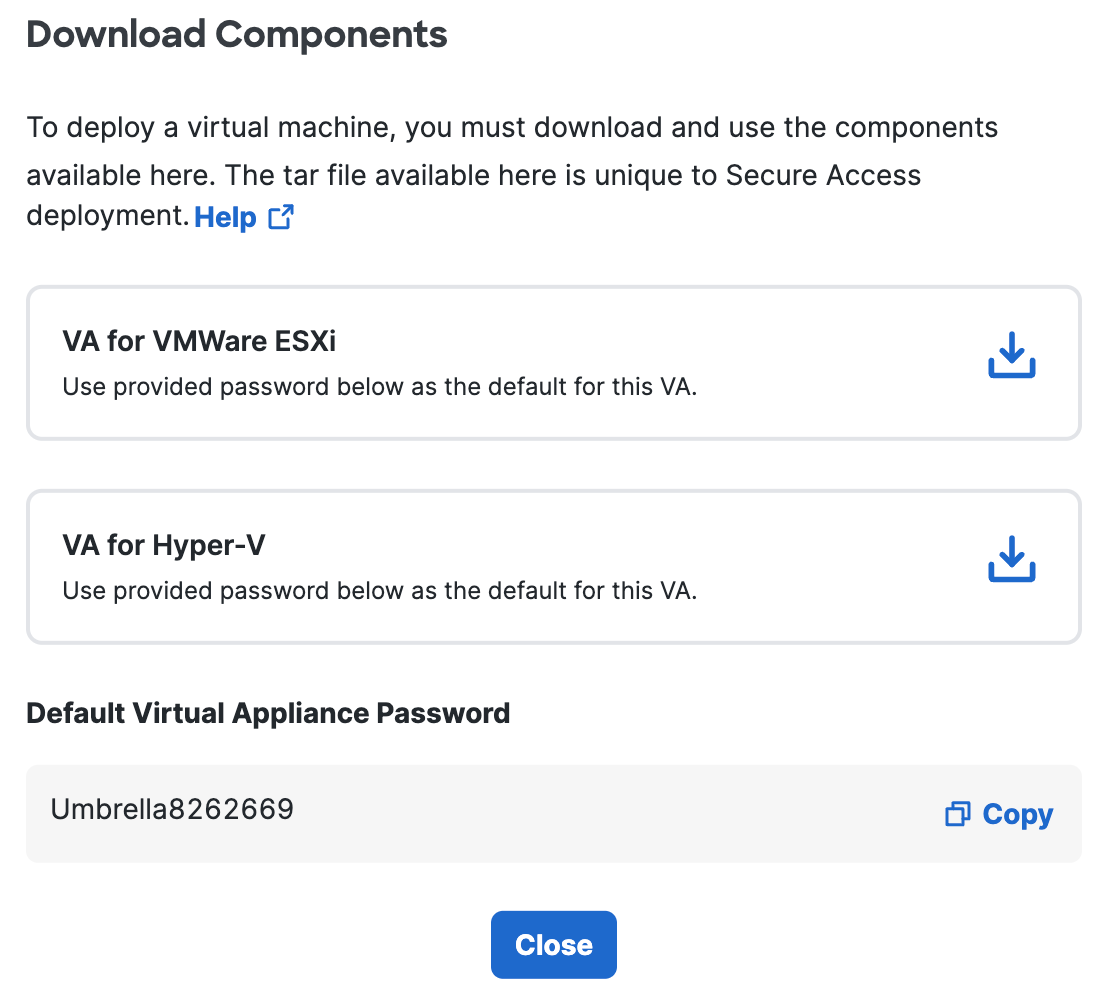
a. Navigate to Connectors and click Download Components.

b. Click Download for VA for Hyper-V.

Secure Access generates and downloads a .tar file to your computer unique to your deployment.
This .tar file includes:
- a .zip file containing the virtual hard disks that need to be deployed on AWS
- a signature file
- a Cisco public certificate to validate the signature
- a readme file
c. Extract the contents of the tar file using the command
tar –xvf <.
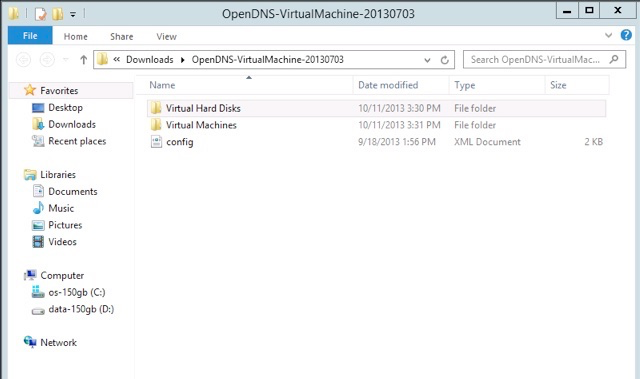
To verify the integrity of the downloaded file, validate the signature by following the instructions provided in the readme file. On successful signature validation, you see a message saying “Verified OK.“d. Extract the .zip file. You'll find two folders—Virtual Hard Disks and Virtual Machines—and a config file.

e. Follow the steps provided by AWS to (optionally) create an S3 bucket and to create the vmimport service role.
f. Upload the downloaded vhd files (forwarder-va.vhd and dynamic.vhd) to the S3 bucket.
This should be the same S3 bucket as specified in the role-policy.json file.g. Use the AWS CLI to import the image.
Create a file locally named "containers.json" for importing the image. The following is an example of a containers.json file. Specify the S3 bucket where you have saved the vhd images in this file.
[
  {
    "Description": "Forwarder",
    "Format": "vhd",
    "UserBucket": {
        "S3Bucket": "va-vhd-bucket",
        "S3Key": "forwarder-va.vhd"
    }
  },
  {
    "Description": "Dynamic",
    "Format": "vhd",
    "UserBucket": {
        "S3Bucket": "va-vhd-bucket",
        "S3Key": "dynamic.vhd"
    }
  }
]
Image File Format
You must use the .vhd files to create the Amazon Machine Image and not the .ova file. Creating the AMI using the .ova file will result in the VA not being able to register to Umbrella.
h. Use the AWS CLI command
import-imageto create import tasks:
aws ec2 import-image --description "Umbrella VA" --license-type BYOL --disk-containers "file://containers.json"i. Note the AMI ID and verify that the import has been completed through the
describe-import-image-taskscommand:
aws ec2 describe-import-image-tasks --import-task-ids <AMI ID>j. Once the VA Amazon Machine Image is created, use this image to launch multiple VAs. For more information, see Step 2. Launch the Virtual Appliance on Amazon Web Services.
Step 2 – Launch the Virtual Appliance on Amazon Web Services
Note: Before performing this task, you must complete the one-time task of preparing the virtual appliance image on AWS.
Nitro based instance types and instance types that enable the Elastic Networking Adapter (ENA) are currently not supported. Refer to AWS documentation to determine if the instance type is Nitro based or uses ENA.
a. Use the AWS console to launch Secure Access VA instances in AWS using the VA image you created in Step 1. Prepare the Virtual Appliance Image on Amazon Web Services. Choose a VM size with at least 1 VCPU and 1 GB RAM.
Note: Specifying a public IP address for the VA is a security risk and is not a supported configuration.

b. In Secure Access, navigate toConnectors > DNS Forwarders.
You should see the VA listed here with the dynamic IP address as its name.
You can now configure the VA. For more information and the procedure, see Enter Configuration Mode on a VA Deployed in Azure, AWS, or Google Cloud Platform.
Route 53 Resolver can also be used to apply network-level protection to your AWS workloads. See How to Point AWS to Umbrella with New Route 53 Feature for more information.
c. For a VA deployed on AWS, in addition to configuring the IP of the VA via the VA command line, you will also need to assign this IP to the VA instance through the AWS console. If this IP is different from the DHCP IP assigned by AWS, you can add it as the secondary IP for the instance.
Deploy VAs in Microsoft Azure < Deploy VAs in Amazon Web Services > Deploy VAs in Google Cloud Platform
Updated 2 months ago
