Integrate Cisco ISE with Secure Access
This topic describes how to complete the integration between Cisco ISE and Cisco Secure Access.
-
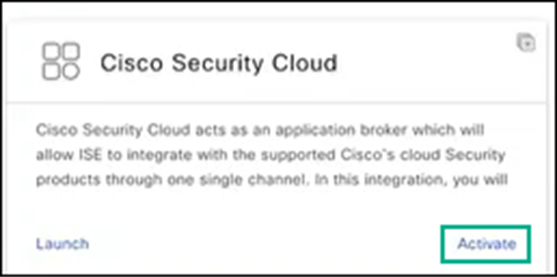
Return to the Cisco DNA Portal tab, search for the Cisco Security Cloud application, and click Activate.
-
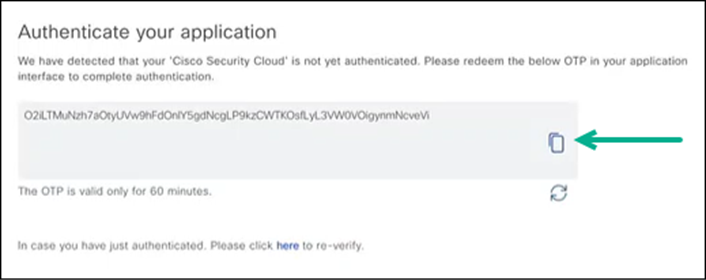
Choose Authenticate your application and copy the resulting token to your clipboard by clicking the copy icon.
-
Click Exit.
-
Return to the Secure Access tab.
-
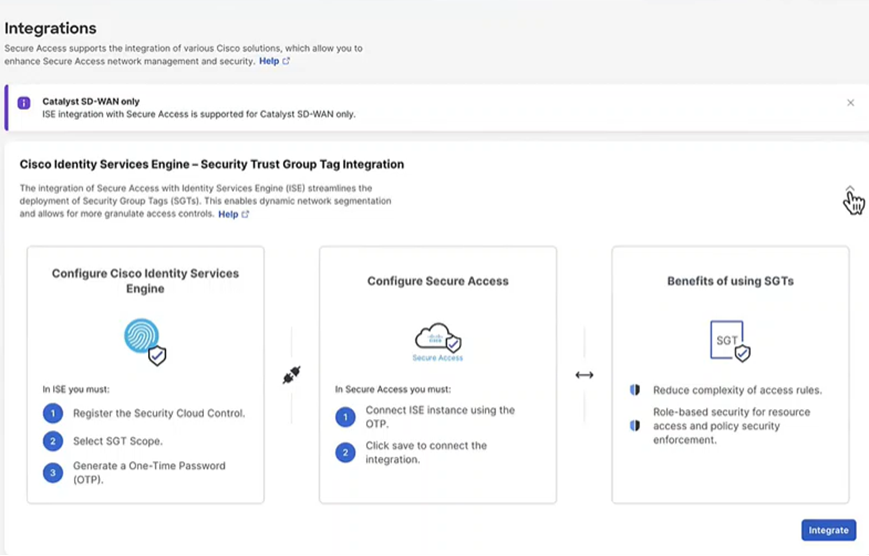
Navigate to Admin > Management > Integrations.
-
Click Integrate to add the ISE integration.
-
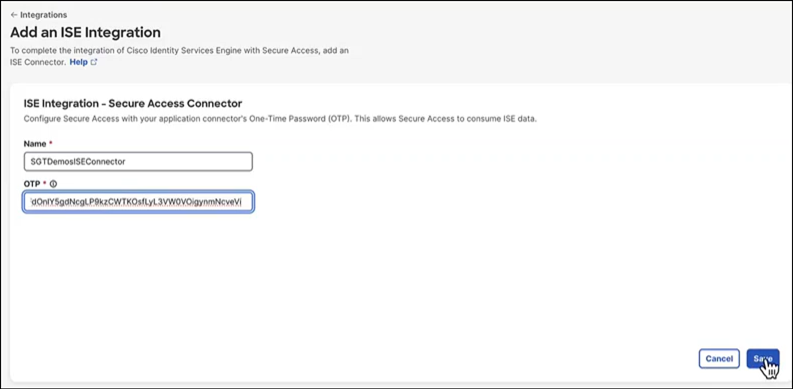
Enter a Name for the ISE integration, paste in the copied token, and then click Save.
-
The system returns a confirmation banner indicating a New ISE Cluster added.
-
Expand the integration pane to view the status of the ISE cluster (waiting for activation).
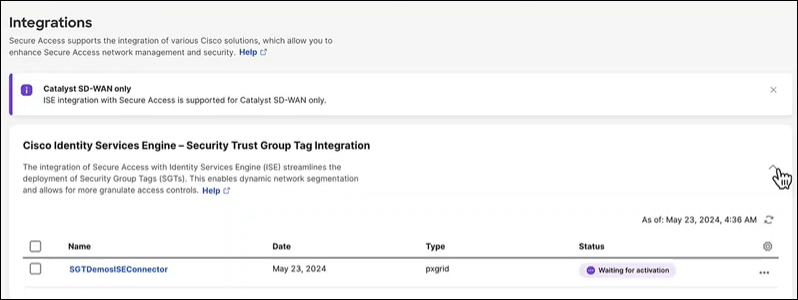
-
Return to the Cisco DNA Portal tab and the Cisco Security Cloud application.
-
On the Cisco Security Cloud tile, click Manage.
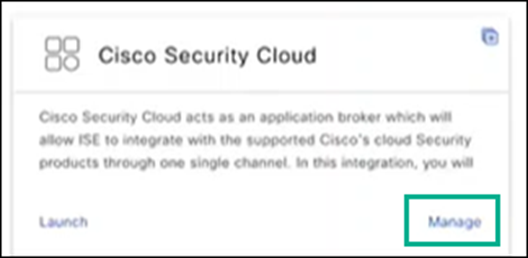
-
Choose Add and select the ISE application instance.
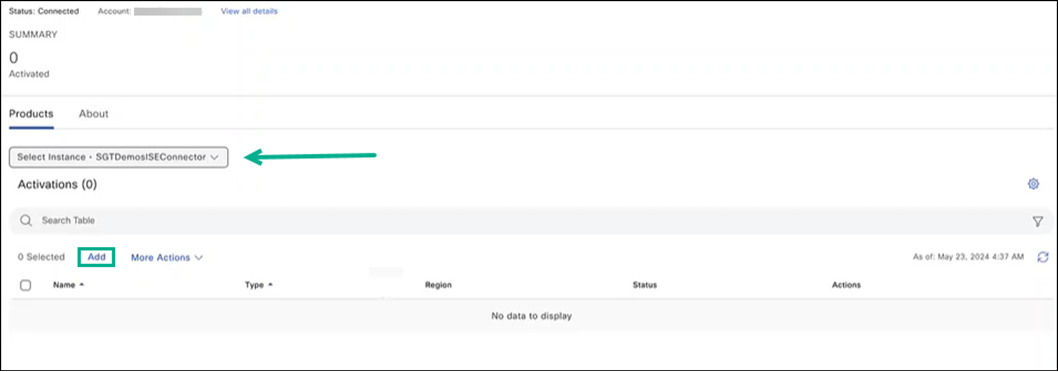
-
Choose the application instance that will be associated with your subscription, then click Next.
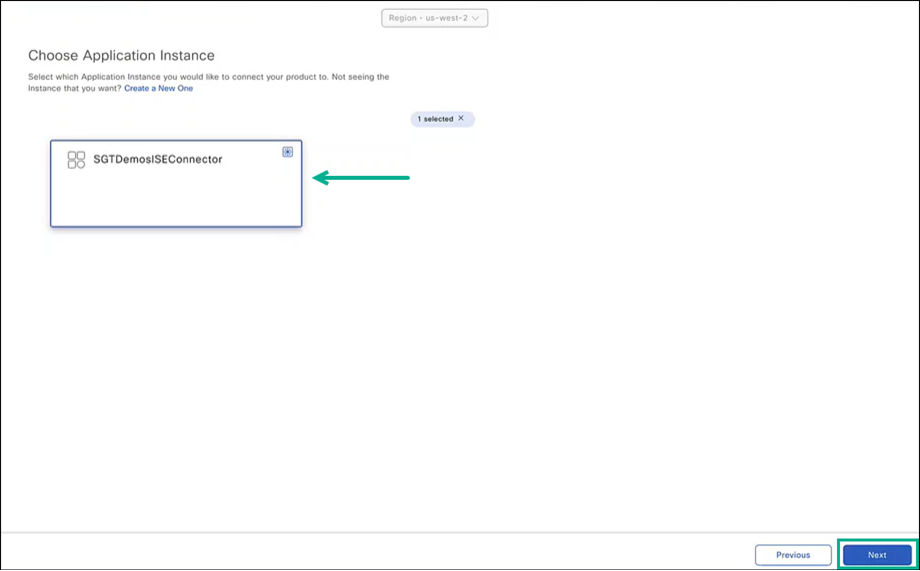
-
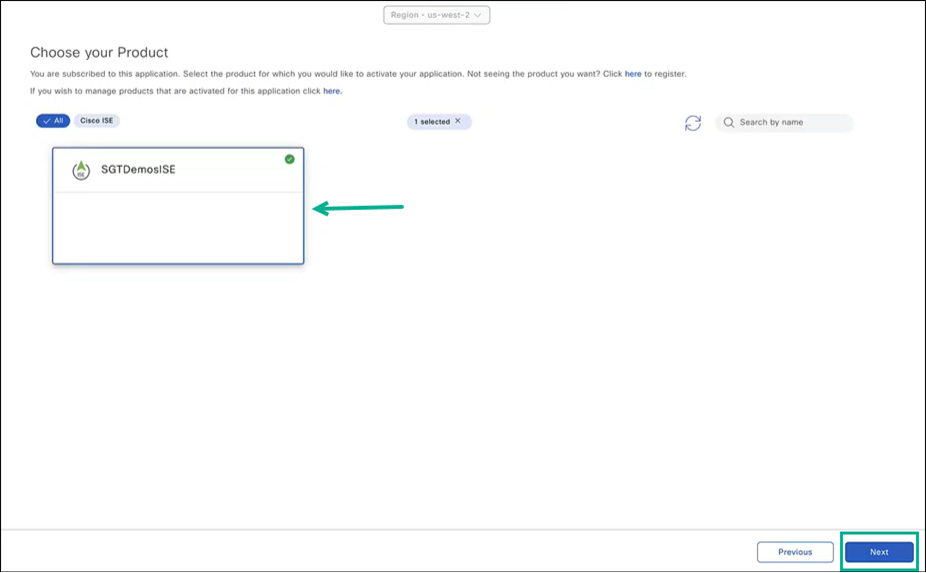
Choose the product for which you want to associate the application. In this example choose Cisco ISE, then click Next.
-
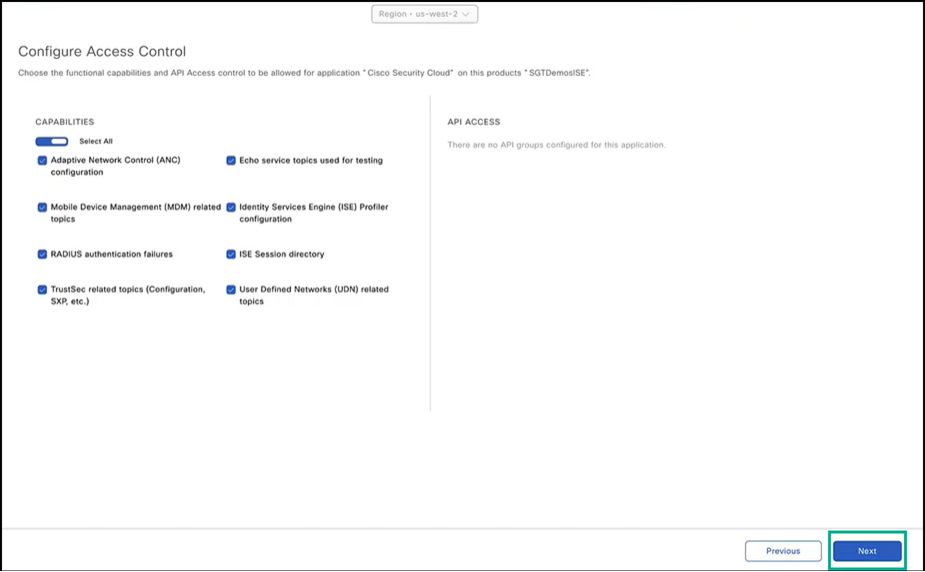
Choose capabilities and API access for the application and click Next.
-
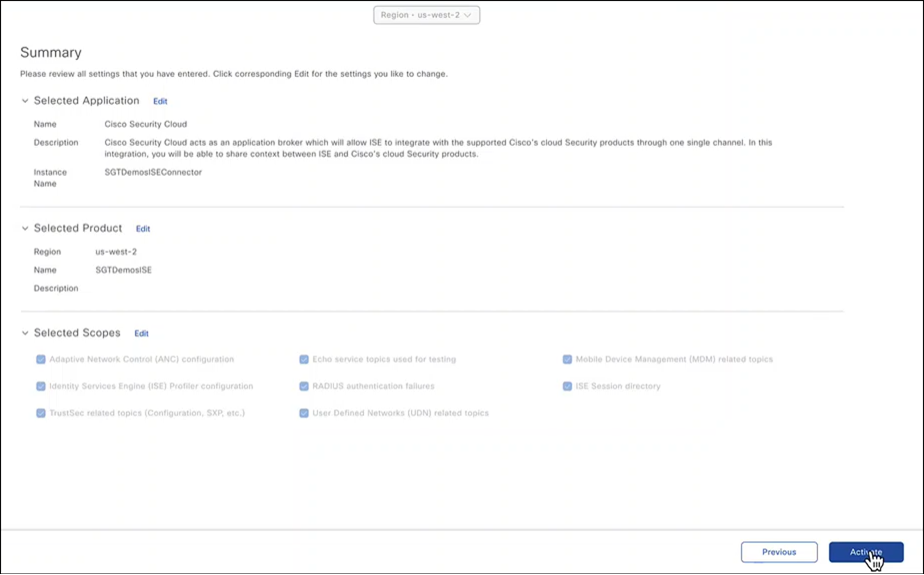
Review the application summary. You can click Edit to make any changes. Click Activate to complete the setup.
-
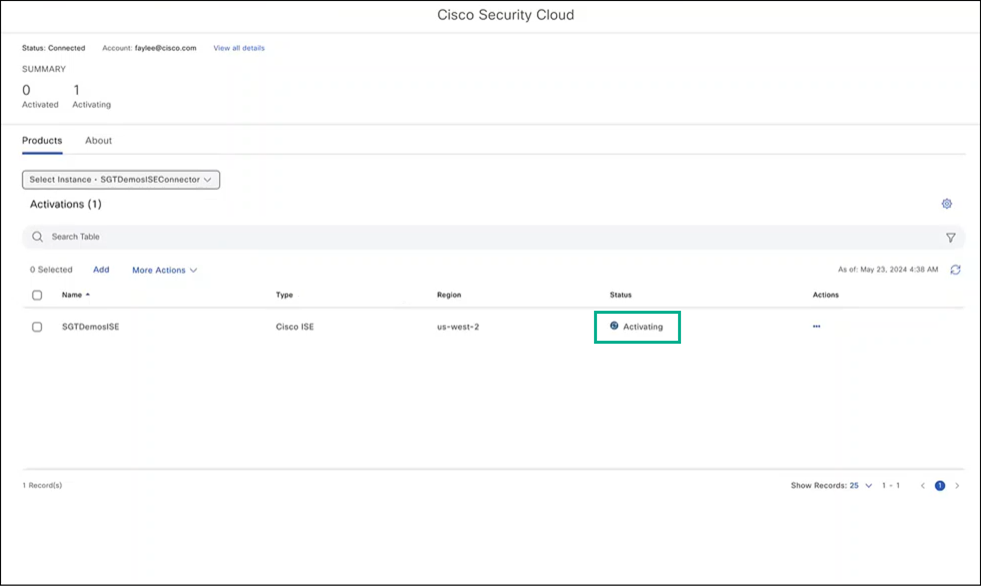
Monitor the Cisco Security Cloud dashboard to view the status.
-
Once the instance is active in Cisco Security Cloud, it should sync to Cisco Secure Access. You can switch between the tabs to view the state of the sync.
Enable Cisco Security Cloud Exchange < Integrate Cisco ISE with Secure Access > Verify and Monitor Context Sharing
Updated 11 months ago
