Deploy a Connector in AWS
A resource connector is a lightweight service deployed in a virtual machine in your cloud environment. A resource connector manages the network communications to a configured private resource. Cisco Secure Access provides a pre-configured resource connector image for Amazon Web Services (AWS).
This guide describes the steps to deploy an Amazon Machine Image (AMI) to create your resource connector instances.
Save Your Private SSH Key
After you generate an SSH key pair required for access to the resource connector, you must save your SSH key in your environment. Cisco cannot recover your SSH key and you will lose remote access and the capability to manage the resource connector.
Table of Contents
- Prerequisites
- Get Connector Images on the AWS Marketplace
- UEFI Secure Boot Environment for Resource Connector Images
- Procedure
Prerequisites
Gather the required information, and understand and meet the Requirements and Prerequisites for Resource Connectors and Connector Groups.
- An AWS account.
- Supported architectures:
- Intel x86_64
- AMD64
- Required instance type for deployments in production environments: C5.xlarge
- Create the connector group in the region nearest to the geographical location where you will deploy these connectors.
- All connectors in a group must use the same environment, for example: AWS.
- Obtain the connector image from the AWS marketplace. For more information, see Get Connector Images on the AWS Marketplace
- Copy the provisioning key for the specific connector group where you will deploy these connectors.
For more information, see Provisioning Keys for Resource Connectors. - Disk encryption is recommended for your connectors. You configure this during connector deployment, but you should complete any prerequisites before deploying the image. For more information, see the AWS documentation.
Get Connector Images on the AWS Marketplace
- Navigate to the AWS Marketplace at
https://aws.amazon.com/marketplace/pp/prodview-oonzvpdnti7jmand sign in with your AWS account. - Choose the Secure Access Resource Connector image for your cloud environment.
UEFI Secure Boot Environment for Resource Connector Images
The Secure Access Resource Connector images for AWS support UEFI Secure Boot, which provides a trusted boot environment for the connector instance.
Requirements for the UEFI Secure Boot Environment
Important
If you choose an AWS instance type that is not recommended by Cisco Secure Access, we can not guarantee that your Resource Connector instance can boot in AWS. Review the AWS documentation to verify whether your instance type supports UEFI Secure Boot.
- You can deploy Resource Connector images with UEFI Secure Boot on these architectures:
- Intel x86_64
- AMD64
- We recommend that you redeploy your Resource Connector instances with the UEFI Secure Boot environment.
Procedure
Perform the following tasks once per connector instance. You can use the Cisco Secure Access Resource Connector image to create multiple connector instances. You must deploy each connector instance independently.
Important
Do not clone the connector instances.
- Step 1 – Launch an Amazon Machine Image for each Connector Instance
- Step 2 – Configure the Connector
- Step 3 – Launch the Connector Instance
Step 1 – Launch an Amazon Machine Image for the Connector Instance
Launch an Amazon machine image for each connector instance.
- Navigate to the AWS Marketplace at
https://aws.amazon.com/marketplace/pp/prodview-oonzvpdnti7jmand sign in with your AWS account. - Review the AMI product overview, pricing, usage, and support.
- Click Continue to Subscribe.
- Review the Terms and Conditions and then click Accept Terms.
- Click Continue to Configuration after accepting End User License Agreement (EULA).
- Choose Fulfillment Option (AMI), Software Version (latest) and Region.
- Continue to Launch.
- For the Launch action, choose Launch through EC2 to launch the configuration through the Amazon EC2 console, and then click Launch.
Note: The Launch from website option is not supported.
Step 2 – Configure the Connector
-
Navigate to the launched Amazon EC2 console to configure the connector instance.
-
Enable Auto-Assign Public IP.
This ensures that a Datagram Transport Layer Security (DTLS) connection uses the same IP address as Transport Layer Security (TLS) connections, which is required for optimal throughput. -
Set the SSH key pair to enable access to the connector instance, and then save your SSH key to your local system. Use the acadmin username.
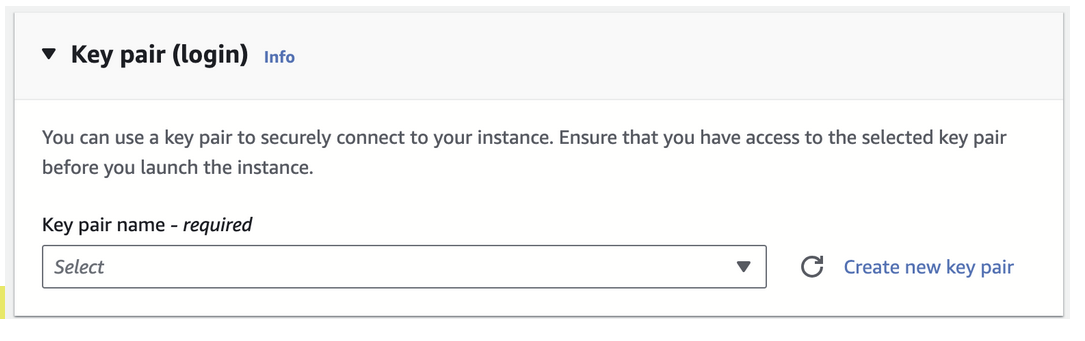
SSH access is required in order to troubleshoot an issue or get information about the connector to provide to Secure Access support. You can SSH to the connector after the instance launches.
Important
You can not enable SSH access after the connector deploys on AWS.
- Associate the connector with the connector group.
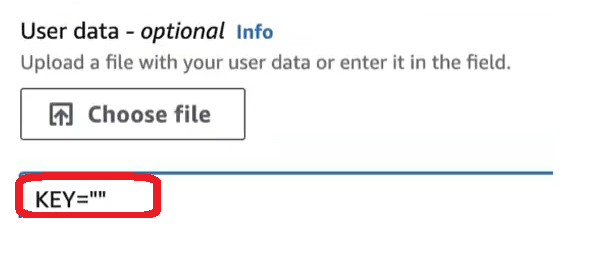
a. Navigate to Advanced Details, scroll to the User Data - optional area.
b. In the text box, type KEY="" and paste the provisioning key that you copied from the connector group in Secure Access between the quotation marks, with no spaces anywhere in the text box. For more information about creating connector provisioning keys, see Provisioning Keys for Resource Connectors.
- Specify the number of connector instances to create based on the calculations you used for required throughput when you added the connector group.
For redundancy, you should deploy at least two connector instances for each group.
Step 3 – Launch the Connector Instance
-
Launch the instance.
-
Once the resource connector VM is up, you can connect to your instance using SSH.
-
The resource connector establishes a network tunnel to the private resource.
-
After you launch the instance, the connector syncs automatically with Secure Access.
- You must confirm each connector instance to complete the connector configuration. For more information, see Add Connectors to a Connector Group: Confirm Connectors.
- If you do not see the connector in your deployed connectors list, see Troubleshoot Resource Connectors and Connector Groups.
Deploy a Connector in VMware < Deploy a Connector in AWS > Deploy a Connector in Azure
Updated 24 days ago