Manage IP Surrogates for User Authentication
The Cisco Secure Access Secure Web Gateway (SWG) uses a cookie surrogate for Security Assertion Markup Language (SAML) authentication. Secure Access checks if a cookie is set in the HTTPS request. If the cookie surrogate is not set in the HTTP header, then Secure Access can not authenticate the user's connections to secure internet destinations.
We recommend using IP surrogates when the user's private IP address is visible, when your network tunnels don't use NAT, or when your networks incorporate a Proxy Chain with the X-Forwarded-For (XFF) request header. If the user’s private IP address or an IP address is shared by multiple users, then we recommend using cookie surrogates. You can bypass IP surrogates for the internal networks that you add to an SSO authentication identity provider (IdP) integration.
Table of Contents
Prerequisites
- Full Admin user role. For more information, see Manage Accounts.
- At least one configured user authentication IdP integration. For more information, see Add User Authentication Profiles.
- Internal private IP addresses are visible. IP surrogate needs to be able to see the internal private IPs.
- Proxy networks with XFF or network tunnels without NAT.
- In Secure Access, enable HTTPS inspection.
- Do not delete cookies at the end of a browser session, or browse in incognito mode.
How HTTPS Inspection Works
Before redirecting a web request to an IdP, Secure Access uses HTTPS inspection to determine if a request is from a browser that supports cookies. Secure Access can establish the identity of a user through the browser cookies and map the user to an IP address. For subsequent requests, Secure Access uses the IP address as a surrogate for the user. Secure Access periodically inspects the cookies in a browser request to ensure the user is mapped to the correct IP address.
Secure Access checks to determine if an IP address has been reassigned; only requests from browsers are checked. This check is affected when browsing in incognito mode or deleting cookies from a browsing session and will require the user to re-authenticate. If the user has not browsed for over 12 hours since the last identity check, the IP is discarded from user to IP mapping until the user re-authenticates. After this, the policy will match either a tunnel or network identity.
Note: When Active Directory IdP users authenticate with a browser installed on a dual stack IPv4/IPv6 device, the IP Surrogates feature will not automatically map both addresses to the user. The user must authenticate twice to map both the IPv4 address and the IPv6 address as user surrogates. Re-authentication will also be enforced separately.
Procedure
- Enable IP Surrogates for User Authentication
- Add Internal Networks for Bypass
- Delete Internal Networks for Bypass
Enable IP Surrogates for User Authentication
You can add internal networks for your integrated SSO authentication IdP that connect on Registered Networks or Network Tunnels through the Secure Access Secure Web Gateway.
The connections on the internal networks bypass the SAML IP surrogate authentication challenge and revert to SAML with cookie surrogates. You should bypass IP surrogates for internal networks from IP surrogates where the IP address is shared by a number of users, such as a virtual desktop deployment. In these cases, where an IP address is shared, we recommend cookie surrogates because they associate the user's browser session to the identity. Internal networks must be defined for the IP address before you can add it to the IP surrogate bypass list.
Add an Internal Network to the IP Surrogate for Registered Networks and Network Tunnels in Network Tunnel Groups where the internal IP address is not visible or is shared by multiple users. Once added, the internal networks will bypass the SAML IP surrogate authentication challenge.
-
Navigate to Connect > Users and User Groups, and then click Configuration management.

-
On the Advanced Settings tab, toggle on IP Surrogate.
The Internal Network bypass option appears.

Add Internal Networks for Bypass
After you enable IP Surrogate, add internal networks. The user connections on internal networks bypass the SAML IP surrogate authentication challenge for traffic to the Secure Access Secure Web Gateway.
-
Navigate to Connect > Users and User Groups, and then click Configuration management.

-
On the Advanced Settings tab, navigate to IP Surrogate.
-
Confirm that you enabled IP Surrogate.

-
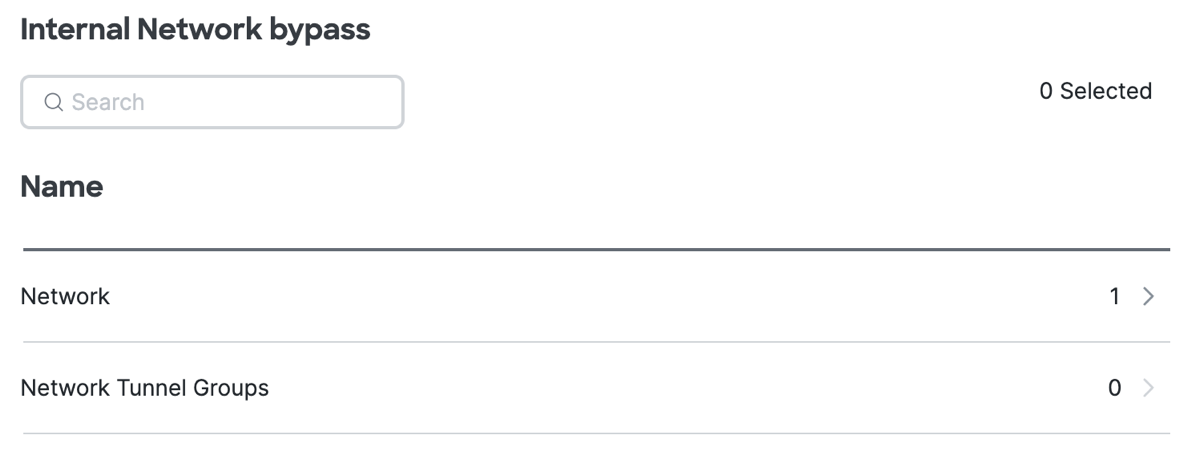
Click Internal Network bypass.
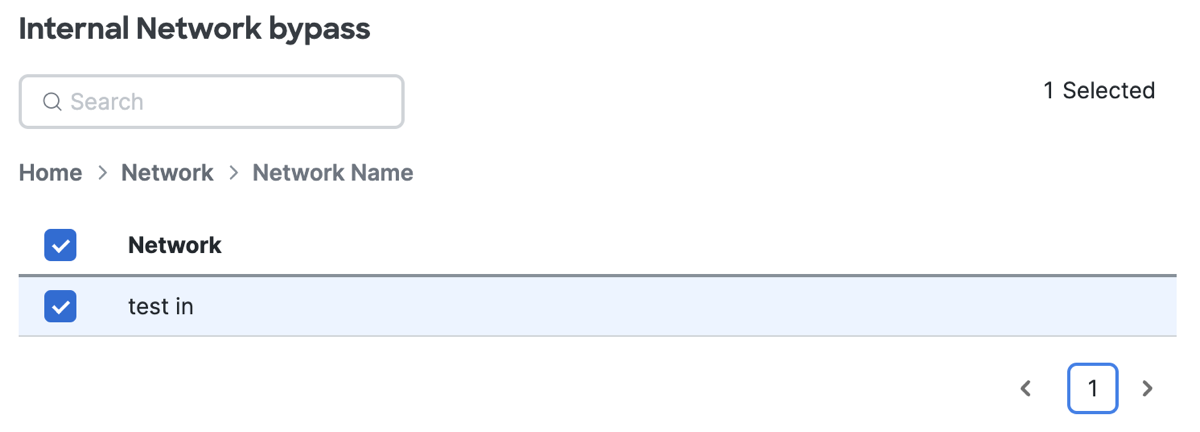
Select the internal networks that are associated with Registered Networks and Network Tunnels in Network Tunnel Groups. -
Expand Network.
a. Expand a specific Network, and then select the internal networks for the Registered Networks.
b. Click Apply.

- Expand Network Tunnel Groups.
a. Expand a specific Network Tunnel Group, and then select the internal networks for the Network Tunnels in the Network Tunnel Groups.
b. Click Apply.

Delete Internal Networks for Bypass
-
Navigate to Connect > Users and User Groups, and then click Configuration management.

-
On the Advanced Settings tab, navigate to IP Surrogate.
-
Confirm that you enabled IP Surrogate.

- Click Internal Network bypass.
Select the internal networks that are associated with Registered Networks and Network Tunnels in Network Tunnel Groups. - Expand Network.
a. Expand a specific Network, and then remove the internal networks for the Registered Networks.
b. Click Apply. - Expand Network Tunnel Groups.
a. Expand a specific Network Tunnel Group, and then remove the internal networks for the Network Tunnels in the Network Tunnel Groups.
b. Click Apply.

Manage Advanced Configuration Settings < Manage IP Surrogates for User Authentication > Configure Identity Providers
Updated 9 months ago
