Configure Microsoft Entra ID for SAML
Cisco Secure Access uses Security Assertion Markup Language (SAML) to authenticate and authorize web requests from user devices on networks and network tunnels with Web security enabled. Secure Access can also authenticate and authorize requests to private resources from user devices with Zero Trust Access (ZTA) enabled. To support SAML authentication and authorization, you must configure the integration of an SAML identity provider (IdP) in Secure Access.
Configure the Microsoft Entra ID SAML IdP with Secure Access by uploading the Entra ID XML metadata file to Secure Access, or alternately add the Entra ID metadata in Secure Access manually.
For information about provisioning an organization's users from Entra ID in Secure Access, see Provision Users and Groups from Microsoft Entra ID.
Table of Contents
- Prerequisites
- Procedure
- Test the Identity Provider Integration
- View the SAML Certificates in Secure Access
Prerequisites
- For information on prerequisites that apply to all SAML IdPs, see Prerequisites for SAML Authentication.
Bypass Domains from SSL Decryption
We recommend that you bypass certain domains on the secure web gateway. For more information, see Manage Internet Security Bypass.
To exclude a domain from Secure Access SSL Decryption, add the following domain names to the list of bypassed domains:
- login.live.com
- login.microsoftonline.com
- msauth.net
- msftauth.net
Procedure
- Step 1 – Choose an Authentication Method.
- Step 2 – Add an Identity Provider
- Step 3 – Configure the Identity Provider's SAML Metadata
Step 1 – Choose an Authentication Method
- For more information, see Add User Authentication Profiles.
Step 2 – Add an Identity Provider
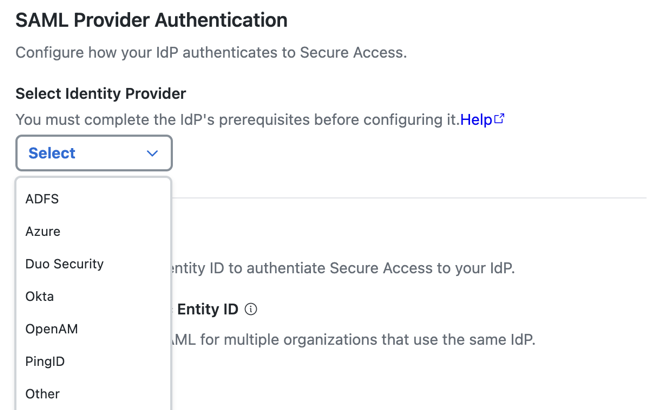
- For Identity Provider, choose Azure. Secure Access supports various IdPs.
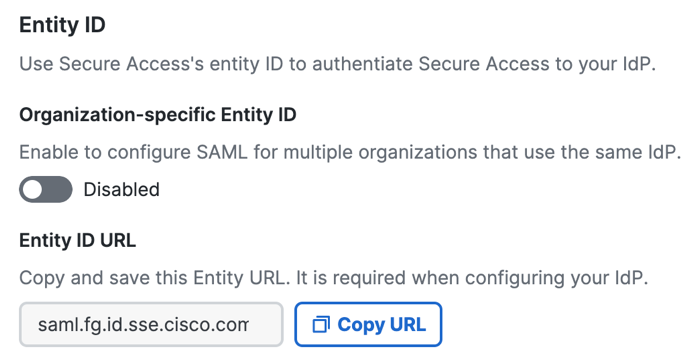
- (Optional) Enable an organization-specific entity ID.
- Organization-specific Entity ID—Choose this option when you have multiple Secure Access Orgs and need to configure SAML authentication for Secure Access Internet Security and Zero Trust (ZT) for these Orgs against the same IdP. The Secure Access SAML default common
EntityIDis saml.fg.id.sse.cisco.com. Secure Access allows you to override the default Secure Access SAML EntityID on a per-Org basis.
- Organization-specific Entity ID—Choose this option when you have multiple Secure Access Orgs and need to configure SAML authentication for Secure Access Internet Security and Zero Trust (ZT) for these Orgs against the same IdP. The Secure Access SAML default common
- For Entity ID URL, click Copy URL to make a local copy of the Secure Access Entity ID URL. The Secure Access SAML default common
EntityIDis saml.fg.id.sse.cisco.com.
- Choose a time interval when a user must authenticate with Secure Access, or select Never.
The time intervals are: Daily, Weekly, or Monthly.
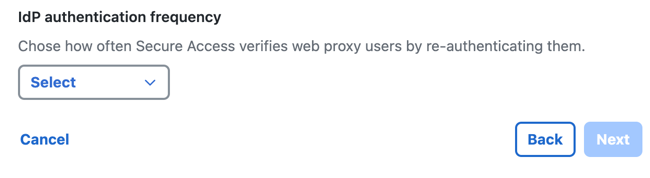
- Click Next.
Step 3 – Add the Identity Provider's SAML Metadata to Secure Access
Download the Secure Access metadata files and use the service provider file to configure your instance of Entra ID.
The Secure Access service provider metadata includes the service provider Issuer ID, the assertion consumer endpoint URL, and the SAML request signing certificate from Secure Access. The Secure Access metadata is required when configuring your IdP.
Your IdP must send the Cisco Secure Access User principal name in the NameID attribute in the SAML assertion.
- Step 3a – Download the Secure Access Service Provider files
- Step 3b – Add the Secure Access Service Provider Metadata to Entra ID
- Step 3c – Add the Entra ID SAML Metadata to Secure Access
Step 3a – Download the Secure Access Service Provider files
Note: Encrypted SAML assertions are a compliance standard in many industries and mitigate the risk of intercepted SAML assertions. For more information, see Prerequisites for SAML Authentication.
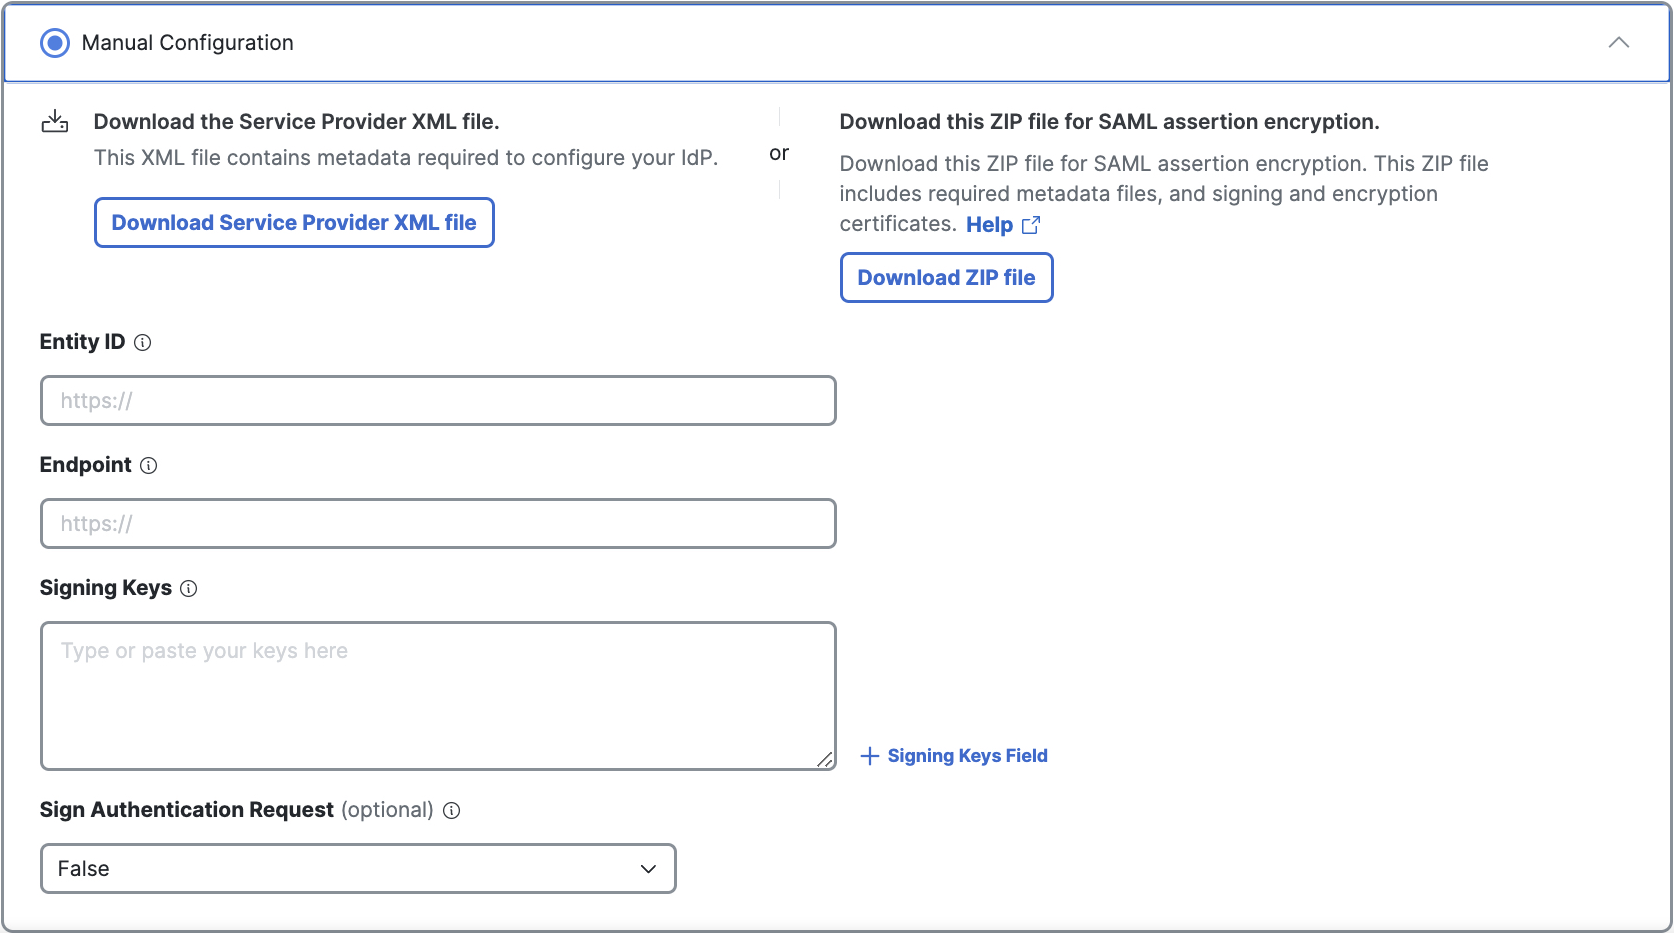
- Check SAML Metadata XML Configuration or Manual Configuration.
- Choose between unencrypted or encrypted SAML assertions.
- Click Download Service Provider XML file for the metadata XML file with the Secure Access root certificate that supports unencrypted SAML assertions.
- Click Download Zip file for the metadata XML file and signing and encryption certificate files required for encrypted SAML assertions. This metadata XML file includes the root certificate metadata for both the signing and the encryption certificates.
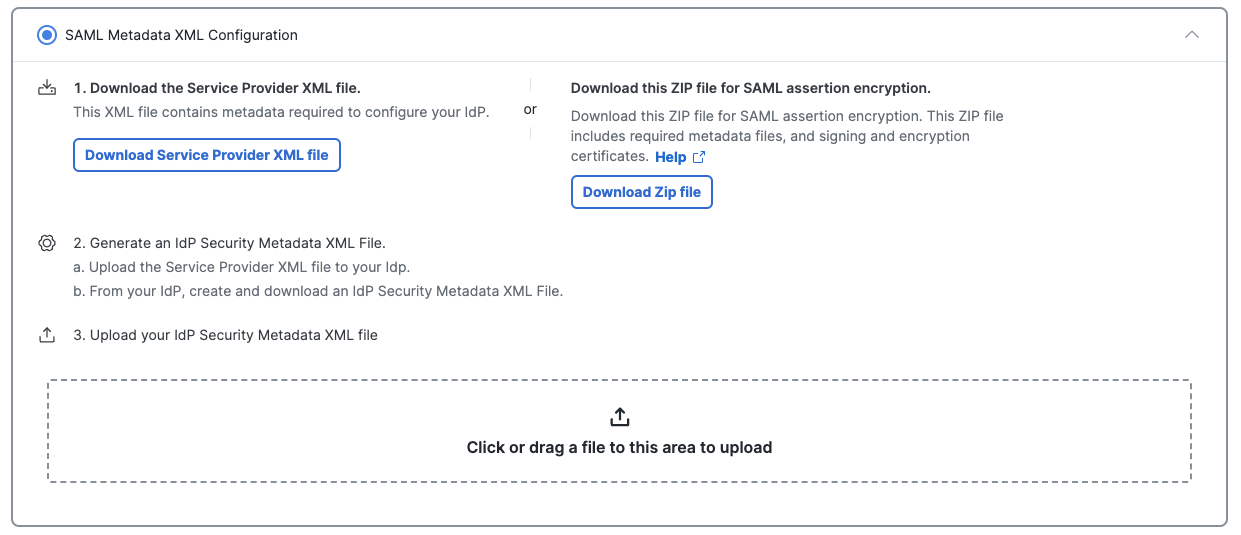
- Open the Cisco_SSE_SP_Metadata XML file.
- Copy the certificates from the Cisco_SSE_SP_Metadata XML file to a new file and save. Use the certificate file in the next step when you create the app integration in Entra ID.
Step 3b – Add Secure Access Service Provider Metadata to Entra ID
Configure Secure Access as a generic SAML 2.0 service provider application for Entra ID. Add the Secure Access service provider metadata to Entra ID, then download the IdP metadata file from Azure to finish configuring Secure Access in the next step.
Contact Microsoft for assistance. For more information on configuring your IdP, exporting your IdP metadata, obtaining your IdP details, or downloading your IdP's signing certificate, refer to Microsoft documentation.
To configure the generic SAML Entra ID application, extract the EntityID and AssertionConsumerService values from the Secure Access metadata file and add these to the applicable fields in Entra ID:
-
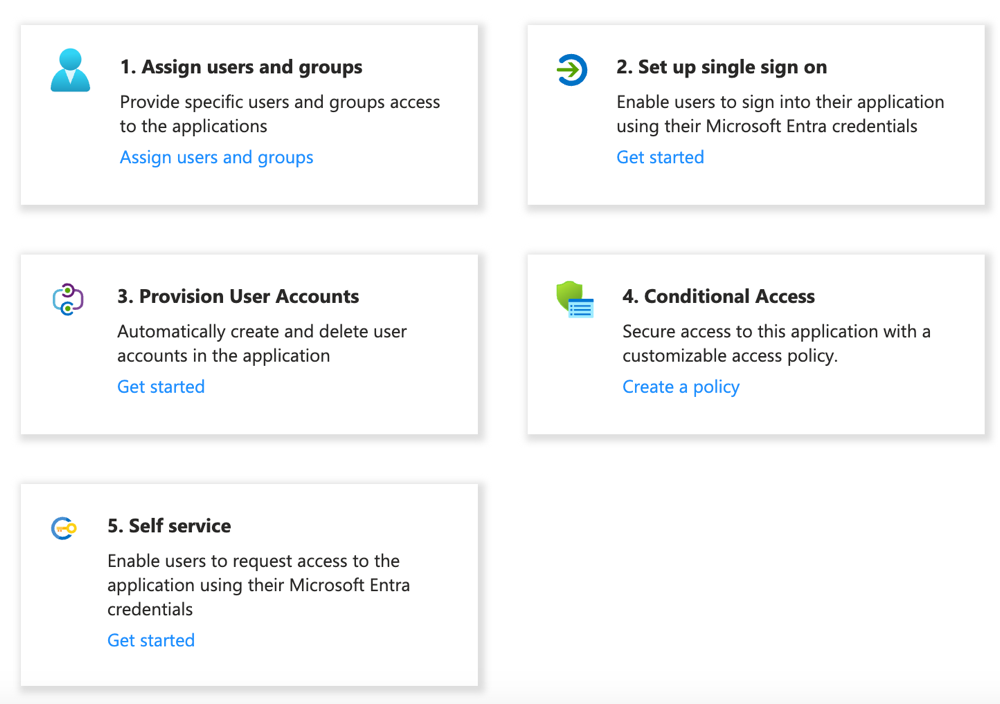
Sign in to Azure and navigate to Azure services > Enterprise Applications.

-
Select New Application.

-
Select Create your own Application.

-
Give the new application a meaningful name, select Integrate any other application you don't find in the gallery (Non-gallery), and then click Create.

-
Navigate to Getting Started, and then click Set up single sign on.
-
Click SAML to select the sign-on method.

-
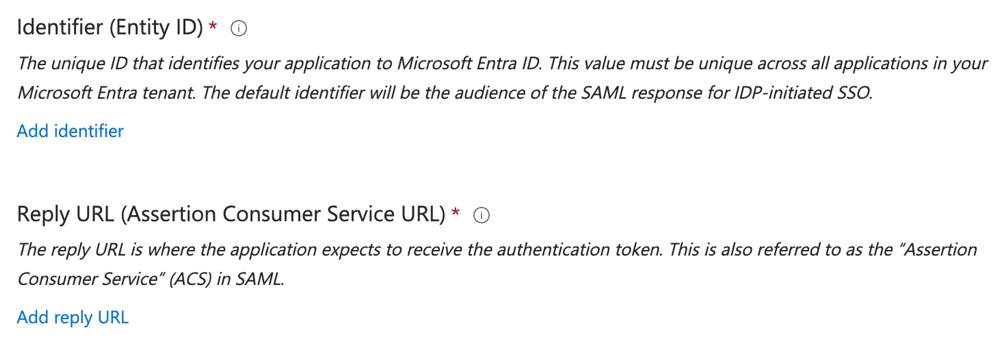
For Basic SAML Configuration, click Edit.

a. For Identifier (Entity ID) (Microsoft Entra ID), click Add identifier and enter saml.fg.id.sse.cisco.com in the text area.
b. For Reply URL (Assertion Consumer Service URL), click Add reply URL and enter https://fg.id.sse.cisco.com/gw/auth/acs/response.
-
Navigate to SAML Certificates, and then Verification certificates (optional).
-
Click Edit.
-
Chose Require verification certificatess and then click Upload certificate.

-
Upload the root certificate that you downloaded from the Cisco_SSE_SP_Metadata XML file, and then click OK.

-
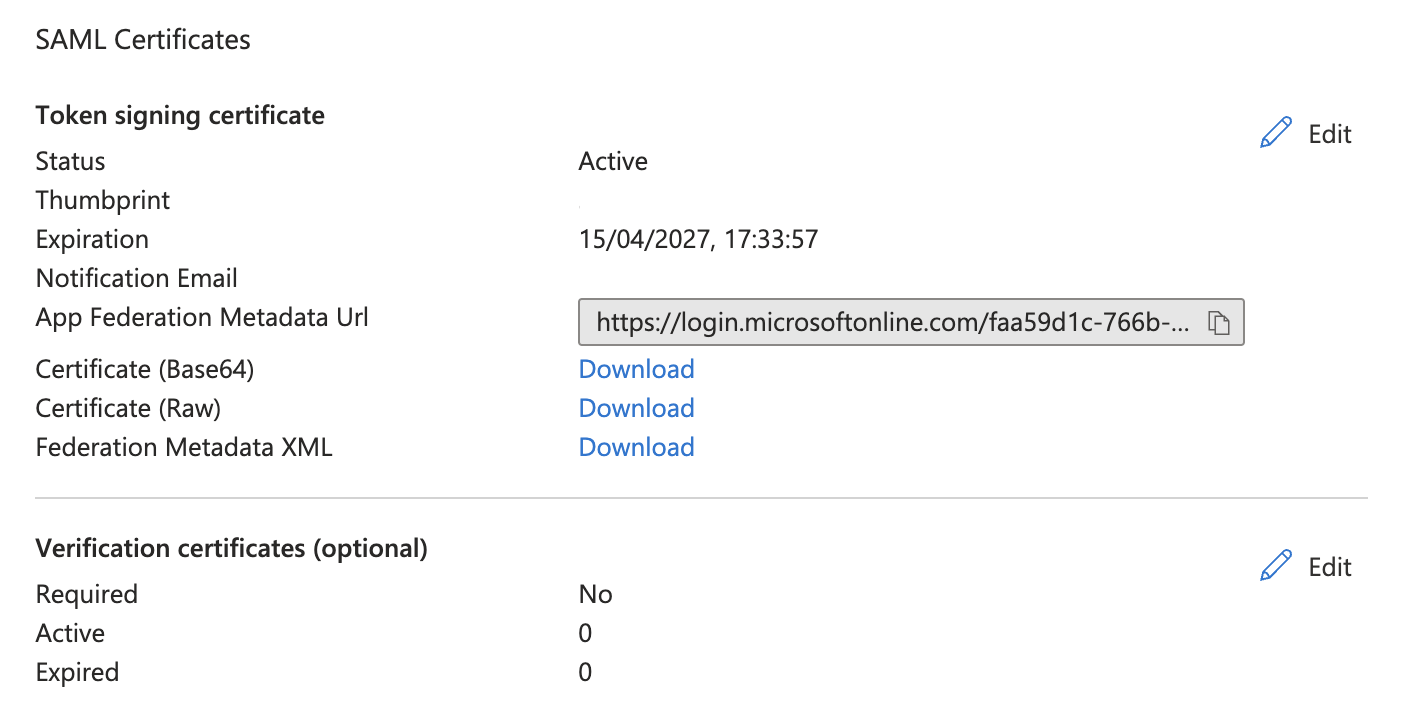
Navigate to SAML Certificates > Token signing certificate.
-
For Federation Metadata XML, click Download.
Save the Federation Metadata XML file to your system and use the file to upload the configured Entra ID SAML attributes to Secure Access.
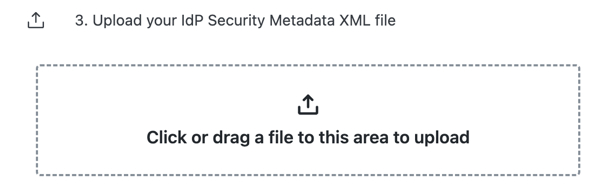
Step 3c – Add the Azure SAML Metadata to Secure Access
If you used SAML Metadata XML Configuration in step 3a above, upload your configured Entra ID SAML Metadata XML file to Secure Access, then click Done.
If you used Manual Configuration in Step 3a above, enter your Entra ID SAML metadata for the following Secure Access settings:
- Entity ID—A globally unique name for an identity provider.
- Endpoint—The URL used to communicate with your identity provider.
- Signing Keys—Your identity provider’s x.509 certificate that is used to sign the authentication request.
- Signed Authentication Request (optional)—Choose whether to sign the authentication request for the IdP.
- On Entra ID, copy the value of Microsoft Entra Identifier. Navigate to Secure Access and and enter the value in Entity ID .
- On Entra ID, copy the value of Login URL. Navigate to Secure Access and enter the value in Endpoint.
- On Entra ID, Copy the value of Signing Certificate. Navigate to Secure Access and enter the value in Signing Keys.
- (Optional) Navigate to Secure Access and choose whether to sign the authentication request.
- On Secure Access, click Done.
Test the Identity Provider Integration
To complete the integration of the SAML IdP with Secure Access, evaluate the single sign-on authentication through the IdP. For more information, see Test SAML Identity Provider Integration.
View the SAML Certificates in Secure Access
Once you have completed the integration of an SAML IdP in Secure Access, you can manage the root certificates used in SAML authentication for Secure Access (service provider) and the SAML IdP. For more information, see Manage Certificates.
Prerequisites for SAML Authentication < Configure Microsoft Entra ID for SAML > Configure Okta for SAML
Updated about 1 month ago