Assign and Modify IP Pools
Secure Access provides IP pool configurations to secure the request and response traffic of your VPN profiles. Typically, IP pools would be used to reserve resources for particular users or groups or to make sure that certain ranges are used for particular purposes.
VPN profiles require that you configure and assign at least one IP address pool in order to be fully-functional. IP address pools are managed through the Regions and IP Pools console, which allows you to organize and allocate IP addresses across your regions. You can create pools to represent different organizational units, environments, or regions, making it easier to manage your IP address space.
Table of Contents
Prerequisites
- Full Admin user role. For more information, see Manage Accounts.
- At least one IP pool defined for use in VPN profiles.
Procedure
Assign an IP pool that is used to manage a set of IP addresses for your VPN profile.
Assign an IP Pool
To assign an IP address pool to a VPN profile, complete the following steps:
-
Navigate to Connect > End User Connectivity > Virtual Private Network.
-
For VPN Profiles, click on a profile to modify or click + VPN Profile to add a new profile.
-
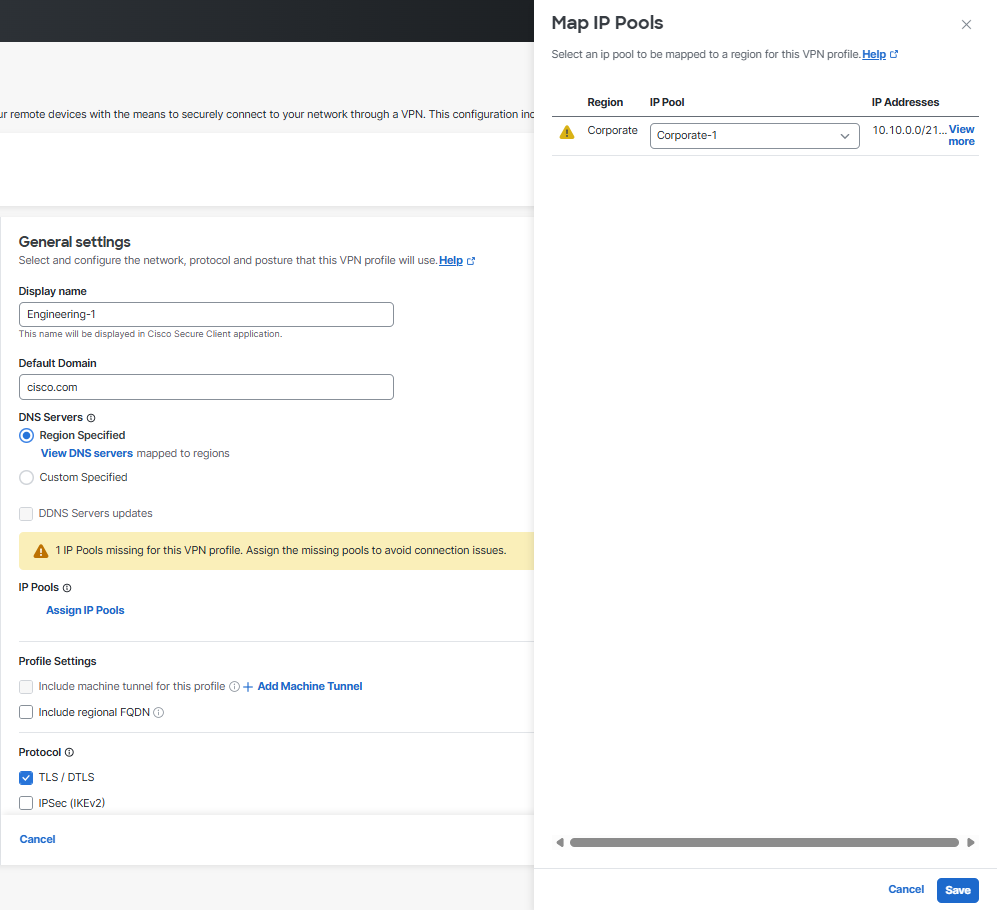
Under General Settings, click Assign IP Pools and select one IP pool per region from the IP Pool drop-down. VPN profiles must have at least one IP pool assigned in each region for a valid configuration. For more information, see Add an IP Pool.
-
Click Save to assign the IP pool to the VPN profile and to clear the alert.
Modify IP Pools
You can modify IP address pools. You can edit a pool's CIDR and other settings through the Regions and IP Pools console.
-
Navigate to Connect > End User Connectivity > Virtual Private Network.
-
For Regions and IP Pools, click Manage.
-
Select a region or data center to modify and click the edit icon.
-
Scroll to IP Pools to edit a pool's CIDR and to add or remove subnets.

-
Optionally, click + Add to create a new IP pool for the region.
-
Click Save to commit changes or Cancel to exit.
Modify IP Pool Assignment
You can modify which IP pools are mapped to a VPN profile. You can edit a pool's assignment through the VPN Profile console.
-
Navigate to Connect > End User Connectivity > Virtual Private Network.
-
Choose the profile to modify under VPN Profiles and click the edit icon.
-
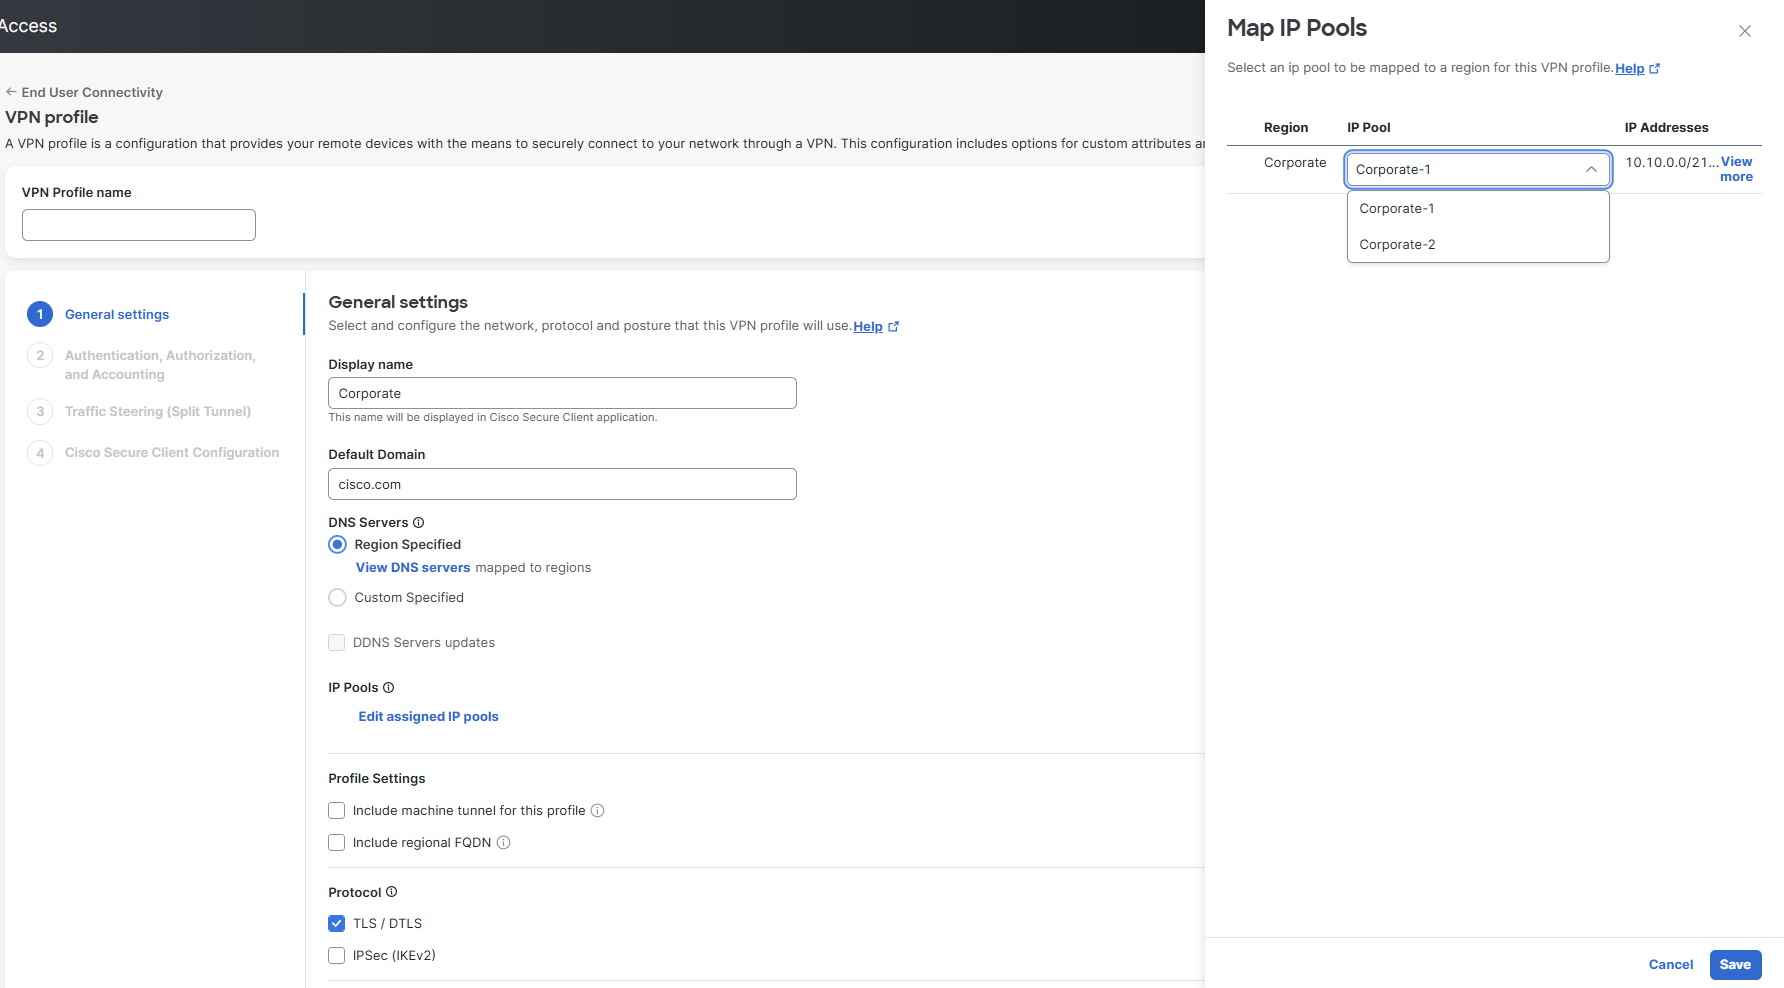
Under General Settings, click Edit assigned IP pools and select another pool from the IP Pool drop-down. VPN profiles must have at least one IP pool assigned in each region for a valid configuration. For more information, see Add an IP Pool.
-
Click Save to assign the selected IP pool to the VPN profile.
Add an IP Pool < Assign and Modify IP Pools > Manage RADIUS Servers and Groups
Updated 4 months ago