Trusted Networks for Zero Trust Access Connections
A trusted network is one that is secure, reliable, and well-protected against unauthorized access, data breaches, and other cyber threats. Trusted networks are typically present within your larger corporate network, or in a trusted partner's network that has all the necessary security measures in place. Trusted Network Detection (TND) enables the recognition of a predefined trusted network. When connected to a trusted network, Secure Access can bypass ZTA enforcement, and start ZTA enforcement when the user is outside the trusted network (corporate network).
Secure Access allows you to define trusted networks using a set of criteria that Cisco Secure Client uses to detect whether an endpoint device is connected to a defined trusted network and route the user's traffic as intended. For instance, if certain destinations are configured to use Zero Trust Access, you can disable them for in-office users and utilize on-network security mechanisms. Trusted networks are used in universal Zero Trust Network Access configuration where the threat defense devices can enforce rules for the private resources associated with them, based on the assigned trusted network.
Caution: When using Secure Access to define a network as trusted, exercise extreme care in your selection. If you designate a network as trusted without thoroughly verifying that all required security and connectivity mechanisms are in place, you risk leaving user data unprotected and vulnerable to potential threats. Failure to choose a properly secured network can compromise the safety and confidentiality of sensitive information.
Prerequisites
- Full Admin user role. For more information, see Manage Accounts.
- Cisco Secure Client version 5.1.10 or newer.
Procedure
To define a network as trusted, perform the following steps:
-
In Secure Access, navigate to Connect > End User Connectivity > Zero Trust Access.
-
Click Manage Trusted Networks.
-
Click + Trusted Network to add the first network. (After the first network is added, the + Add option is displayed for adding additional networks.)
-
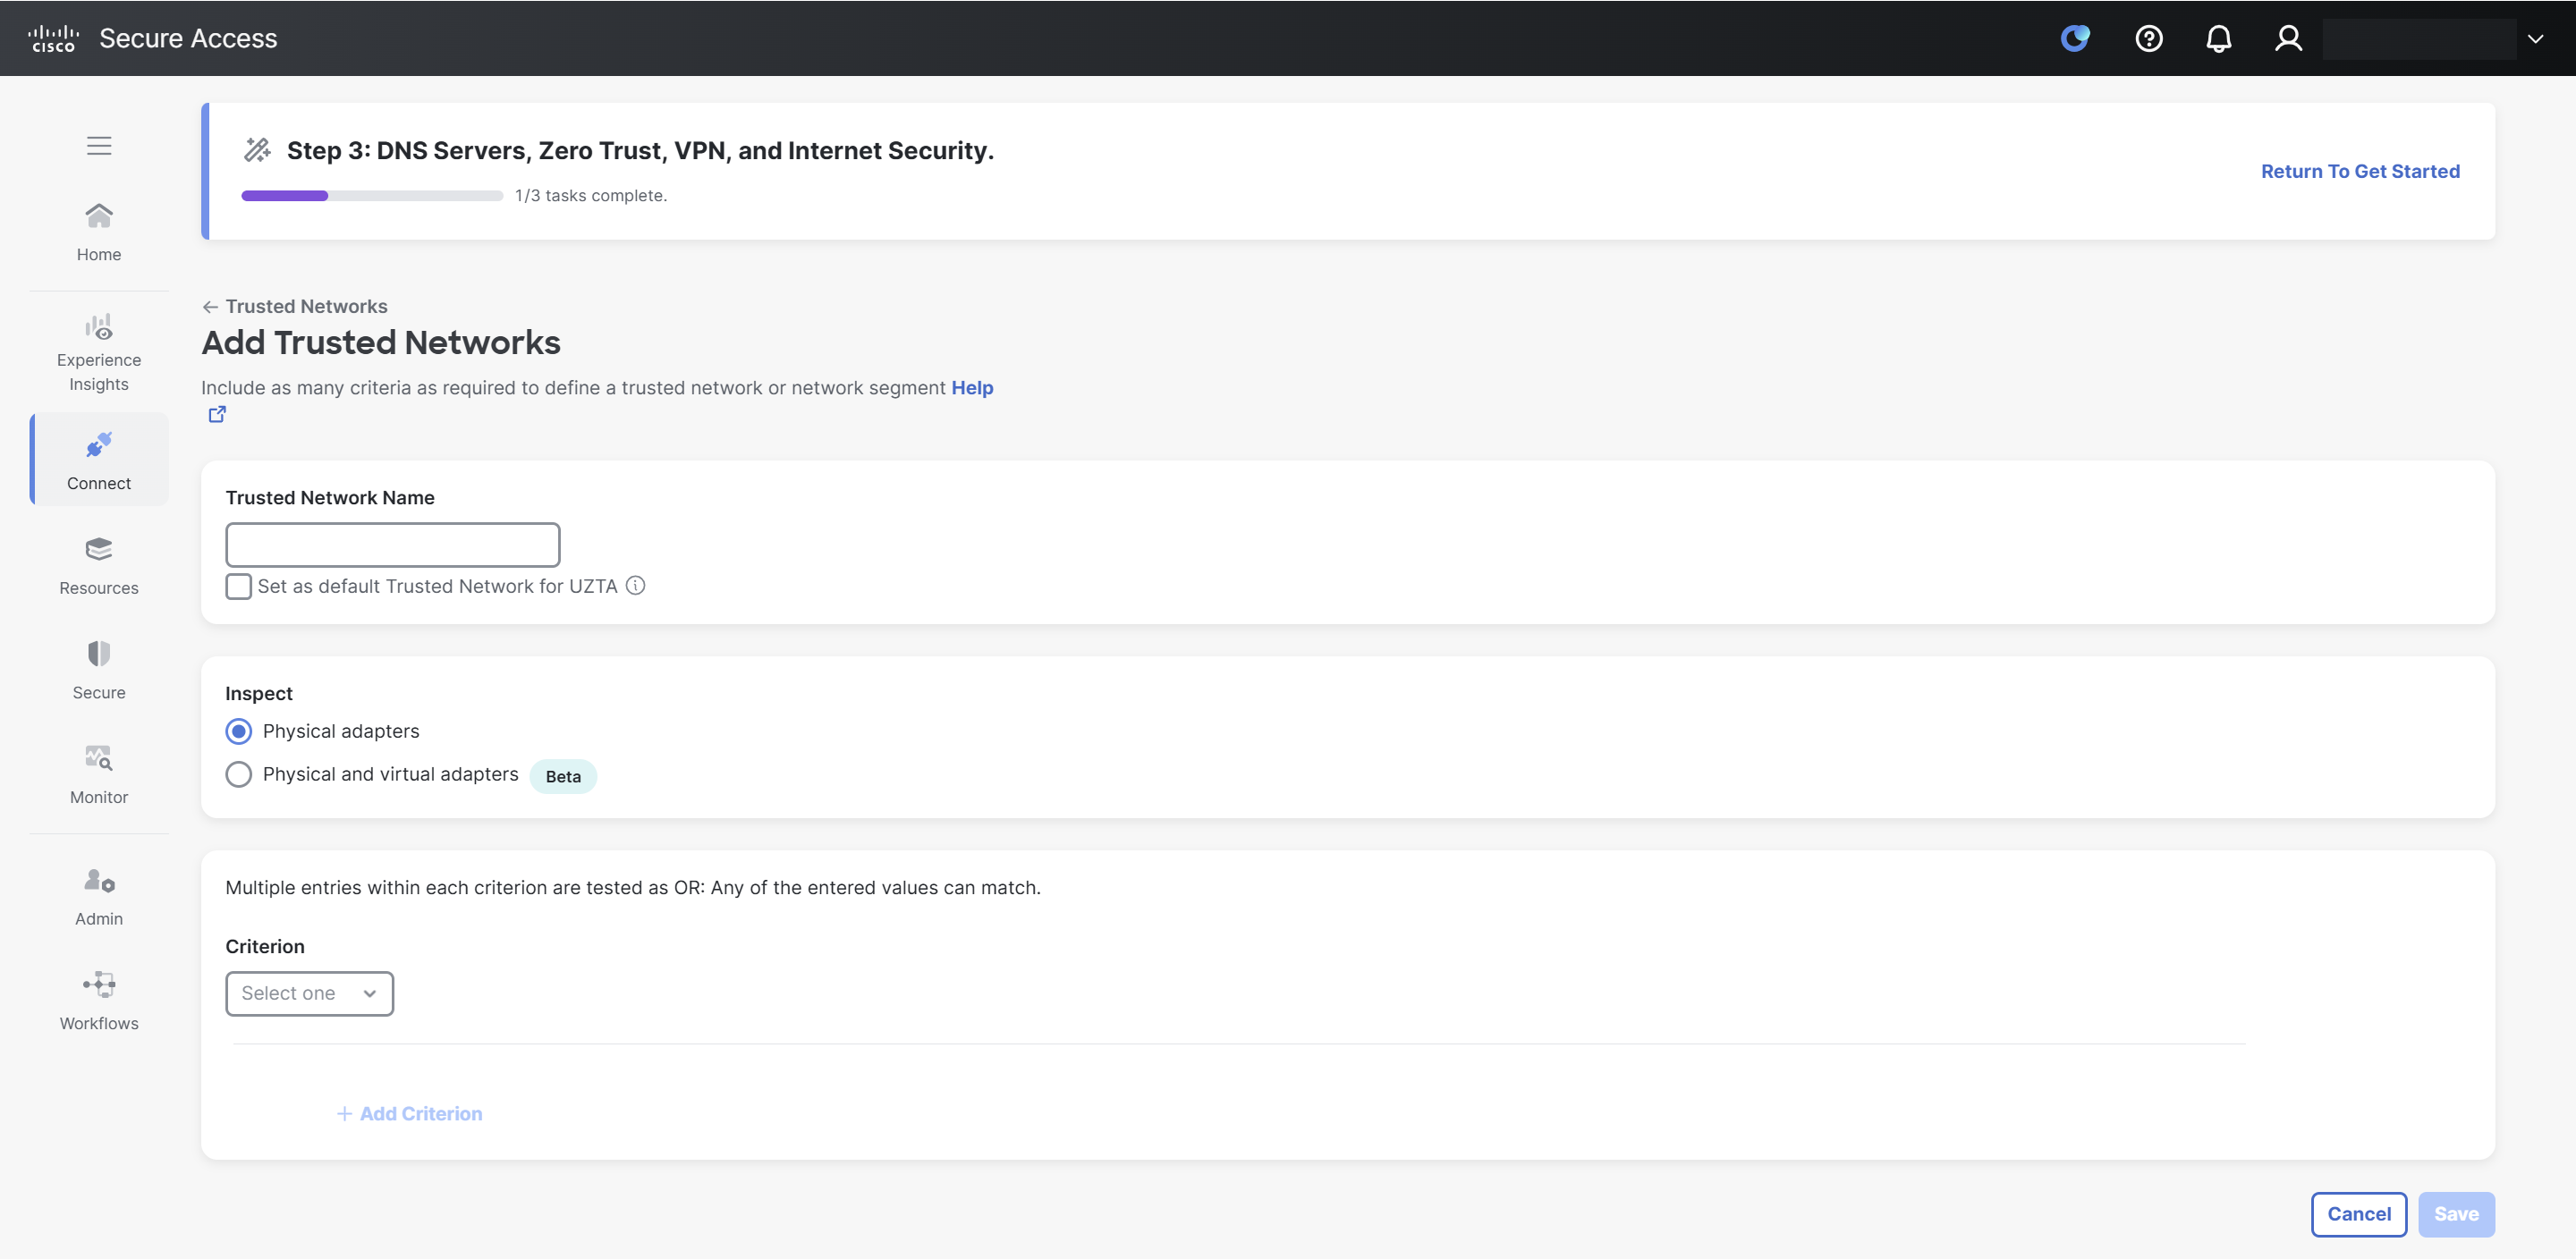
In the Trusted Network Name field, enter a name for the trusted network.
-
(Optional) Select the Set as default Trusted Network for UZTA checkbox to make this the default trusted network for universal Zero Trust Network Access configuration.
-
In the Inspect section, click one of the following radio buttons:
- Physical adapters: This ensures that TND inspects only physical network interfaces in an endpoint.
- Physical and virtual adapters: This ensures that TND inspects both physical and virtual network interfaces in an endpoint.
Note: The Physical and virtual adapters option is a beta feature intended for limited testing. You must not use this option in production environments.
-
From the Criterion drop-down list, select one of the following options:
-
DNS Servers: If you choose this option, enter all the DNS server addresses (comma separated) for the trusted network in the adjacent DNS Servers field. Cisco Secure Client detects a trusted network only if it matches any of the specified DNS servers.

-
DNS Domains: If you choose this option, enter the DNS domain suffixes (comma separated) for the trusted network in the adjacent DNS Domains field. Cisco Secure Client detects a trusted network only if it matches any of the specified DNS domain suffixes.

-
Trusted Servers: If you choose this option, enter a trusted server address in the adjacent Trusted Servers field. A DNS server specified in this profile must translate the domain name of this server to its corresponding IP address and provide a TLS certificate.
(Optional) In the Certificate Hash field, enter the hash of the public key of this certificate.
Note: Certificate hash is not applicable for iOS devices.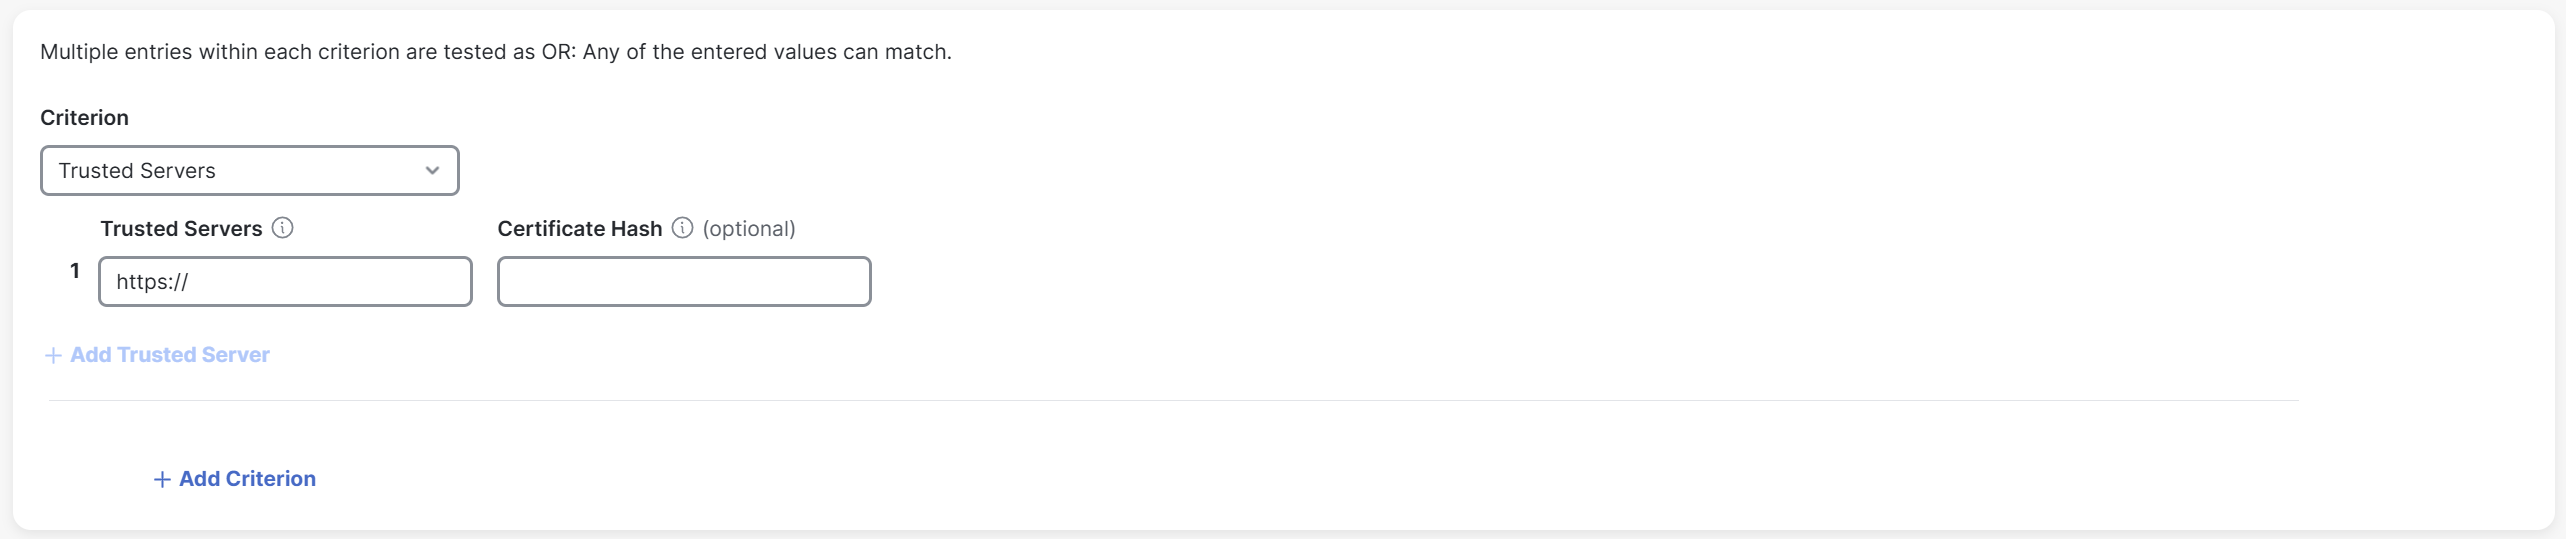
-
-
(Optional) Click +Add Trusted Server to add up to 10 trusted servers. Only one of the trusted servers is required to pass validation.
-
(Optional) Click +Add Criterion to add more criteria.
Note: You can add a criteria only once. -
Click Save.
Note that if you provide multiple criteria for DNS domains, DNS servers, and trusted servers, the client will recognize a trusted network using any of the criteria provided.
The following is an example of this:
You provide the following criteria for these fields:
-
DNS Domains: YourCompany.com and AcquiredCompany.com
-
DNS Servers: 10.10.10.10 and 10.10.10.11
-
Trusted Servers: server1.YourCompany.com with hash xyz and server2.YourCompany.com with hash abc
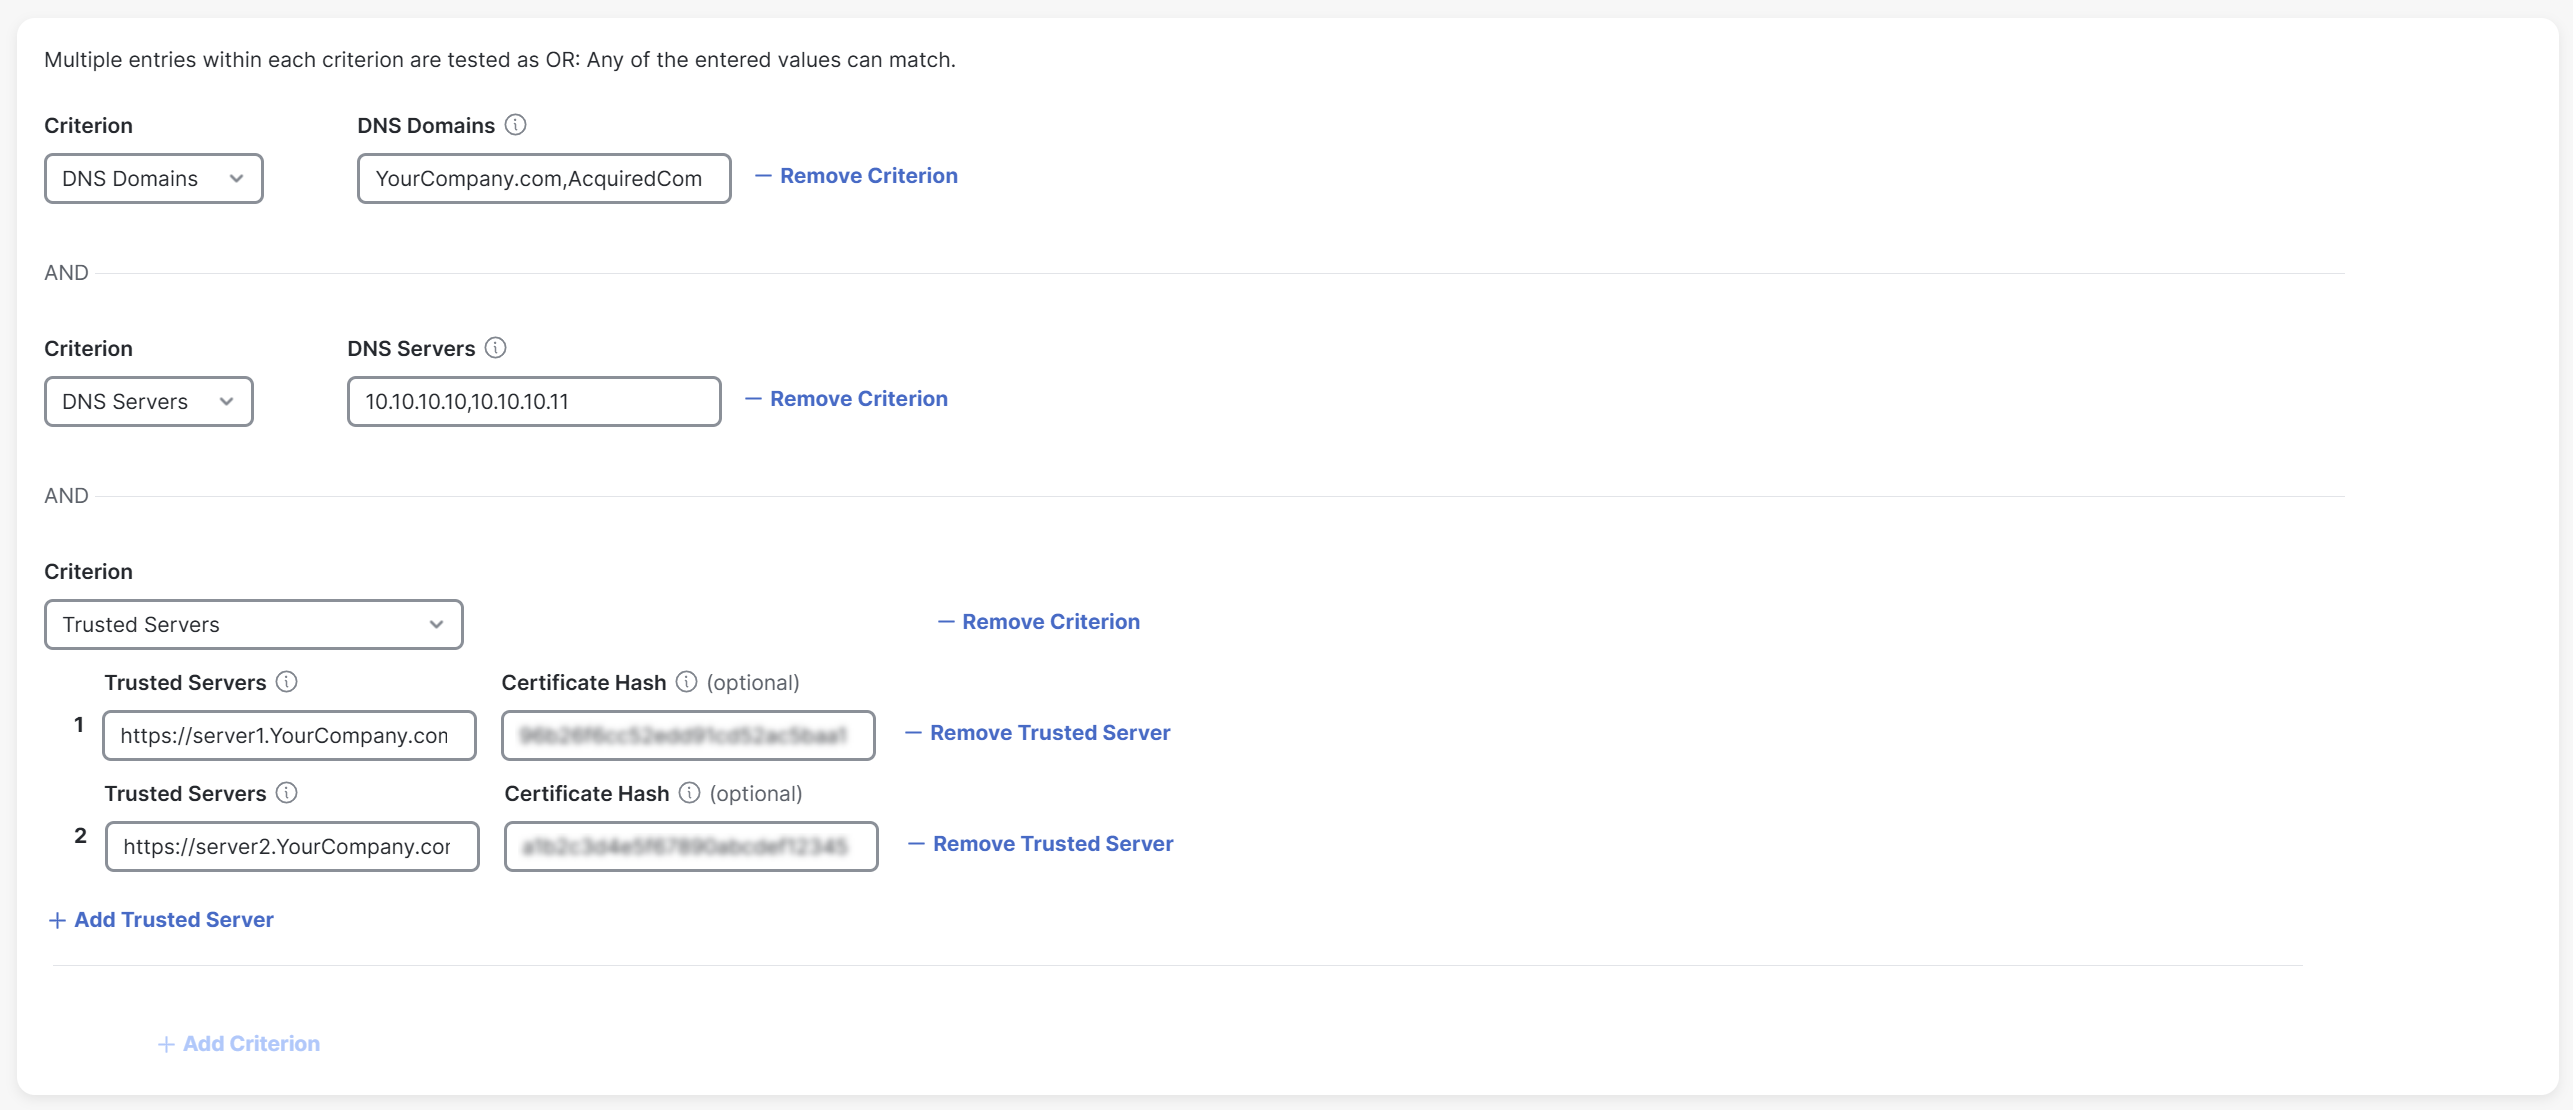
The client recognizes a trusted network based on any of the criteria provided by you.
- AcquiredCompany.com
- 10.10.10.11
- server2.YourCompany.com with hash abc
Zero Trust Access to Internet Destinations < Trusted Networks for Zero Trust Access Connections > Manage Threat Defense Devices for Universal Zero Trust Network Access
Updated about 2 hours ago