Copy and Customize a Built-In Data Classification
The system provides four different built-in data classifications you can use in real time rules, SaaS API rules, and discovery scans. These are:
PII Data Classification
Personal Information Identifiers; data that includes any personal information that may identify an individual, such as financial account numbers, medical records, passport or government identification numbers, or credit card numbers.
PCI Data Classification
Data related to the Payment Card Industry.
GDPR Data Classification
Common personal data associated with the European Union’s General Data Protection Regulation. Customers can use these identifiers to support GDPR compliance within their organizations.
HIPAA Data Classification
Personal medical and healthcare data associated with the United States’ Health Insurance Portability and Accountability Act. Customers can use these identifiers to support HIPAA compliance within their organizations.
For more details on each of these built-in data classifications, see Built-In Data Classifications. You can create custom data classifications based on any of these built-in data classifications. Simply copy the desired built-in classification, make changes to the copy, and save it as a custom data classification.
The building blocks for data classifications are data identifiers. The data identifiers selected for a data classification determine the type of data for which rules using that data classification will scan. Built-in data classifications have data identifiers already selected for them; you can produce your own customized versions of these classifications by removing selected identifiers or adding other identifiers.
Using the inclusion and exclusion options on the Data Classification page, you can fine-tune your classification to be more precise and reduce false positives. You can exclude specific terms and regular expression (regex) patterns by creating a custom identifier in the exclusion area, or by excluding a pre-existing built-in identifier.
The exclusion applies only to the content that's been matched, not to every document that meets the exclusion criteria.
For example, consider a data classification that targets the built-in identifier Health Condition and Person Name (US). You want to block instances of "John Smith cancer" while allowing instances of "John Smith cancer fundraising." To achieve this, you can craft a custom data identifier for "cancer fundraising" and set up an exclusion for this identifier within your data classification. As a result, matches for the Health Condition and Person Name (US) identifier will be flagged, except when the phrase "cancer fundraising" is present.
The system compares data identifiers selected for exclusion against both the keywords and the proximity terms of included data identifiers. If the Data Loss Prevention Report reveals that a particular rule or identifier is generating false positives, consider using terms and identifiers exclusion to remedy the situation.
Note: If you select a data identifier for both inclusion and exclusion, exclusion will take precedence.
The system offers two types of built-in data identifiers you can choose to remove from or add to your customized version of a built-in data classification:
- Built-In Identifiers
These identify data using pattern matching and dictionary lookups. The descriptions shown in the GUI provide details about the type of data they match. For more information, see Built-In Data Identifiers.
- Machine Learning Identifiers
These identify data based on AI analysis of example documents. For example, the identifier for Patent Files has been trained to recognize documents that are likely patent applications. For more information, see Built-In Data Identifiers.
The system offers three types of data identifiers you can create yourself applying different methods of data analysis. You can add these to your customized version of a built-in data classification:
- Custom Identifiers
You can create custom identifiers to match specific terms and pattern expressions of your choosing. See Create a Custom Identifier .
- Exact Data Match Identifiers
Exact Data Match Identifiers use fingerprinting to identify data in structured documents that match criteria you define. (See Create an Exact Data Match Identifier for more information.)
- Indexed Document Match Identifiers
Indexed Document Match Identifiers use fingerprinting to identify data in unstructured documents that match criteria you define. See Create an Indexed Document Match Identifier for more information.
To delete or edit a data classification, see Delete or Edit a Classification.
Prerequisites
- Full Admin user role. For more information, see Manage Accounts.
Procedure
- Navigate to Secure > Settings > Data Loss Prevention Classifications > Data Classification.
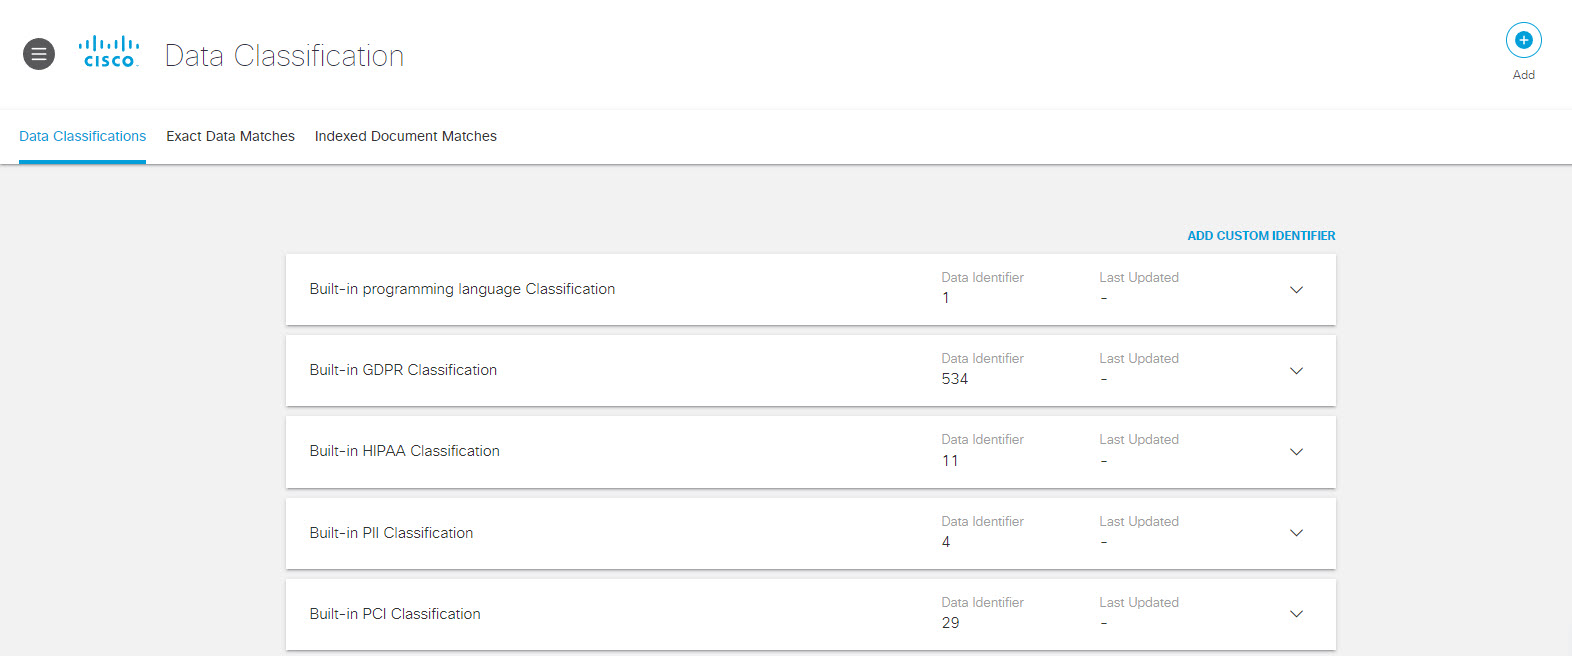
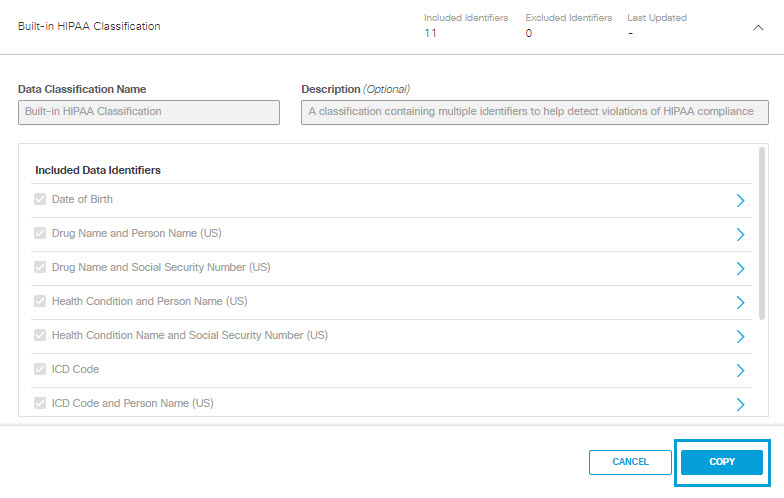
- Expand one of the built-in data classifications and click Copy.
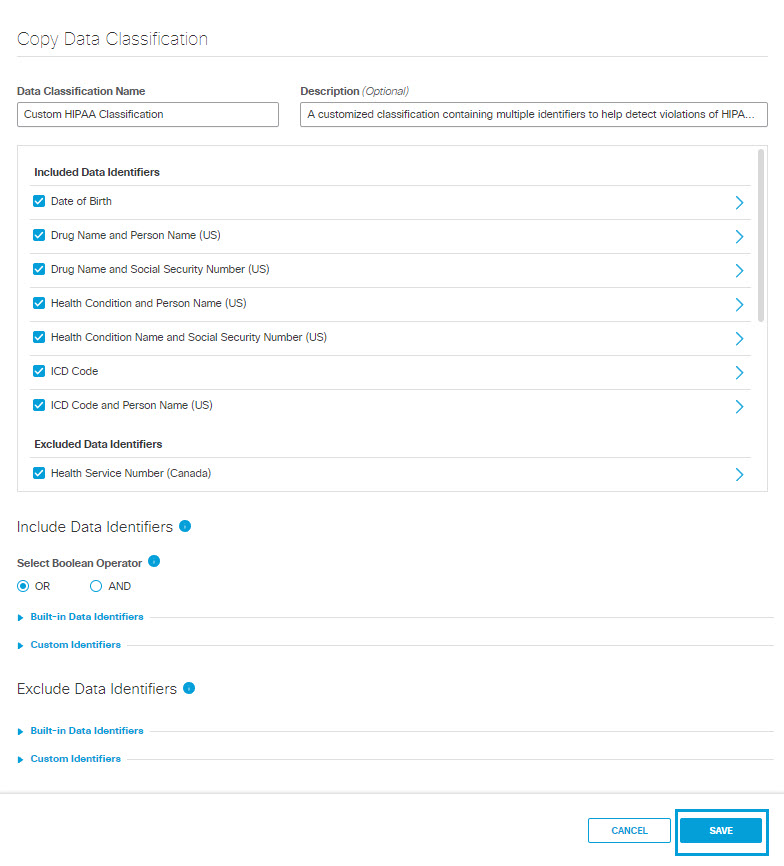
- Give the new data classification a meaningful name and description.
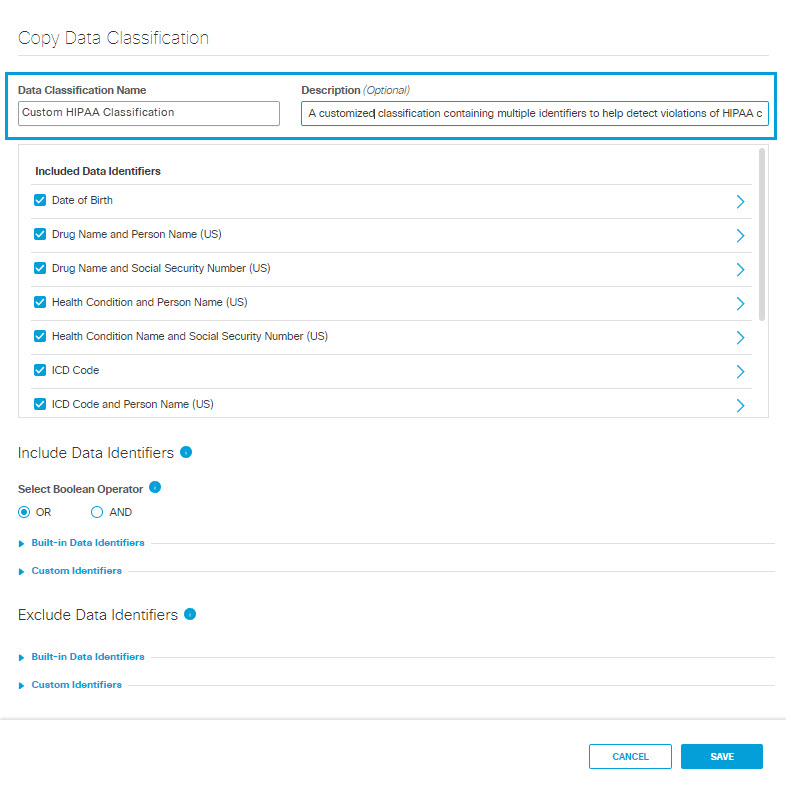
- Under Included Data Identifiers deselect pre-selected data identifiers as needed.

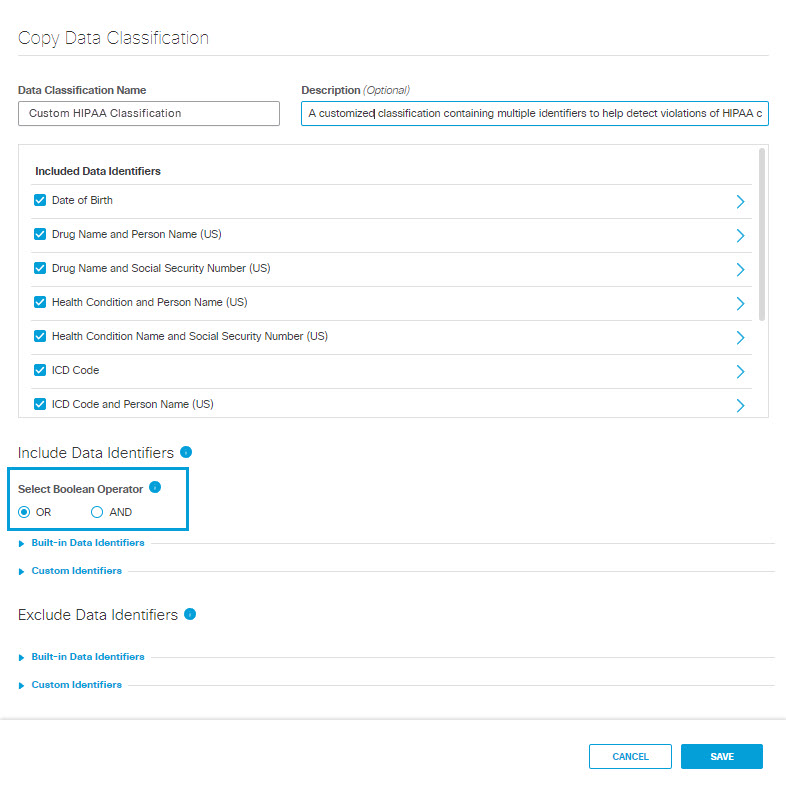
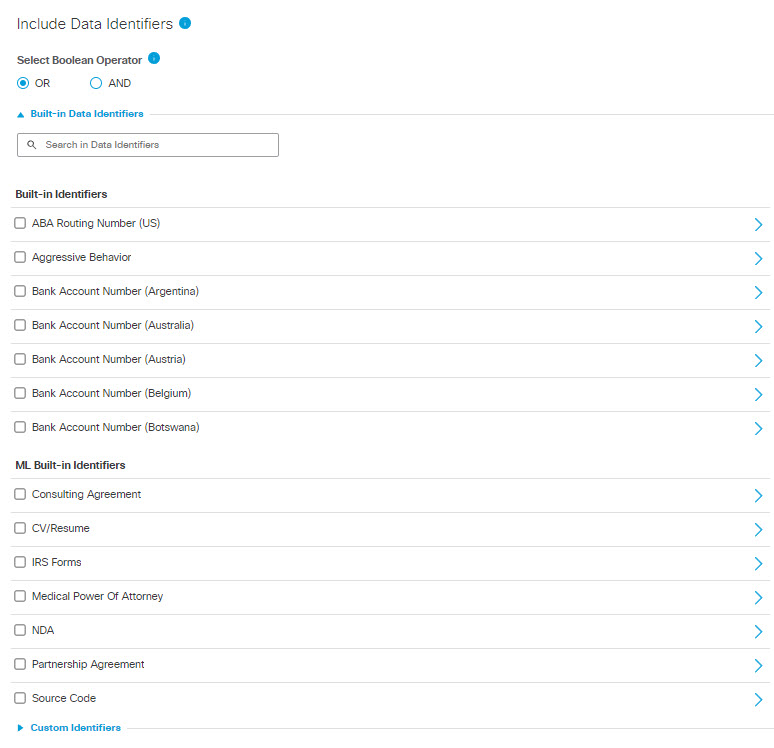
- Under Include Data Identifiers, you may change the Boolean operator to separate the identifiers included in the classification:
- OR—At least one of the data identifiers selected must match during rule evaluation.
- AND—All of the data identifiers selected must match during rule evaluation.
- Under Include Data Identifiersexpand Built-in Data Identifiers and select additional data identifiers to include in the data classification.
Choose from:
- Built-In Identifiers
- ML (Machine Learning) Built-In Identifiers
- Under Include Data Identifiers expand Custom Identifiers and select custom data identifiers to include in the data classification.
Choose from:
- Custom Identifiers
- Exact Data Match Identifiers
Note: Exact Data Match Identifiers that are greyed out have not yet been indexed and may not be selected. (See Create an Exact Data Match Identifier for more information.)- Indexed Document Match Identifiers
Note: Index Document Match Identifiers that are greyed out have not yet been indexed and may not be selected. (See Create an Indexed Document Match Identifier for more information.)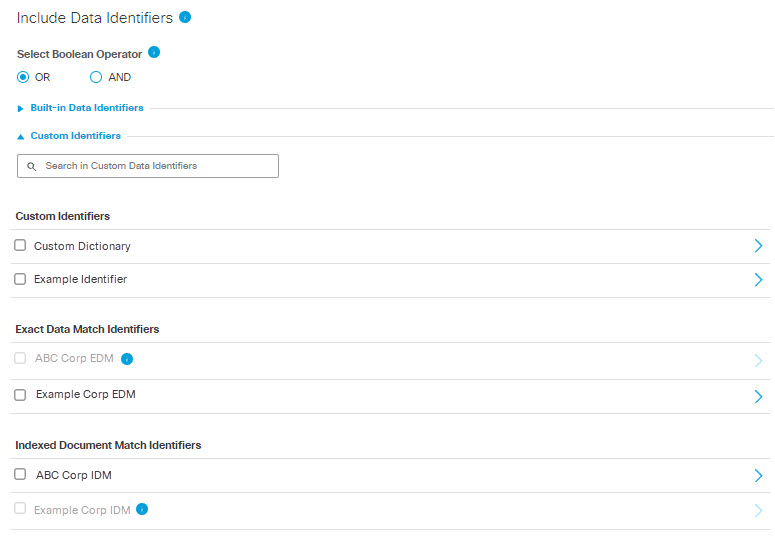
- Under Exclude Data Identifiers, expand Built-in Data Identifiers and choose data identifiers to exclude from the data classification.
Choose from:
- Built-In Identifiers
- ML (Machine Learning) Built-In Identifiers

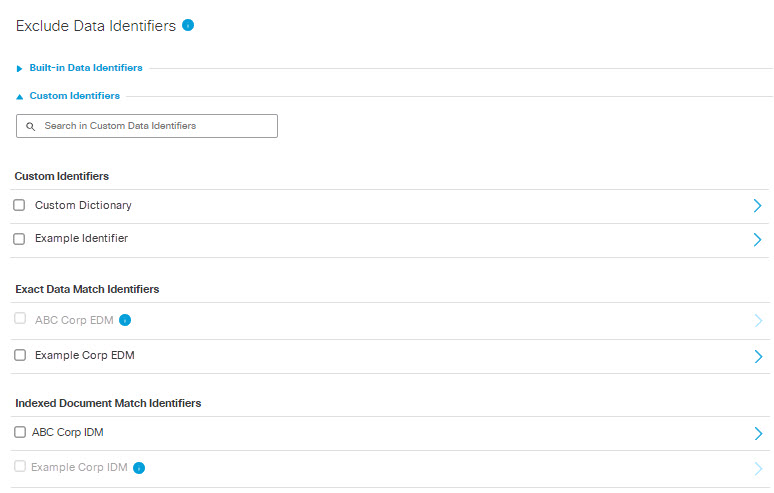
- Under Exclude Data Identifiers, expand Custom Identifiers and choose custom data identifiers to exclude from the data classification.
Choose from:
- Custom Identifiers
- Exact Data Match Identifiers
NOTE: Exact Data Match Identifiers that are greyed out have not yet been indexed and may not be selected. (See Create an Exact Data Match Identifier for more information.)- Indexed Document Match Identifiers
NOTE: Indexed Document Match Identifiers that are greyed out have not yet been indexed and may not be selected. (See Create an Indexed Document Match Identifier for more information.)
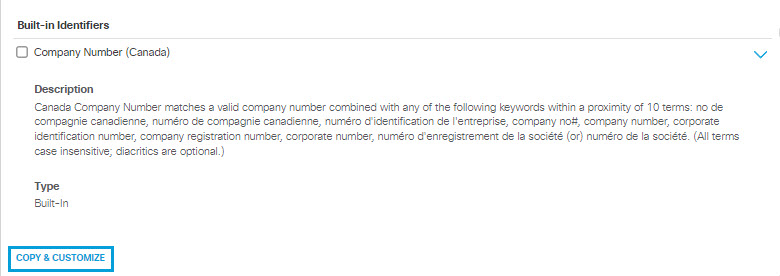
- You may expand any built-in data identifier and click COPY & CUSTOMIZE to create a new customized data identifier. See Copy and Customize a Data Identifier.
- Click Save.
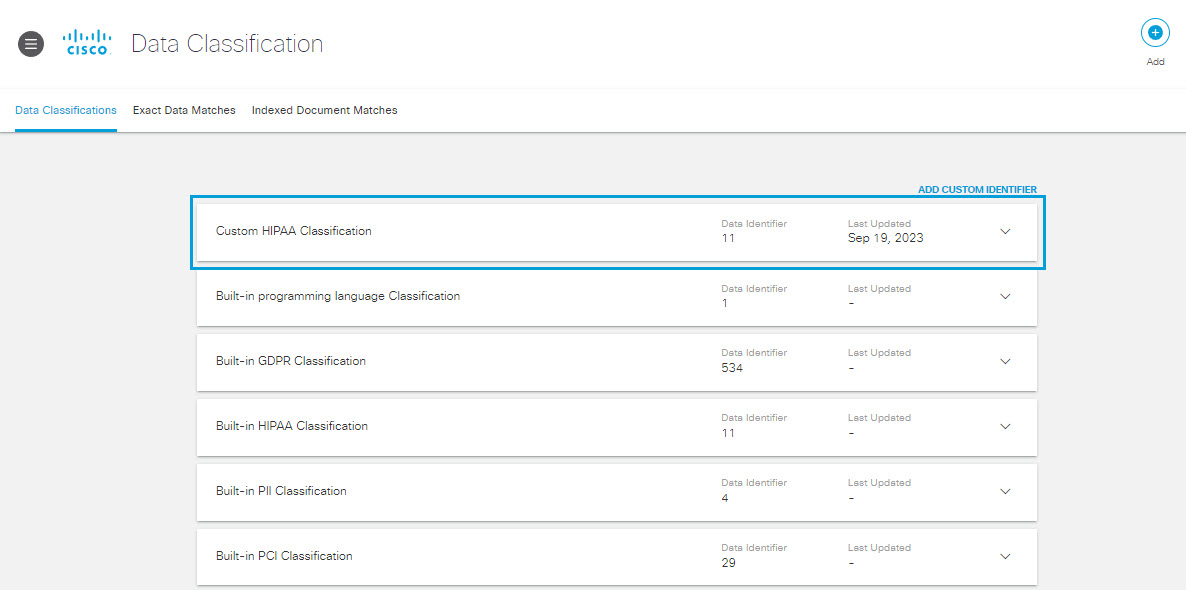
Your new classification is listed on the Data Classification page, and will be available to you when you Add a Real Time Rule to the Data Loss Prevention Policy, Add a SaaS API Rule to the Data Loss Prevention Policy, or initiate a new Discovery Scan.
Create a Data Classification < Copy and Customize a Built-In Data Classification > Delete or Edit a Classification
Updated about 1 month ago