Cloud Malware Report
The Cloud Malware Report provides an overview of malicious files within your environment and details the potential risk and exposure these files present. For setup instructions, see Enable Cloud Malware Protection.
Table of Contents
Prerequisites
- A minimum user role of Read-only. For more information, see Manage Accounts.
View the Cloud Malware Report
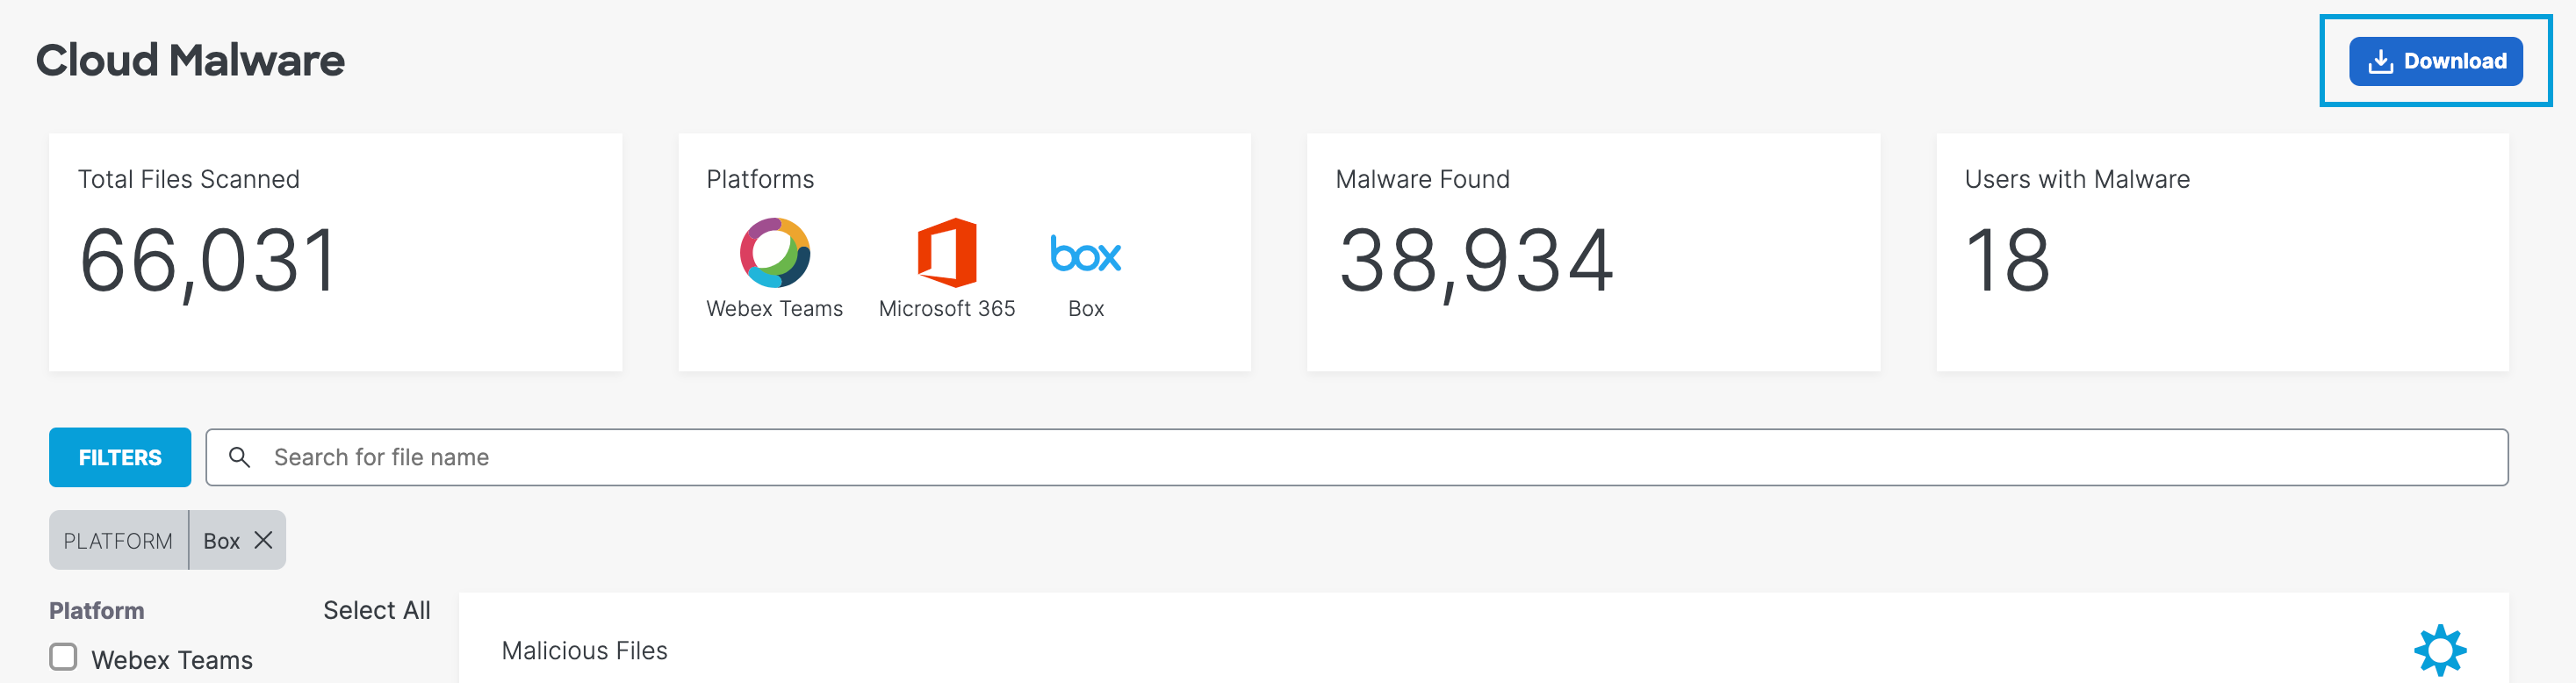
- Navigate to Monitor > Reports > Cloud Malware.

- View the report's overview of information about the malicious files in your organization.
- Total files scanned—The total number of files in the organization scanned for potential malware. This will also show a status as to whether the scan is complete or in progress.
- Platforms—The platforms where malicious files were found.
- Malware found—The total number of files found deemed malicious.
- Users with malware—The number of users in your environment whose files contain malware.
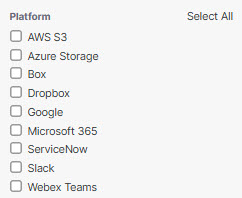
- Filter by platform.
The platforms available for Cloud Malware are AWS S3, Azure Storage, Box, Dropbox, Google, Microsoft 365, ServiceNow, Slack, and Webex Teams. You can filter your malicious files' results by selecting any or all of the platforms listed.
- Filter by exposure.
You can filter your malicious files by the type of exposure they pose to the environment. By default, none are selected, so all exposure types are presented.

- Filter by status.
Each file displays a status depending on whether it is newly discovered, a quarantine is in progress or failed, or that the file was successfully quarantined or deleted.

- Optionally, you can choose to view suspect Potential Unwanted Applications.

- Sort columns by detection or status.

Click the settings menu icon to select which columns to display and organize them as you choose.

Use the Cloud Malware Report
Quarantine a Malicious File
On the Microsoft OneDrive, SharePoint Online, Box, Dropbox, ServiceNow, or Google Drive, when a malicious file presents a potential risk and needs remediation, you can manually quarantine the file. Only the integration user for the platform will have access to the quarantined files.
- Click the Action Menu to the right of the file that needs to be quarantined, then select Quarantine.

- A modal appears to verify if this is the file to be quarantined. Click Quarantine. The status will update in the report to Quarantine in Progress while the quarantine is processing. This process can take up to five minutes; when complete, the status will update to Quarantined.

Note:
- For Microsoft OneDrive, SharePoint Online, Box, Dropbox, or Google Drive:
- The file identified as exposing sensitive data is moved to the Cisco_Quarantine/DLP folder Secure Access created in the root path of the Global Admin who authorized the tenant.
- The user who authorizes access to Secure Access will have access to the quarantine folder. All other accesses and collaborators are removed. Thus, we recommend that the admin add the relevant DLP Admins as additional collaborators to the folder.
- For ServiceNow:
- The file identified as exposing sensitive data is moved to a table named Cisco_Quarantine_Malware which can be access only by the admin user who authorized the ServiceNow tenant.
- A footprint is attached to the notes\activities area of the table the file is attached to. This footprint will notify users that the file has been identified as malware, and for more information they should contact their administrator.
- Quarantine attempts may fail if the files have been locked or blocked by settings within their native platforms. Settings local to the platform where a file resides take precedence over Secure Access' ability to detect or remediate DLP violations or malware.
Restore a Quarantined File
On the Microsoft OneDrive, SharePoint Online, Box, Dropbox, ServiceNow, or Google Drive platforms, you can restore a file that has previously been quarantined.
Note: Once a file has been quarantined and then restored, it cannot be quarantined again.
- Click the Action Menu to the right of the file that needs to be quarantined, then select Restore from Quarantine.

- A dialog box appears to verify the file is to be restored. Click RESTORE. The status will update to Restoration in Progress while the file is being processed. This can take up to five minutes; when complete, the status will update to Restored.

Note: If your Cloud Malware deployment processes files from Microsoft OneDrive, SharePoint Online, Box, Dropbox, ServiceNow, or Google Drive and you restore a quarantined file that still violates rule criteria, the system will quarantine that file again. To prevent the system from quarantining the file again, remove the file's violation, or update the rule's criteria.
Delete a Malicious File
For the Webex Teams platform, when a malicious file presents a potential risk and needs remediation, you can delete the file.
- Click the Action Menu for the file that needs to be quarantined and choose Delete.

- A modal appears to verify if this is the file to be deleted. Click Delete. The report status is updated to Deleted.

Dismiss an Item from the Report
When a reported file is found to not present a risk, you can dismiss the file from the report.
- Click the Action Menu for the file that needs to be removed from the report and choose Dismiss.

- A modal appears to verify if this is the file to be dismissed. Click OK. The file is removed from the report.

Export a Cloud Malware Report
You can export your Cloud Malware report to a CSV file for your records.
- Click Download.
- Give your report a title and click Export.
Note: Data is limited to 1,000,000 rows when exporting to CSV.

- When you click Export, you are taken to the Exported Reports page. Click the download icon in the download column to download the CSV file.
More Information
To find the Cloud Malware Report, navigate to Monitor > Reports > Cloud Malware. For setup instructions, see Enable Cloud Malware Protection.
View App Details < Cloud Malware Report > Data Loss Prevention Report
Updated 6 months ago