Enable SaaS API Data Loss Prevention for Google Drive Tenants
Table of Contents
Prerequisites
- Chrome or Firefox (recommended) with pop-up blockers and ad blockers disabled (only for the duration of authorization)
- Secure Access DLP Connector must be installed in the tenant by a Google Admin User.
- It is recommended to use a service account for the installation.
Validation
-
Log in to https://admin.google.com with admin credentials.
-
Navigate to Apps > Google Workspace Marketplace Apps > App List.
-
Ensure that the Secure Access DLP Connector application is present and enabled for your admin or for the group you are a part of.
-
Navigate to Apps > Google Workspace > Drive And Docs and ensure that the drive service is enabled for your admin or for a group you are part of.
The Secure Access DLP Connector needs access to your Google account. This allows Secure Access DLP Connector to:
| View, Edit, Create, and Delete all of your Google Drive files |
| View domains related to your customers |
| View groups on your domain |
| View organization units on your domain |
| View and manage the provisioning of users on your domain |
| View Information about users on your domain |
| View audit reports for your G suite domain |
| View usage reports for your G suite domain |
| View, Edit, Configure, and Delete your Google Cloud data and view the email address for your Google Account |
| View your primary Google Account email address |
| View your personal information that is made publicly available |
| Manage your sites |
| View the activity history of your Google apps |
Authorize a Tenant
- Navigate to Admin > Authentication.
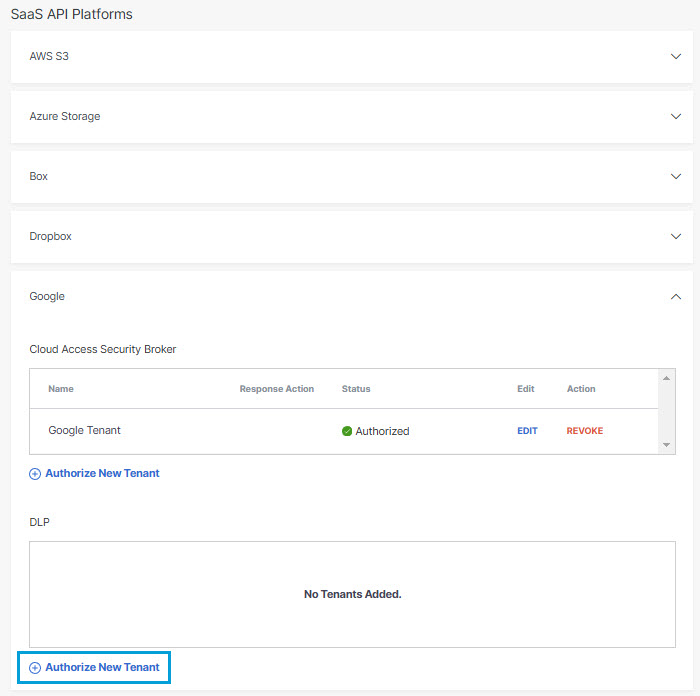
- Under SaaS API Platforms, click Google.
- Click Authorize New Tenant to add a Google Drive tenant to your Secure Access environment.
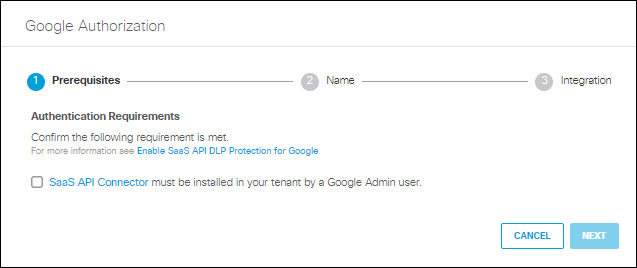
- In the Google Authorization dialog, check the checkbox to verify you meet the prerequisite, then click Next.
Note:
NOTE:
The link to the SaaS API Connector brings you to the Umbrella DLP Connector site in the Google Workspace Marketplace. This is correct, despite the nomenclature difference.
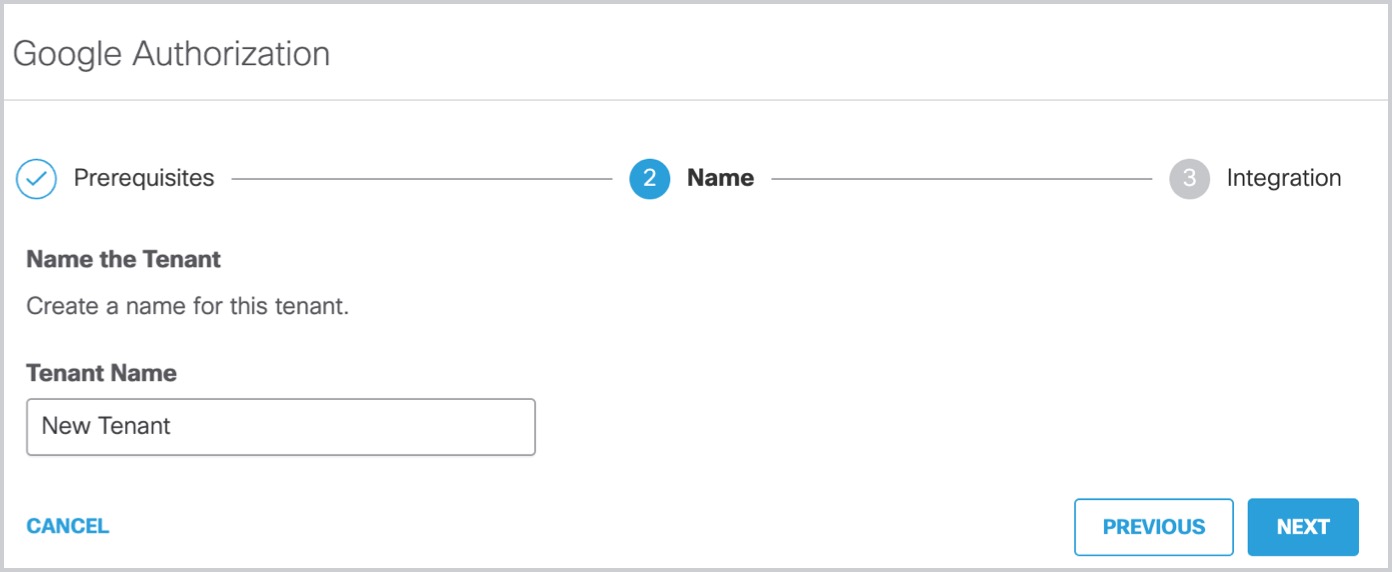
- Enter the tenant name, then click Next.
- Enter the Email Address, then click Next.
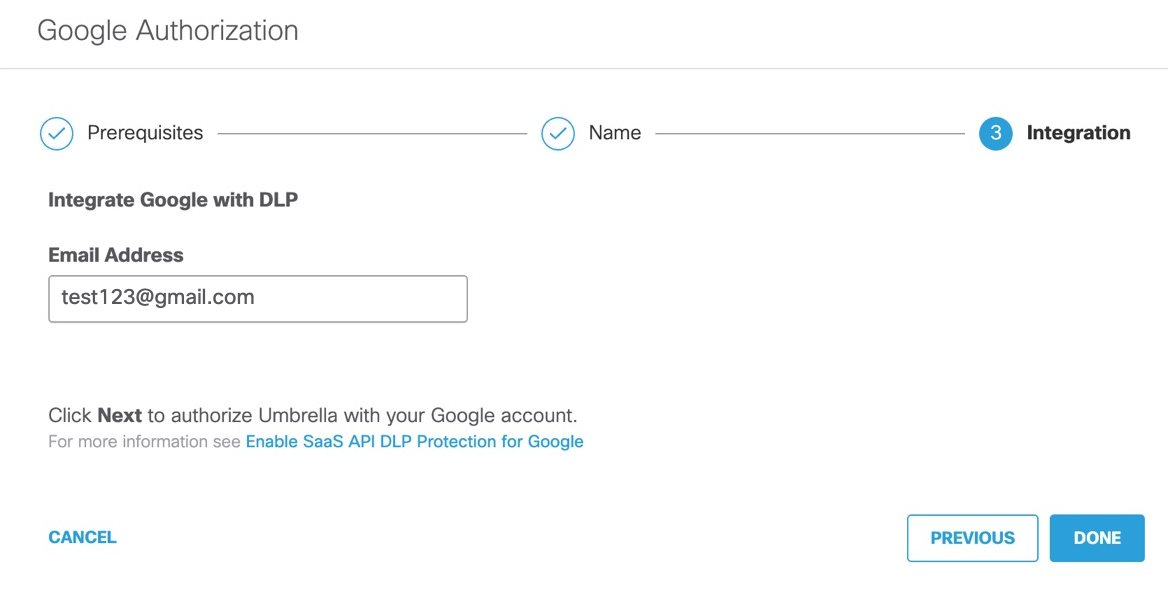
You are redirected to the Secure Access Dashboard and a message appears showing the integration was successful. It may be up to 8 hours for the integration to be confirmed and appear as Authorized.
- Click Done to complete.
Revoke Authorization
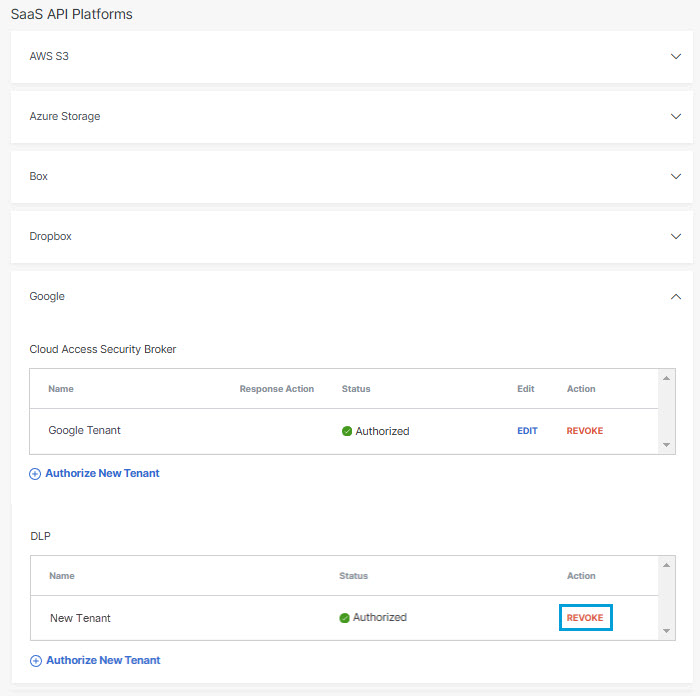
- Under Action, click Revoke. You can revoke any authorized tenant.
- Confirm to proceed. The selected account will no longer be authorized.
Enable SaaS API Data Loss Prevention for Dropbox Tenants < Enable SaaS API Data Loss Prevention for Google Drive Tenants > Enable SaaS API Data Loss Prevention for Microsoft 365 Tenants
Updated 5 months ago

