Add a RADIUS Group
This section describes how to configure a RADIUS group and add servers to the group. This RADIUS group can be applied to the Authentication, Authorization, and Accounting (AAA) methods of a VPN profile configuration and mapped to other VPN profiles.
Table of Contents
Prerequisites
- Full Admin user role. For more information, see Manage Accounts.
Procedure
-
Navigate to Connect > End User Connectivity > Virtual Private Network.
-
For VPN Profiles, click Add.
-
Complete General settings of the VPN Profile and click Next.
-
On the Authentication, Authorization, and Accounting page, expand the Map authentication groups to regions pane and click + Group.

-
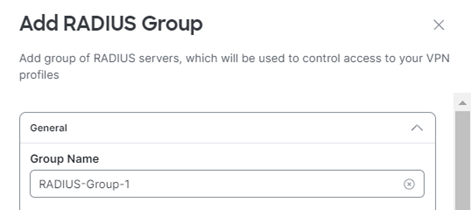
To configure the RADIUS group, enter a meaningful Group Name.
-
Choose the AAA methods to apply to this RADIUS Group. Choose at least one method. Note: If both the Authentication and Authorization methods are selected, the same port number must be used.
-
Authentication - Enter the RADIUS authentication Port number. The valid range is from 1 to 65535.
The default is 1812.Check Microsoft CHAPv2 to use Microsoft Challenge Handshake Authentication Protocol Version 2 as the authentication method.

-
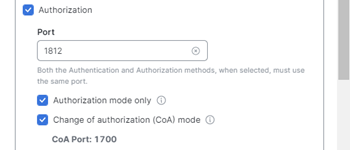
Authorization- Enter the RADIUS authorization Port number. The valid range is from 1 to 65535.
The default is 1812.When you check Authorization mode only, no common password is required.
When you check Change of authorization (CoA) mode, the RADIUS server group will be registered for CoA notification. If you enable CoA, the listening port for RADIUS CoA requests uses the default of 1700. Select this option when using this server group for ISE Policy Enforcement in remote access VPNs.
-
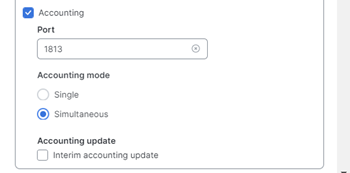
Accounting- Enter the RADIUS accounting Port number. The valid range is from 1 to 65535. The default is 1813.
Select the Accounting mode, either Single or Simultaneous. In single mode, accounting data is sent to only one server. In simultaneous mode, accounting data to all servers in the group.
For Accounting update, select Interim accounting update to enable the periodic generation of RADIUS interim-accounting-update messages.
-
-
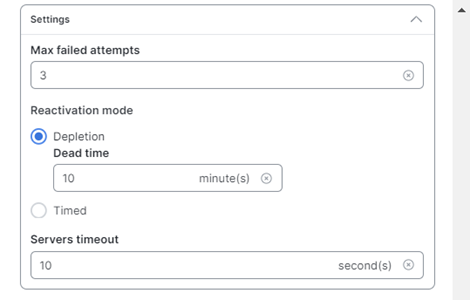
Configure the method (Reactivation mode) by which failed servers in a group are reactivated:
-
Set the Max failed attempts to specify the maximum number of failed AAA transactions with a RADIUS server in the group before trying the next server. The range is from 1 and 5. The default is 3.
-
Choose Depletion, Dead time to reactivate failed servers only after all of the servers in the group are inactive.
This is the default reactivation mode. Specify the amount of time, between 0 and 1440 minutes, that
elapses between the disabling of the last server in the group and the subsequent reenabling of all servers.
Deadtime applies only if you configure fallback to the local database; authentication is attempted locally
until the deadtime elapses. The default is 10 minutes. -
Choose Timed to reactivate failed servers after 30 seconds of down time.
-
Set the Servers timeout setting. Enter the number of seconds to wait for a response from a RADIUS server (in seconds). The default is 10 seconds.
-
-
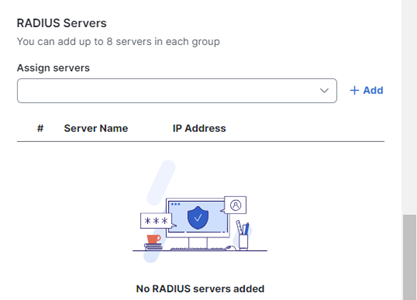
Scroll down to RADIUS Servers and click Add.
You can add up to eight servers to each RADIUS group.
-
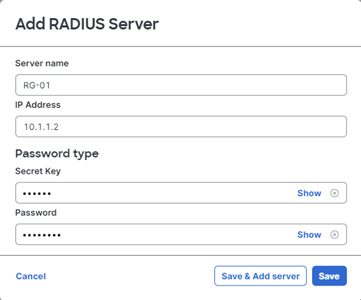
Enter a meaningful Server name, an IP Address, and a Secret Key/Password combination and click Save & Add server.
-
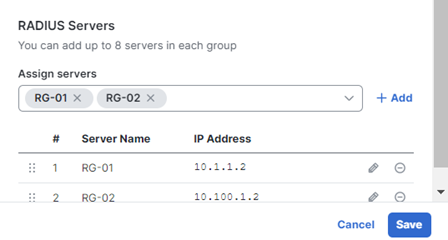
Click Save when you are done adding servers to complete the RADIUS Group.
Add VPN Profiles <Add a RADIUS Group > Manage VPN Settings
Updated 3 months ago