Add a Private Resource
Private resources are the applications, networks or subnets that are internal resources hosted in your data center, including resources hosted on a private cloud in your data center, that have a login page that cannot be accessed from outside the network.
Configure a private resource to specify connection information for the resource, then configure access rules to determine which users and devices can access the resource using the connection methods you have enabled.
For information on using Secure Access to suggest private resources based on your private network traffic, see Discover Private Resources.
Table of Contents
- Prerequisites
- Define a Private Resource
- Communication with Secure Access Cloud
- Endpoint Connection Methods
- Resource Connector Groups
- Decryption
- View Access Rules Associated with a Private Resource
- What's Next
Prerequisites
- Full Admin user role. For more information, see Manage Accounts.
- Gather IP or CIDR addresses for your private resources.
- If you will specify resource addresses using domain names (FQDNs), you must add at least one internal DNS server that can route traffic to your resource. For more information, see Add DNS Servers.
- For each resource, you must choose connection options. For descriptions of the options, see the topics under Manage Connections to Private Destinations.
- If you will enable Zero Trust Access for the resource:
- Meet the requirements in Requirements for Zero Trust Access.
- To allow client-based Zero Trust Access and inspect traffic using the Intrusion Prevention (IPS), file inspection, and file type blocking features, you must provide the resource's certificate to Secure Access so that Secure Access can display it to end-user devices.
- Cisco recommends using a certificate signed by a publicly recognized certificate authority (CA).
- If you will enable browser-based zero trust access using SSH or Remote Desktop (RDP), see Allow SSH and RDP Access to Private Resources.
- Plan your private resource configurations to avoid configuration conflicts such as unintentional duplicate or overlapping addresses.
For example, if a resource can be reached using multiple addresses, decide in advance whether you will create a single resource with multiple addresses or multiple resources. For more information about this particular scenario, see Private Resource Configuration Examples.
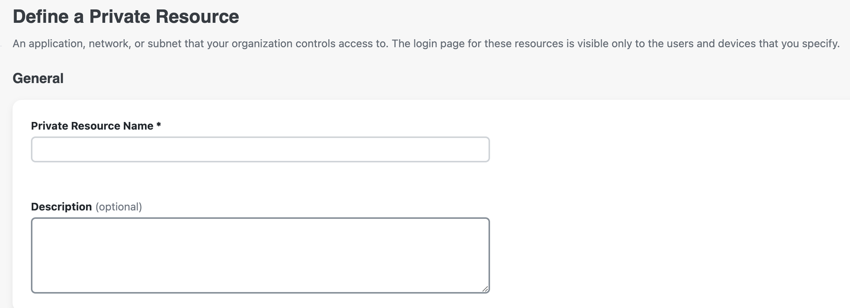
Define a Private Resource
Configure a resource controlled by your organization.
- Navigate to Resources > Private Resources , choose Private Resources, and then click +Add.

- For Private Resource Name, enter a meaningful name for the resource. For Description, we recommend that you provide information such as the purpose of the resource or the name of the resource owner.
Communication with Secure Access Cloud
Provide the network address information for communicating with the private resource.
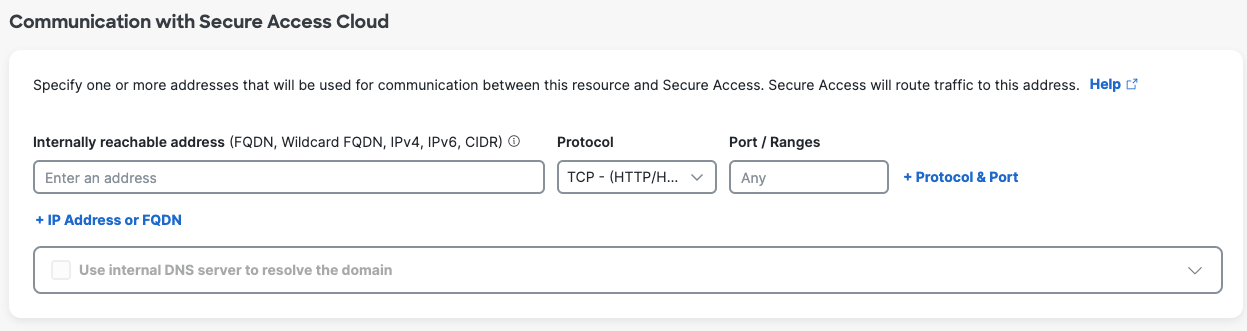
- For Internally reachable address, enter an IP address, FQDN, wildcard FQDN (in the format *.example.com), protocol, and port or port ranges.
- You do not have to provide an address that is publicly accessible from outside the network.
- If you will allow browser-based access to this resource by users who do not have the Cisco Secure Client installed on their devices, the protocol you select must include HTTP/HTTPS.
Use caution when adding addresses that duplicate or overlap with addresses in other configured private resources.
If you will enable browser-based zero trust access using SSH or Remote Desktop (RDP) protocols, see Allow SSH and RDP Access to Private Resources. - If you will decrypt traffic to this resource:
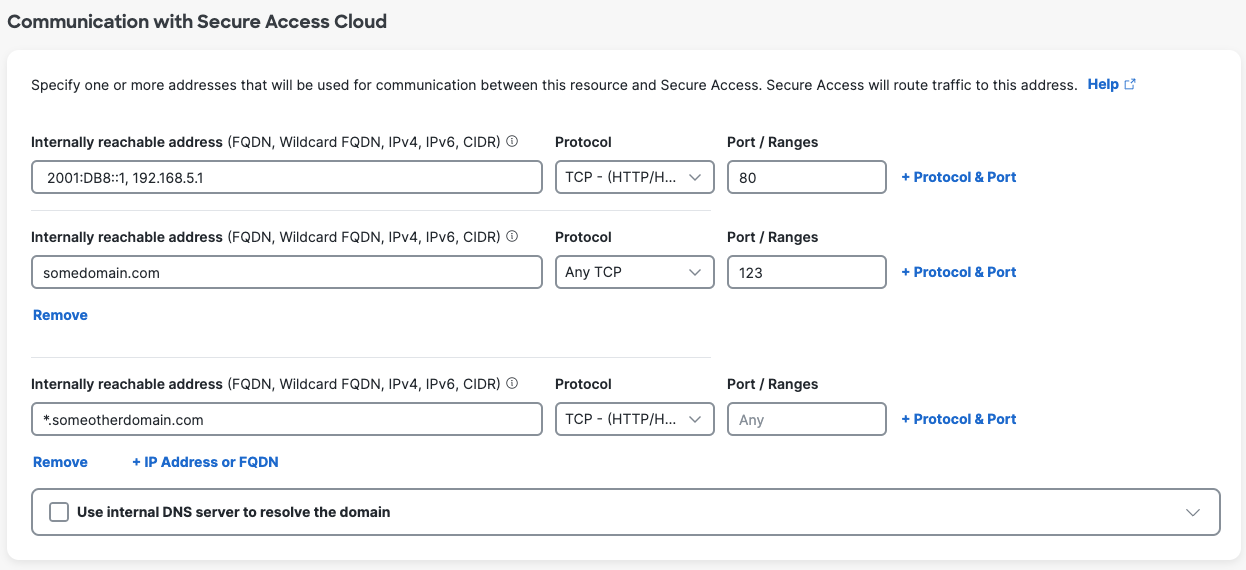
- In each address line, you can specify a single IP address (no address ranges) or CIDR block, or a comma-separated list of addresses or CIDR blocks, or an FQDN with or without wildcard. Add addresses and FQDNs as separate lines.
- If the address includes a wildcard FQDN, the wildcard must be the first character in the address string (*.example.com).
- Specify a single port or "Any" port; no comma-separated port numbers, no port ranges.
- If you need to decrypt traffic to multiple ports for the same address, click + Network IP or FQDN and add a separate address line for each port.
- Select a protocol that includes TCP and does not include UDP.
- Example configurations:
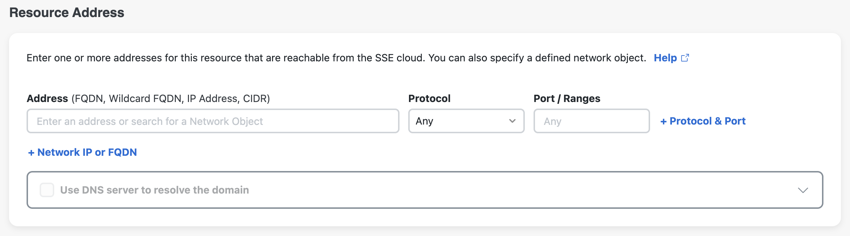
- If you have entered a domain and Secure Access will route traffic to this resource using network tunnels:
- Select an internal DNS server that can route traffic to the specified resource address.
- To configure an internal DNS server, see Add DNS Servers.
Endpoint Connection Methods
Choose the connection methods to allow communications to the private resource. For more information, see Comparison of Zero Trust Access and VPN.
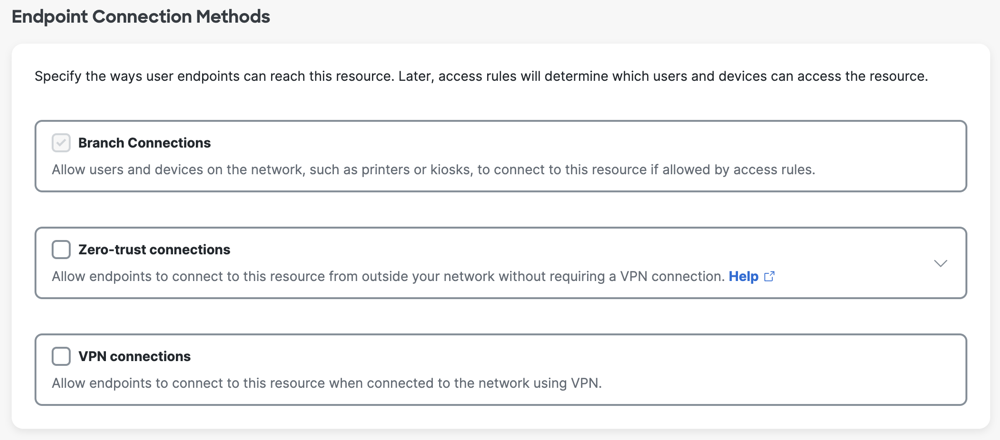
If you do not allow Zero Trust Access or VPN connections for the private resource, only branch connections are enabled on the private resource. Branch connections are pre-selected for a private resource. For more information, see Manage Branch Connections.
You can allow any of these connection options:
- Zero-trust connections
- Client-based connection—For devices with the Cisco Secure Client or the Zero Trust Access mobile application installed.
- Browser-based connection—For devices without the Cisco Secure Client or the Zero Trust Access mobile application installed, or when you only want to allow access using a browser.
- VPN connections—For devices that allow VPN connections to the private resource.
Zero-Trust Connections
Select Zero-trust connections to allow connections from devices with and without the Secure Client installed. You can allow either or both of these options.
If you want devices that your organization does not manage (such as contractor, vendor, or Bring-Your-Own devices) to be able to connect to this resource, you must enable browser-based access. Browser-based (clientless) access offers fewer controls on device security than client-based access does.
a. For Client-based connection, enter the address you want users to use in order to connect to this resource.
- For best security (to keep the internal IP address of this resource private), you should provide a domain rather than an IP address. Your internal DNS server must be able to route traffic to this address. For example, you can enter mail.example.com.
- Note: This address can be the same as the address you entered above for Secure Access to connect to the resource.
b. For Browser-based connection, configure a public URL for this resource that you will give to users. You have the option to use either a Cisco domain or a custom domain.
Both options allow end users to reach this resource from outside your network without exposing the actual address of the resource. Secure Access forwards authorized connections to the resource.

Option 1: Use a URL in a Cisco domain.
- Provide a URL prefix that uniquely identifies this resource. Secure Access will join the prefix to
<your organization's tenant ID>-ztna.sse.cisco.ioto form the public URL address. Secure Access will route traffic using this address to the resource.- If you don't provide a URL prefix, Secure Access adds one for you based on the resource name.
Option 2: Use a URL in your domain.
- In the previous step, Communication with Secure Access Cloud, the following configuration is required to use your own custom domain for a browser-based ZTA connection.
- Internally reachable address must be either a single FQDN or one or more IP addresses.
- Protocol must be TCP - (HTTP,HTTPS) only, TCP – SSH or TCP – RDP.
- Port / Ranges must be a single port number.
- Provide a full URL from your custom domain name. The URL field supports domains (e.g., example.com) and subdomains (e.g., subdomain.example.com).
- Certificate-Key Pairs: Select an existing cryptographic certificate-key pair from the dropdown list or click +Add certificate and key to upload .pem files or paste new certificate and key data.
- You may also browse to Secure > Certificates and click the Private resources tab to upload and manage certificates used by private resources with browser-based ZTA.
- Cisco recommends using a certificate signed by a publicly recognized certificate authority (CA).
- The DNS server for your domain requires an additional canonical name (CNAME) record that maps your custom URL to the Secure Access URL provided in the field Your DNS server must be able to route this traffic to this address. Format the CNAME records as follows:
Record type @ Value CNAME subdomain.example.com [custom-prefix]-[org ID].ztna.sse.cisco.io
Custom Host Header is optional for both a Cisco domain and a custom domain.
Add a custom host header if your resource requires it to validate HTTP or HTTPS connections.
If Protocol is set to HTTP and the Custom host header field is left empty, the host header is the same as the Public URL for this resource.

If Protocol is set to HTTPS and both the Custom host header and Server Name Indication (SNI) fields are left empty, the host header is the same as the Public URL for this resource.
If the Server Name Indication (SNI) field has a value, the host header is the SNI value.
If end users typically use the fully qualified domain name (FQDN) to request the private resource, enter the FQDN for the private resource in the Server Name Indication (SNI) field.

SNI is the hostname that the browser connects with to start a TLS handshake. If this resource shares a single IP address with other resources that present different certificates, enter the SNI hostname to connect traffic to this resource.
Validate Application Certificate is enabled by default. If Decrypt Traffic is enabled in the step below, this certificate validation setting will be disabled.
VPN Connections
Select VPN connections to allow endpoints to communicate to this resource when connected to the network using VPN.
Note: If you enable both Zero Trust connections and VPN connections, users will connect to the resource using zero trust.
Resource Connector Groups
- (Optional) For Resource Connector Groups, choose the resource connector groups that can forward traffic to this resource.
Note: Before you can choose a Resource Connector Group, you must enable Zero Trust connections for this resource. You can also choose a connector group for this resource later, or assign resources on the Connector Group page.

Choose a group or groups that have deployed connectors, which are located in the same data center, branch office, or security zone as the resource. For more detailed guidelines, or an alternative place to associate resources with connector groups, see Assign Private Resources to a Connector Group.

Decryption
- For Decryption, enable Decrypt Traffic.
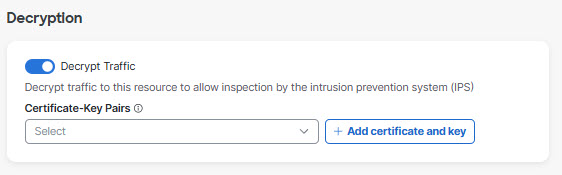
- Decryption is required in order to inspect traffic for threats using the Data Loss Prevention (DLP) policy, intrusion prevention (IPS), file inspection, and file type blocking features. For security reasons, you should enable this option. You can enable this option depending on the resource address. For details, see information about the Internally Reachable Address field on this page.
Because traffic is routed through Secure Access, Secure Access must be able to display the resource's certificate to end-user devices. If you have already uploaded the applicable certificate (as described in Manage Certificates for Private Resource Decryption), select the certificate from the drop-down menu. Otherwise, click +Add certificate and key to upload or paste the application certificate (including both the public and private keys) used by the private resource here. Be sure to include all intermediate certificates in the certificate chain. - If you enable decryption, the option to Validate application certificate for browser-based traffic will be disabled, even if you have previously enabled it. This is expected.
Note: Only PEM encoding is supported.
Note: For effective inspection of encrypted traffic, you must also enable global decryption .
View Access Rules Associated with a Private Resource
After you add a private resource in Secure Access, you can view the attributes of the private resource. The attributes of the private resource include the private access rules in the Access policy associated with the private resource.
- Navigate to a row in the table of private resources, and then click the ellipsis (...) at the end of the row.
- Choose Edit, and then navigate to Associated Rules.
What's Next
- Test the connection between Secure Access and your private resources. See Test Private Resource Reachability.
- (Optional) If you entered a FQDN of the format *.example.com and you want to exclude subdomains from the ability to connect to this resource, add exceptions to the Traffic Steering page. See Using Wildcards to Configure Traffic Steering for Private Destinations.
- (Optional) You can exclude subdomains from this Private Resource configuration and then add one or more separate Private Resources and access rules to allow different access for those subdomains.
- Configure requirements that you want to apply to this resource, such as endpoint requirements (using posture profiles) and intrusion prevention (IPS profiles). See Components for Private Access Rules.
- After you have configured other requirements, add policy rules to access this resource.
- Add private access rules to allow users and devices to access this resource. See Manage Private Access Rules to add private acess rules.
- See Add a Real Time Rule to the Data Loss Prevention Policy to allow DLP real-time rules to scan for violations in upload, download, or both upload and download traffic.
Note: An access policy rule targeting “any” for private destination will not pass traffic to Data Loss Prevention rules for evaluation. Secure Access will forward private traffic to the Data Loss Prevention engine only if an access policy rule matching that traffic specifies private resources or private resource groups for the destination.
- When you are ready for end-users to access the resource, if you have enabled browser-based access, give your users the dummy URL that you configured in this procedure.
Manage Private Resources < Add a Private Resource > Discover Private Resources
Updated 11 days ago