Add VPN Profiles
A virtual private network (VPN) connection establishes a secure tunnel between endpoint devices over a public network such as the Internet. This section describes how to create VPN profiles to allow for configuration of remote user connections through a VPN.
Always On for VPN Profiles
Always On determines whether AnyConnect automatically connects to the VPN when the user
logs in to a compute. You can enforce corporate policies, protecting the computer from security threats by preventing access to Internet resources when it is not in a trusted network. We strongly recommend purchasing a digital certificate from a certificate authority and enrolling it on the secure gateways. Note that if Always On is enabled, but the user does not log on, AnyConnect VPN does not establish the VPN connection.
An option that accompanies the Always On feature is "Allow VPN Disconnect; users of Always On VPN sessions may want to click Disconnect so they can choose an alternative secure gateway for reasons such as performance issues with the current VPN session or reconnection issues following the interruption of a VPN session.
The following topics explain how to configure remote access VPN profiles.
Table of Contents
- Prerequisites
- Step 1 – General Settings
- Step 2 – Authentication, Authorization, and Accounting
- Step 3 – Traffic Steering (Split Tunnel)
- Step 4 – Cisco Secure Client Configuration
Prerequisites
- Full Admin role in Secure Access. See Manage Accounts.
Step 1 – General Settings
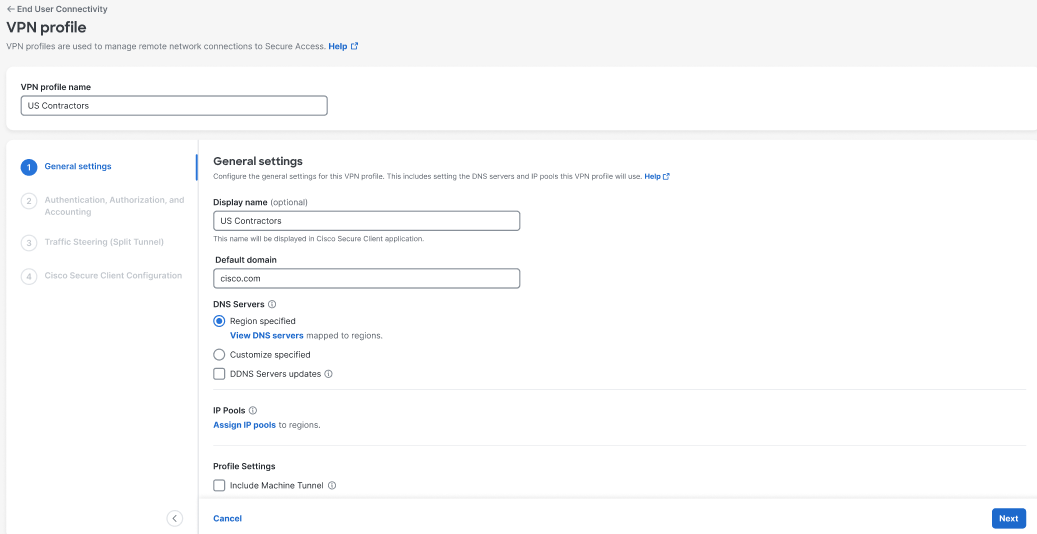
Enter a name and configure the general settings that this VPN profile will use.
-
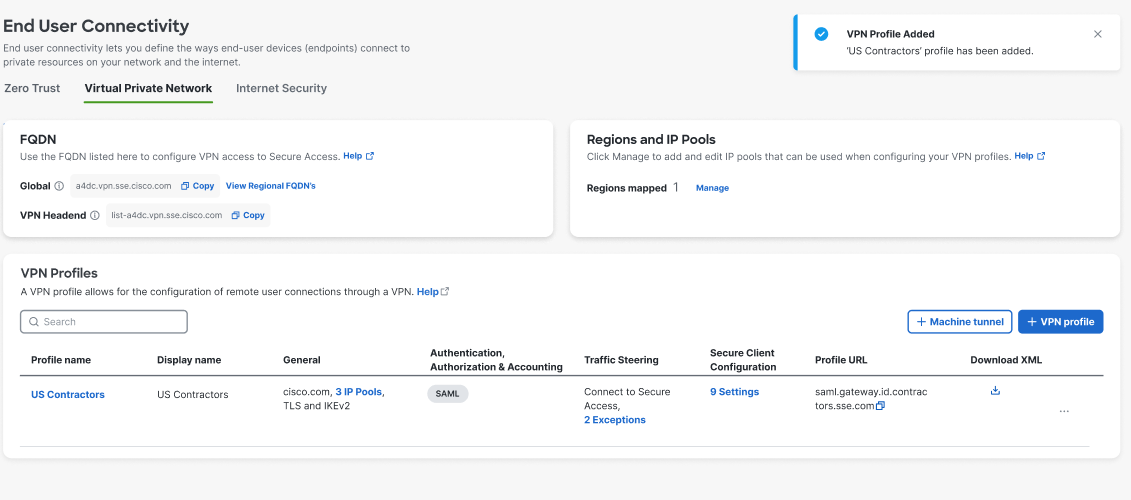
Navigate to Connect > End User Connectivity > Virtual Private Network.
-
For VPN Profiles, click + VPN Profile.
-
Enter a meaningful VPN profile name for this profile.
-
Enter an optional Display name for this profile. This is a customizable and flexible label that is displayed to end-users of the Cisco Secure Client for ease-of-selection when choosing the appropriate profile.
-
Enter the Default Domain.
-
Review the DNS Servers options.
- By default, the DNS Servers is set to Region specified, meaning that the VPN profile uses the DNS specified for the region.
- (Optional) Click View DNS servers to see the list of DNS servers mapped to regions.
- (Optional) To choose a DNS pair other than the default regional DNS, click Custom specified, then click Map DNS servers to open an configurable view of all available DNS servers for a VPN profile. For more information, see Map DNS Servers to Regions.
- (Optional) Check DDNS Servers updates to include dynamic updates to the mappings of domain names to IP addresses when a remote user's network IP address changes. By default, the DDNS Servers is set to Region specified, meaning that the VPN profile uses the DDNS specified for the region. For more information, see Map DDNS Servers to Regions.
-
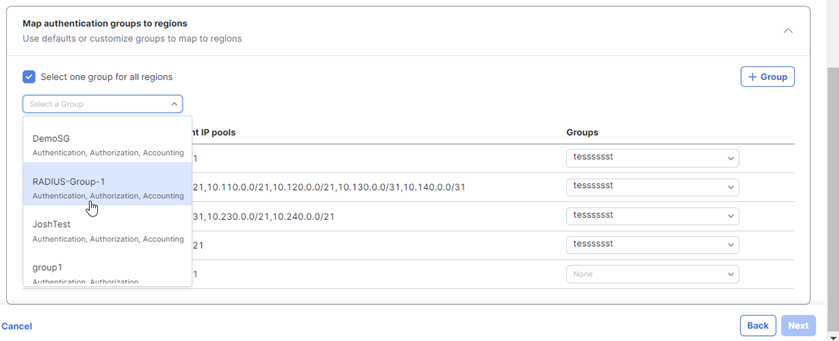
Click Assign IP pools and select one IP pool per region from the IP Pools drop-down. VPN profiles must have at least one IP pool assigned in each region for a valid configuration. For more information, see Add an IP Pool.
-
Under Profile Settings, review the following settings and choose the options appropriate for this profile:
- Check Include machine tunnel for this profile to allow a client device to connect to Secure Access before a user initiates a login. Click + Add Machine Tunnel to configure a machine tunnel if one does not exist for this profile; see Manage Machine Tunnels for more information.
- Check Include regional FQDN to add a region-specific FQDN to the hostname, which provides flexibility to clients when connecting to their VPN headend.
-
Under IP version mode, select the mode(s) that this VPN profile will use:
- IPv4
- IPv6
-
Under Protocol, select the protocol(s) that this VPN profile will use:
- TLS/DTLS
- IKEv2
At least one protocol must be selected. If both TLS/DTLS and IKEv2 are selected, choose the primary protocol from the Primary drop-down.
-
Optionally, choose a Connect time posture from the drop-down. See Add a VPN Connection Posture Profile.
-
Click Next.
Step 2 – Authentication, Authorization, and Accounting
Choose a configuration method from the Protocols drop-down to complete the authentication process for this VPN profile. Authentication is the way a user is identified before being allowed access to the network and network resources. Authentication requires valid user credentials, a certificate, or both. You can use authentication alone, or with authorization and accounting.
Choose from:
SAML
Use this option to authenticate users with SAML.
Important: In Secure Access, you can add the same SAML identity provider (IdP) in multiple VPN profiles. When you configure the same SAML IdP in your VPN profiles, you must enable the same metadata, certificate, and re-authentication settings for the SAML IdP. Secure Access does not support the configuration of different settings for the same SAML IdP in multiple VPN profiles.
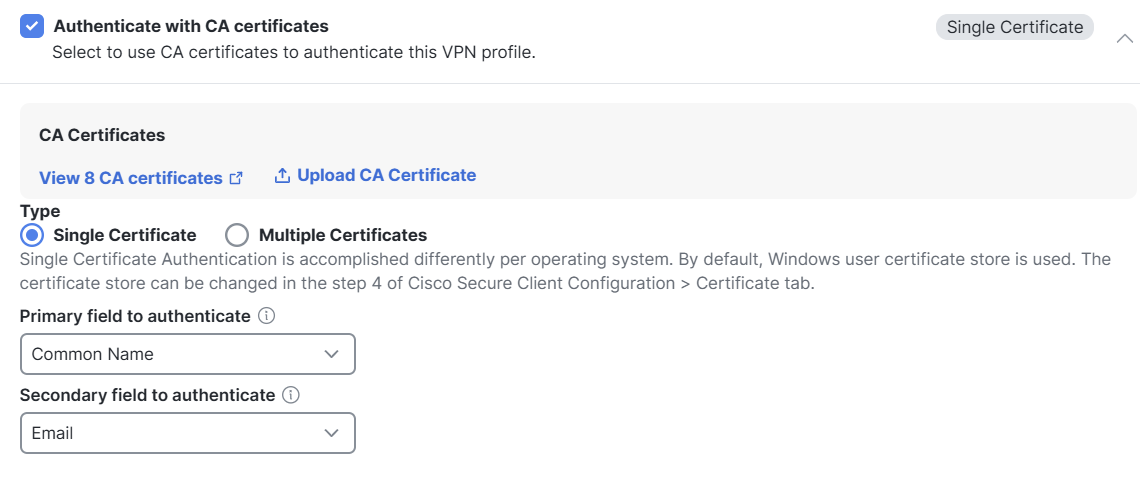
Authenticate with CA certificates
If you select SAML attribute name with the intention of selecting the posture profile with the VPN profile, then the authentication type of said VPN profile should be SAML+Cert or SAML+Multicert based on how many certificates you want to select for posture endpoint. The SAML attributes must be present and match the certificate attributes.
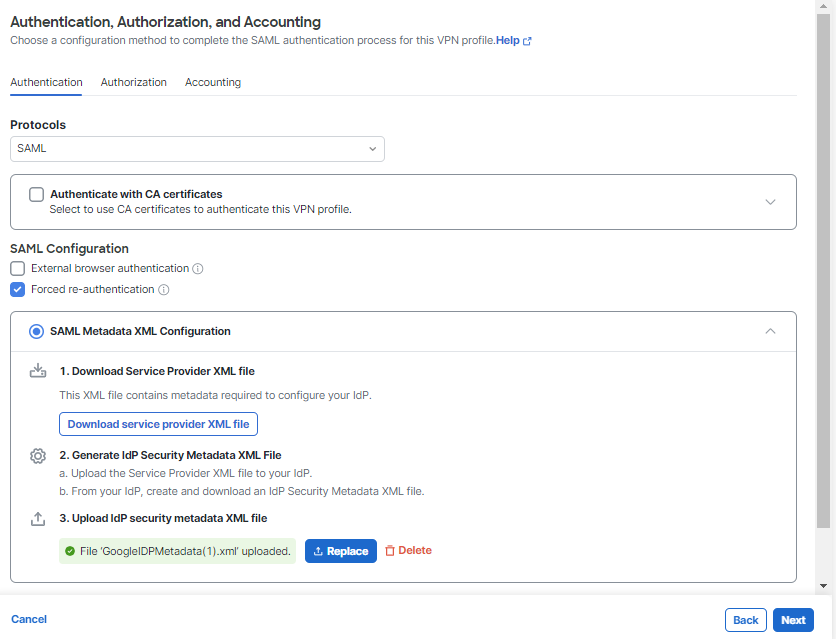
SAML Configuration
When you choose SAML, each user is authenticated using the SAML single sign-on server.
- External browser authentication—Select this option to have Secure Client use a local browser for authentication. When selected, Secure Client can support other SAML-based web authentication options, such as Single Sign On, biometric authentication, or other enhanced methods that are unavailable with an embedded browser.
- Forced re-authentication—Select this option to force a re-authentication whenever a VPN connection is initiated. Forced re-authentication is related to the Session Timeout setting. For more information see Cisco Secure Client Configuration.
For more information about Secure Access and SAML for VPNs with a configured VPN profile, see Manage SAML Certificates for Identity Providers. SAML authentication for remote access VPNs supports SAML, SAML + Single CA certificate, and SAML + Multiple CA Certificates.
SAML Metadata XML Configuration
- Click the SAML Metadata XML Configuration option, provide your Service Provider XML file and follow the guidelines to complete your Identity Provider (IdP) setup.
- Upload your IdP Security Metadata XML file to Secure Access. You can drag-and-drop the file or click the upload icon to browse and select the file.
Manual Configuration
- Click the Manual Configuration option complete the form with information obtained from your Service Provider (SP) and Identity Provider (IdP).
- Download the SP Certificate.
- Obtain the following from the SAML IdP:
- Identity Provider Entity ID URL.
- Sign-in URL.
- Sign-out URL.
- IdP Certificate.
- Request Signature.
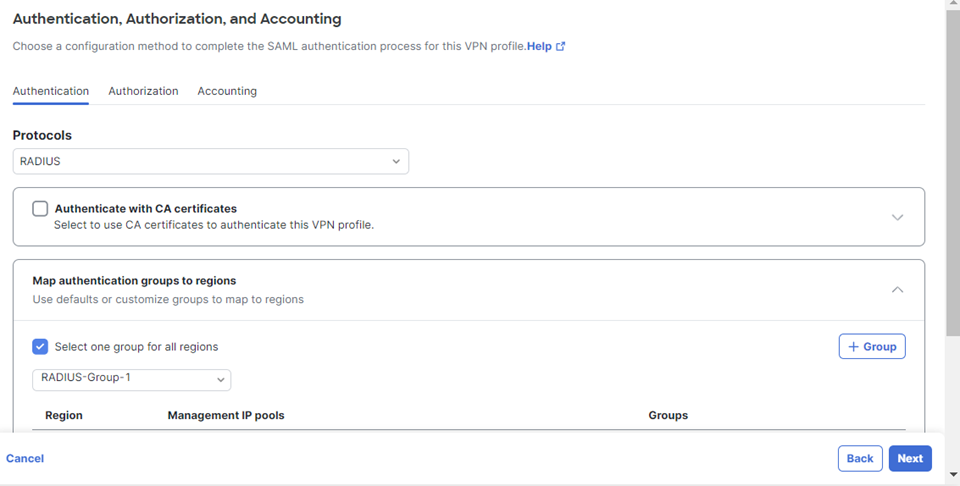
RADIUS
Use this option to authenticate users on a RADIUS server.
Note: Cisco strongly discourages the use of RADIUS (RADIUS username/password only) as a single form of authentication. If the RADIUS server does not provide multi-factor authentication (MFA), then you must enable a second factor of authentication in Secure Access for VPN authentication. You can configure certificates in Secure Access as the second form of authentication.
When you choose RADIUS, each user is authenticated using RADIUS group servers. RADIUS authentication for remote access VPNs supports RADIUS, RADIUS+ Single CA certificate, and RADIUS+ Multiple CA Certificates.
Certificate
Use this option to authenticate users with trusted certificate authorities (CAs).
When you choose Certificate, each user is authenticated with a client certificate. The client certificate must be configured on VPN client endpoints. By default, the user name is derived from the client certificate fields CN and OU. If the user name is specified in other fields in the client certificate, use the Primary field to authenticate and Secondary field to authenticate field to map appropriate fields.
Select Multiple Certificates authentication to authenticate the VPN client using the machine and user certificates.
If have enabled Multiple Certificates authentication, you can select one of the following certificates to map the username and authenticate the VPN user:
- First Cert—Select this option to map the username from the machine certificate sent from the VPN client.
- Second Cert—Select this option to map the username from the user certificate sent from the client.
Note: If you do not enable multiple certificate authentication, the user certificate (second certificate) is used for authentication by default.
Step 3 – Traffic Steering (Split Tunnel)
Step 3a – Traffic Steering (Split Tunnel)
For Traffic Steering (Split Tunnel), you can configure a VPN profile to maintain a full tunnel connection to Secure Access, or configure the profile to use a split tunnel connection to direct traffic through the VPN only if necessary.
-
For Tunnel Mode, choose either:
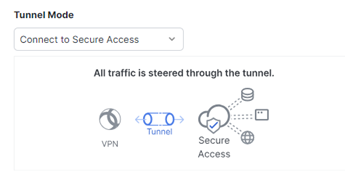
-
Connect to Secure Access to direct all traffic through the tunnel. Note that DNS names matching the configured DNS Names are routed over the local physical interface for the resolution. Any that do not match the configured DNS Names are routed via the encrypted Secure Client connection for resolution.
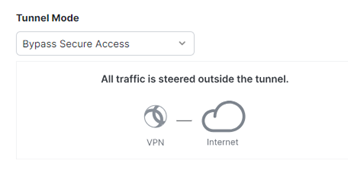
-
Bypass Secure Access to direct all traffic outside the tunnel.
-
-
Depending on your selection, to addExceptions to steer traffic inside or outside the tunnel, perform the following steps:
-
Click + Add.
-
Enter the name of a Network Object or a Network Object Group in the search bar and then select the same on the Select sources tab.
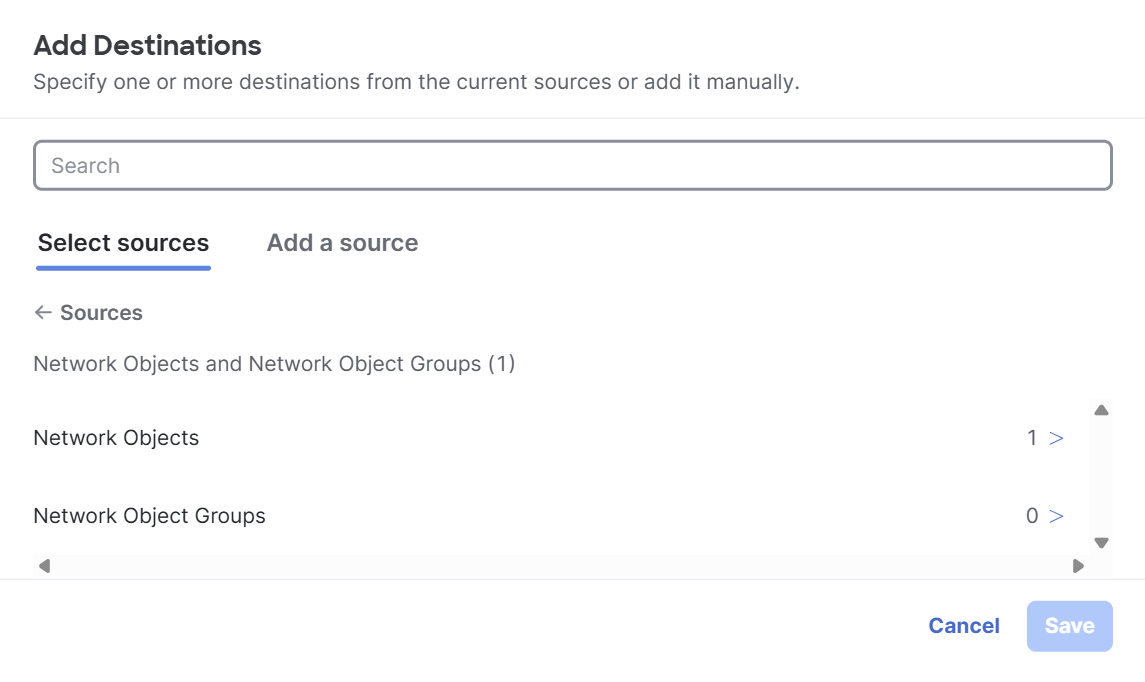
Or
On the Add a source tab, enter comma-separated IPs, domains, and network spaces.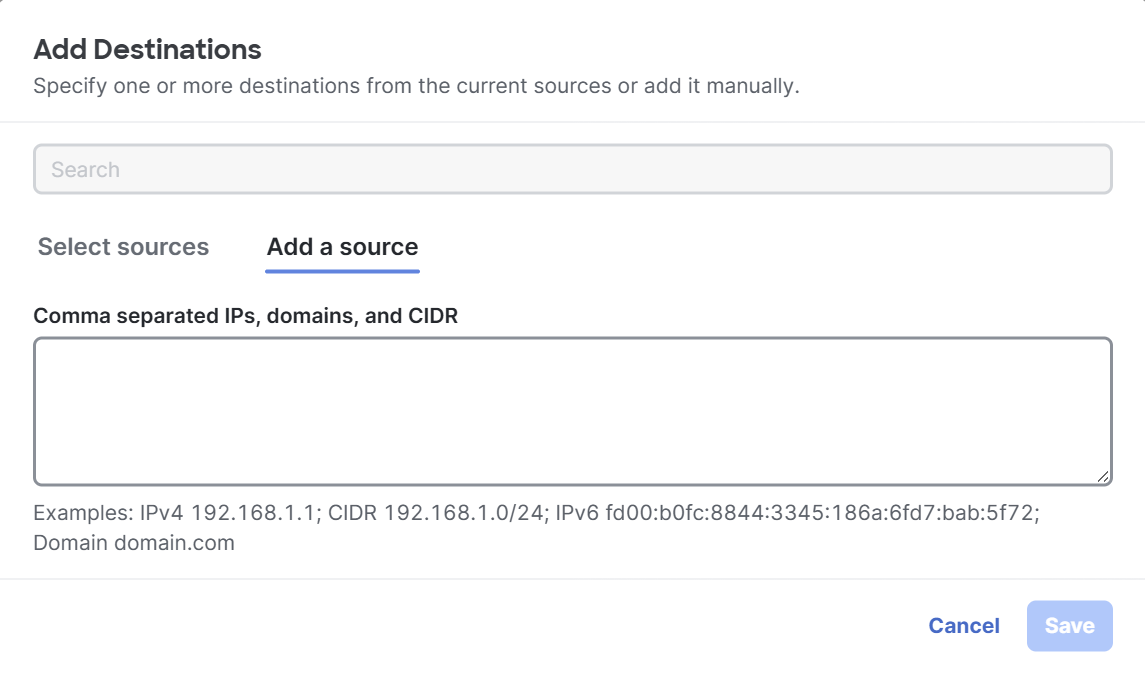
-
Click Save.
-
-
Click Next to configure the Cisco Secure Client.
Step 3b – Proxy and DNS Steering Settings
Use Proxy and DNS Steering Settings to manage how VPN clients handle proxy routing and DNS resolution. You can configure the VPN profile to bypass the proxy server for specific destinations or ports, or enforce the use of an alternative proxy server.
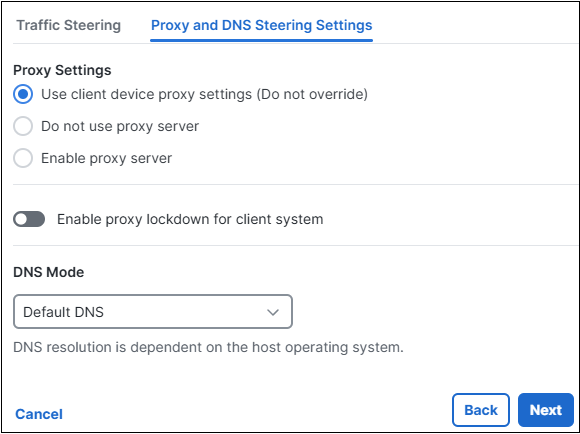
- For Proxy Settings , choose one of the following options:
- Use client device proxy settings (Do not override): Allow the user to configure a browser proxy for HTTP traffic and use the proxy if it is configured.
- Do not use proxy server: Prevent the use of browser-configured proxies. No browser connections will be routed through the proxy.
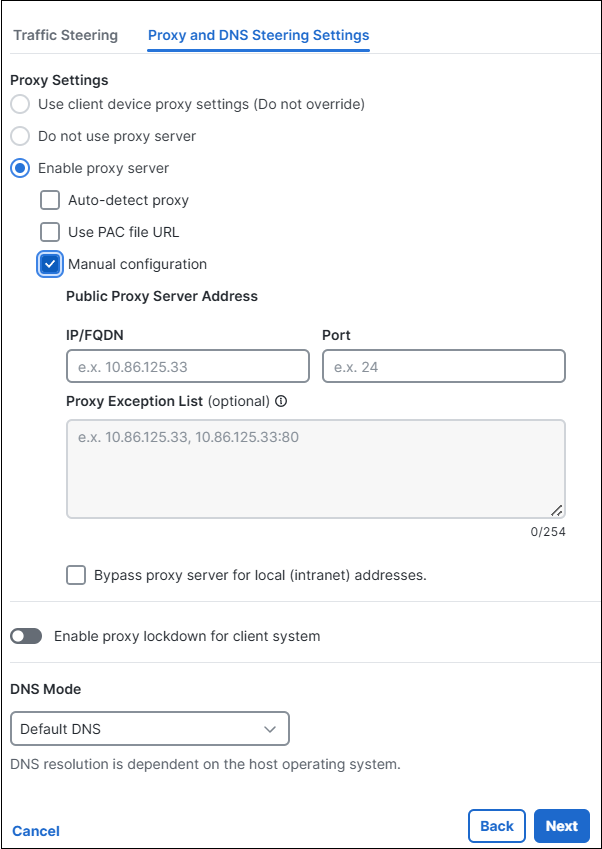
- Enable proxy server: Configure and enforce the use of a proxy server for client devices.
- When Enable proxy server is chosen, the following proxy server settings options are displayed. Choose the required settings:
- Auto-detect proxy: Check this box to specify the URL where the Proxy Auto-Configuration (PAC) file is located.
- Use PAC file URL: Check this box to provide the PAC file URL.
- Manual configuration: Check this box to manually define a proxy server to be used by all client devices for HTTP traffic. Then, configure the following:
- Public Proxy Server IP: Enter the IP address or hostname of the public proxy server and specify the port.
Note: The combined length of the hostname and port cannot exceed 100 characters. - Proxy Exemption List (optional): Add host/port combinations that should bypass the proxy. Enter the public proxy server address before adding exceptions.
Note: You must enter the public proxy server address before adding exceptions.
- Public Proxy Server IP: Enter the IP address or hostname of the public proxy server and specify the port.
Note: To bypass the proxy for local addresses, check the Bypass Proxy Server for Local (Intranet) Addresses checkbox.
- (Optional) Use the Enable Proxy Lockdown for Client System toggle button to activate proxy lockdown for the client system.
- For DNS Mode, choose one of the following:
Tunnel all DNS traffic : Route all DNS traffic over the encrypted VPN connection.
Split DNS traffic: Route DNS names matching the configured DNS Names over the encrypted VPN connection. Any names that do not match the configured DNS Names are resolved through the local physical interface.
- Click Next to configure the Cisco Secure Client.
Step 4 – Cisco Secure Client Configuration
You can modify a subset of Cisco Secure Client settings based on the needs of a particular VPN profile.
-
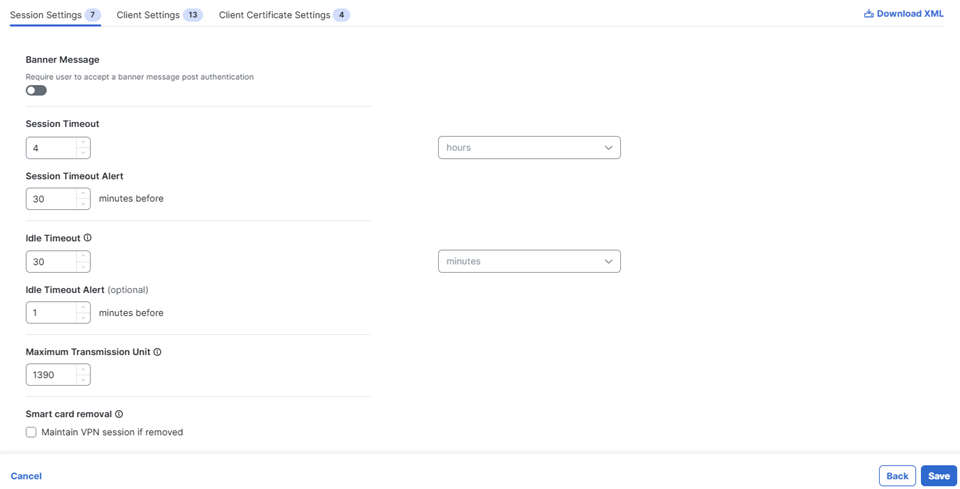
Click the Session Settings tab to modify session-specific settings:
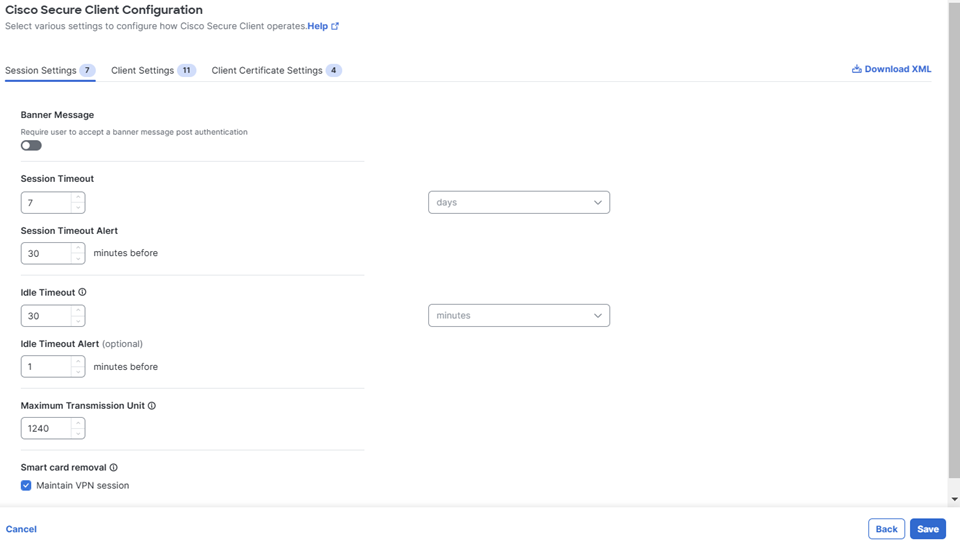
- Banner Message—Configure a banner message for the user to accept after Secure Client authentication.
- Session Timeout—Configure a time window after which the Secure Client session will end. The default is 4 hours.
- Session Timeout Alert—Configure the number of minutes before the session timeout to alert the user. The default is 30 minutes.
- Idle Timeout — Configure a time window for an idle Secure Client session, after which the session will end.
Note: This value affects the Disconnected Timeout configuration in your Cisco AnyConnect settings; which determines when AnyConnect/Secure Client ceases reconnect attempts since the session to the ASA has been interrupted. - Idle Timeout Alert—Configure the number of minutes before the idle session timeout to alert the user. The default is 1 minute.
- Maximum Transmission Unit (MTU)—Configure the largest packet size that can be transmitted through the VPN tunnel before fragmentation. Accepts a value between 576 and 1390.
- Smart card removal—Check Maintain VPN session to continue the VPN connection in the event of a smart card removal. Otherwise the VPN connection is terminated when a smart card is removed.
-
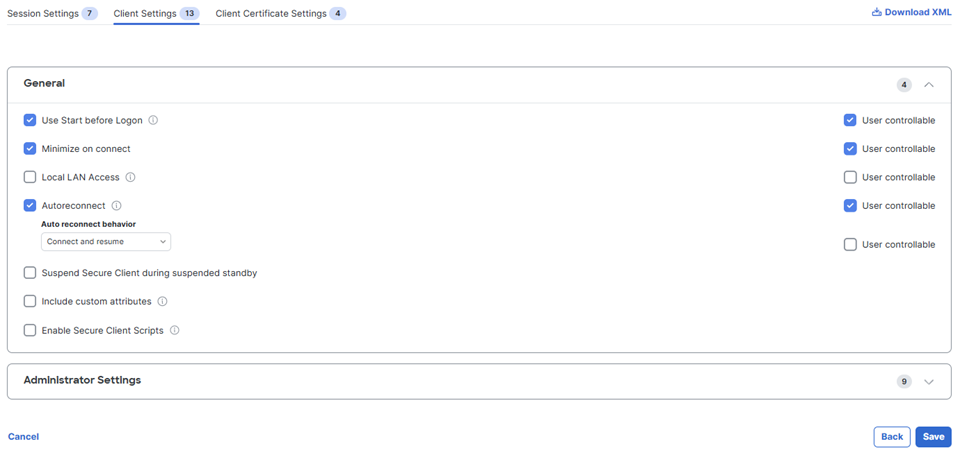
Click the Client Settings tab then click Edit to modify client-specific sessions. See The Cisco Secure Client Profile Editor for complete information about Cisco Secure Client settings.
-
Modify Session Settings as needed.
-
Modify Client Settings (General) as needed.
-
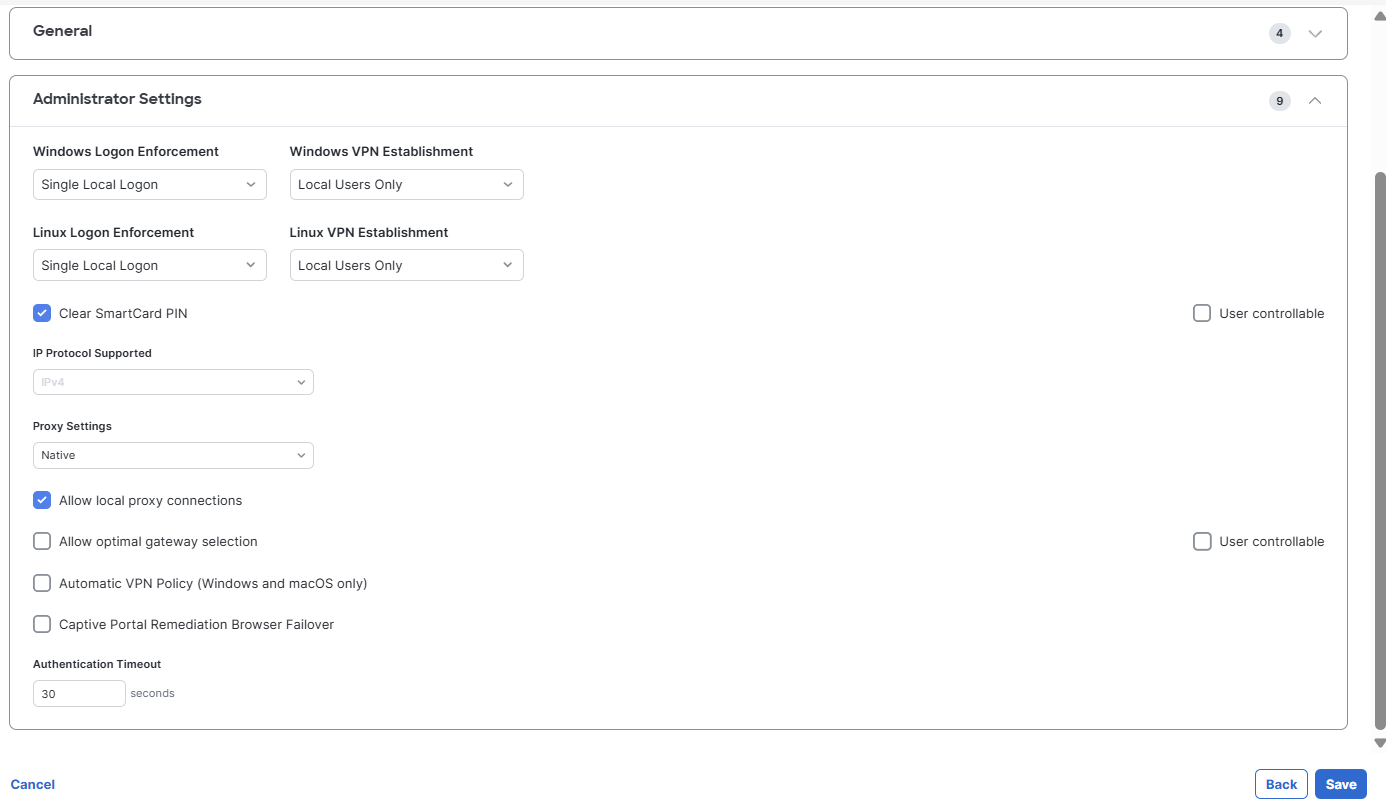
Configure a time window for an idle Secure Client session, after which the session will end. Note: This value affects the Disconnected Timeout configuration in your Cisco AnyConnect settings; which determines when AnyConnect/Secure Client ceases reconnect attempts since the session to the ASA has been interrupted. Modify Client Settings (Administrator) as needed.
-
Note: To enable and configure the Always-On operation, which prevents access to Internet resources without a server certificate when the computer is not on a trusted network (unless a VPN session is active), check the Automatic VPN Policy option, then scroll down and check the Always on VPN option. Optionally,
-
Click Save.
-
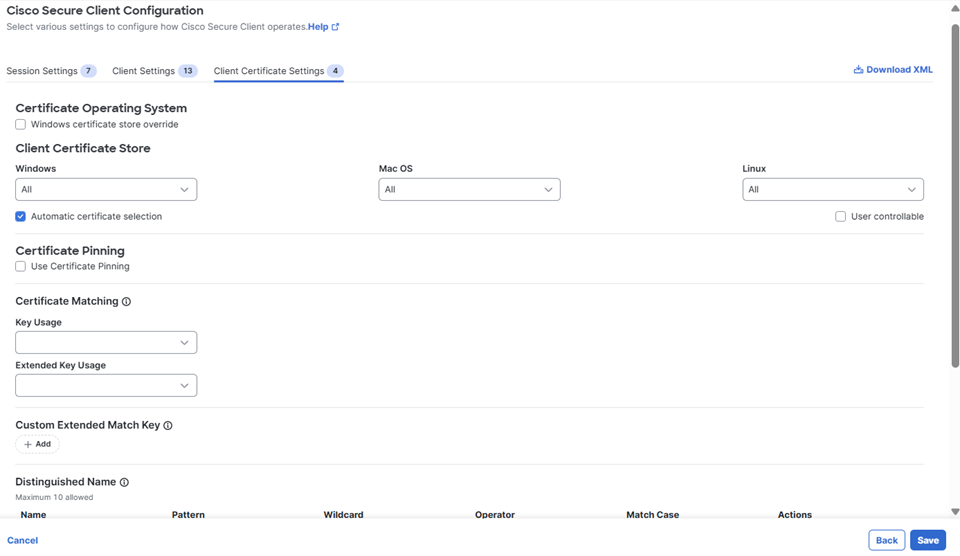
Modify any Client Certificate Settings as needed.
-
Click Save to complete the VPN Profile.
Manage VPN Profiles < Add a VPN Profile > Add a RADIUS Group
Updated 12 days ago