Deploy VAs in KVM
Deploy Cisco Secure Access Virtual Appliances (VAs) in KVM.
Note: You must deploy at least two Virtual Appliances (VAs) in a Secure Access Site. It is critical that these VAs are not cloned or copied in any way. Configure and set up each VA manually.
Table of Contents
Prerequisites
- Full Admin user role. For more information, see Manage Accounts.
- For information about the network requirements for deploying VAs, see Prerequisites for Virtual Appliances.
- A Linux system with qemu-utils package installed.
- Only VAs running 2.5 or above can be deployed in KVM.
- Virtual Appliance deployments in KVM are supported with specific Red Hat Linux and Ubuntu Linux versions only.
- KVM on Ubuntu Linux (supported LTS versions)
- KVM on Red Hat Linux (supported versions)
Configure Authentication for the Virtual Appliances
Before you can download the Virtual Appliance images in Secure Access, you must configure your Secure Access API keys for the Virtual Appliances in your organization. Secure Access enables the Download Components button only after the API keys for the VAs are configured. For more information, see Configure Authentication for Virtual Appliances.
Procedure
Step 1 – Create the qcow2 files for KVM
a. Navigate to Connectors > DNS Forwarders and click Download Components.

b. Click Download for VA VMWare ESXi.
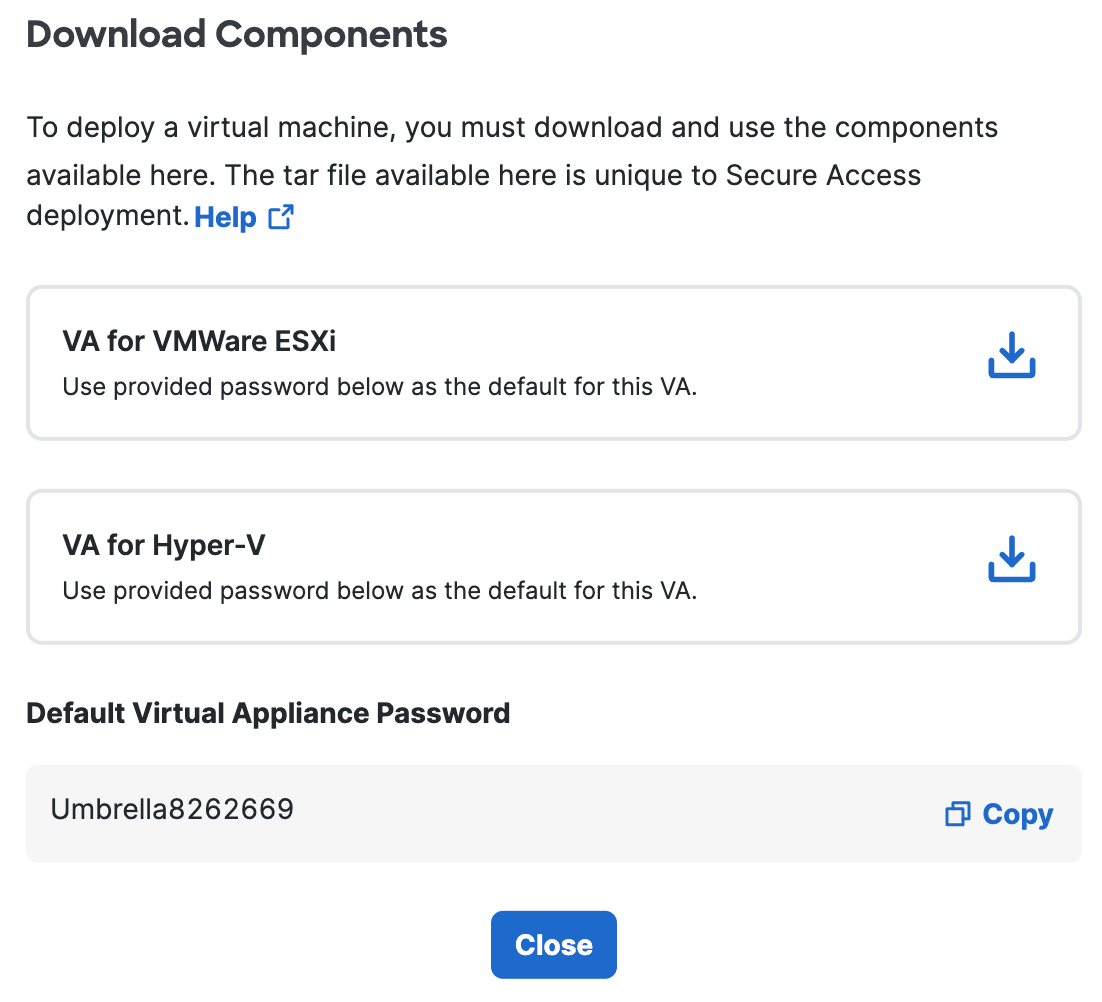
Secure Access generates and downloads a .tar file unique to your deployment.
This tar file includes:
- an .ova template containing the virtual hard disks that need to be deployed on KVM
- a signature file
- a Cisco public certificate to validate the signature
- a readme file
c. Extract the contents of the tar file using the command
tar –xvf <.
To verify the integrity of the downloaded file, validate the signature by following the instructions provided in the readme file. When successful, you should see a message saying “Verified OK."d. Extract the downloaded.ova file to retrieve the vmdk files.
e. Use the qemu-img convert commands to convert each of the vmdk files to the qcow2 format.
qemu-img convert -f vmdk -O qcow2 forwarder-va.vmdk forwarder-va.qcow2
qemu-img convert -f vmdk -O qcow2 dynamic.vmdk dynamic.qcow2f. Copy both the qcow2 files on your Linux system running KVM.
Note: Deploying the VA results in a modification of the source qcow2 files. Thus, you must copy the qcow2 files each time you deploy a new VA.
Step 2 – Launch the Virtual Appliance on KVM
a. Open the Virtual Machine Manager on your Linux system running KVM and click Create a new virtual machine.

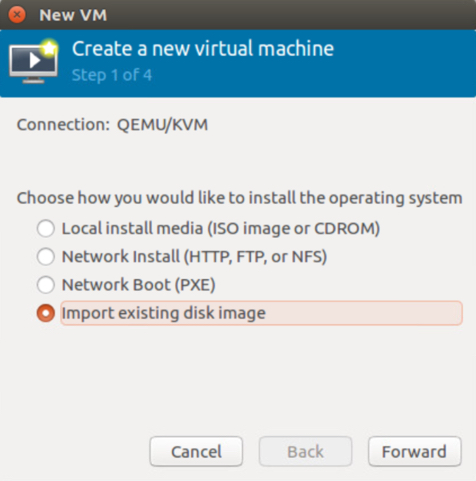
b. In the first step of the wizard, choose Import existing disk image.
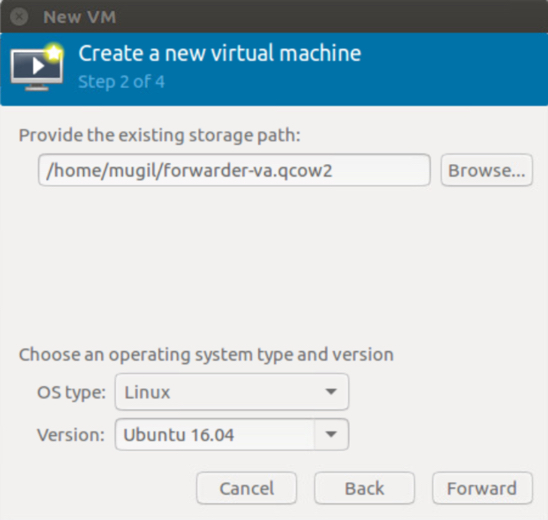
c. Provide the existing storage path to your forwarder-va.qcow2. Set the OS type to Linux and click Forward.
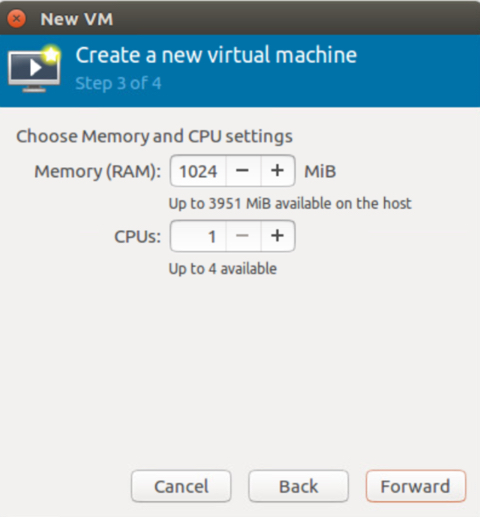
d. Set the memory and CPU settings to at least 1 CPU and 1 GB RAM and click Forward.
e. In the last step of the wizard, select Customize configuration before install and then click Finish.
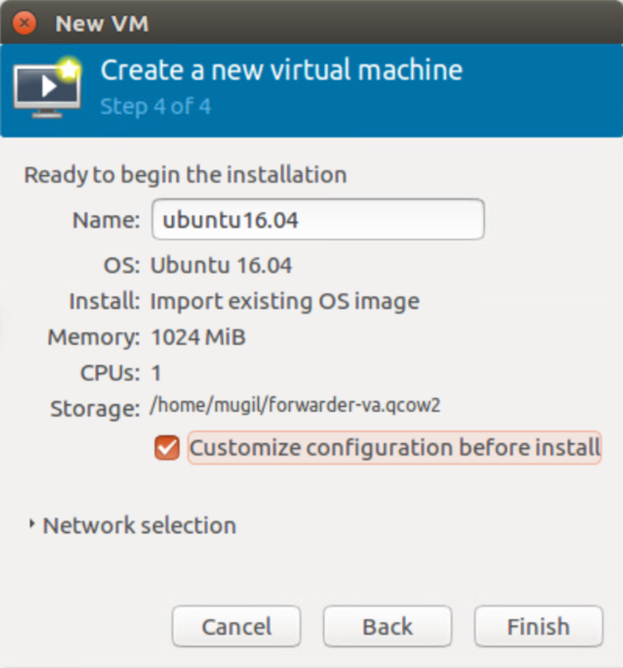
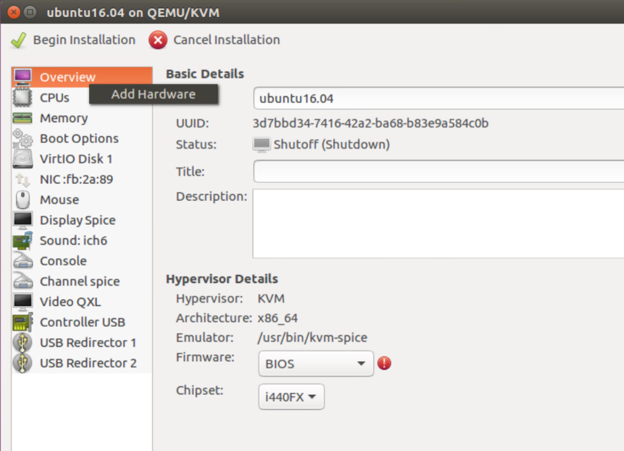
f. Select Add Hardware.
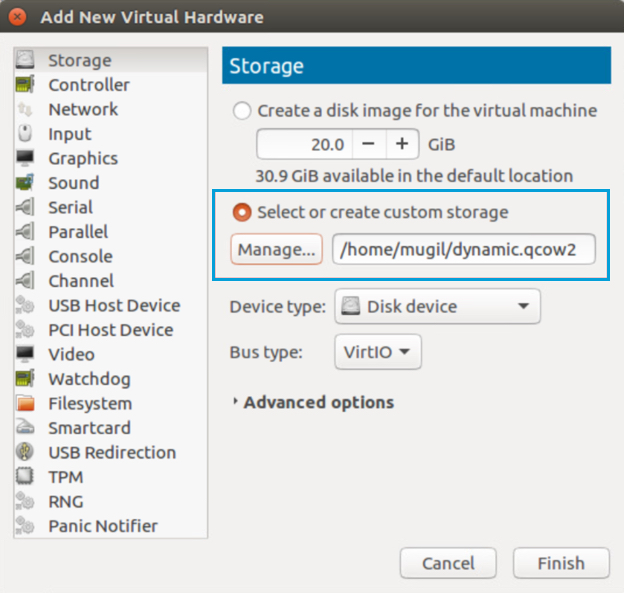
g. Select Storage, add or create custom storage, add the dynamic disk, and then click Finish.
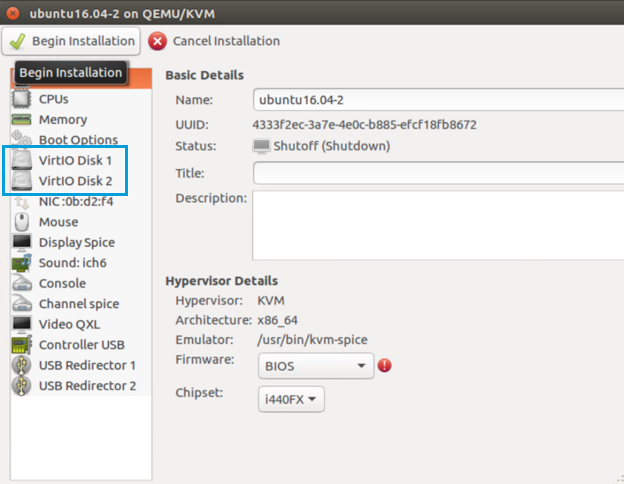
You should then see two disks.
h. Click Begin installation to create the VA.
i. If your network supports DHCP, the VA will get auto-configured with a DHCP IP address and will register to Umbrella using this IP. You can configure the VA on KVM through two mechanisms:
- Press Ctrl+B on the VA console and entering the Configuration mode.
Or - Initiate an SSH connection to the DHCP IP—this IP can be retrieved in Secure Access—and enter Configuration mode.
You can now configure the VA. For information about configuring VAs, see Configure Virtual Appliances.
Deploy VAs in Google Cloud Platform < Deploy VAs in KVM > Deploy VAs in Nutanix
Updated 2 months ago
