View and Manage Schedules
After you add a Schedule resource in Cisco Secure Access, you can include the Schedule on an internet access rule. You can also view, edit, or delete the Schedule. A Schedule configures the time zone, date and time ranges, and days of the week when Secure Access enables an internet access rule. For more information, see About Configuring Schedule Resources.
To begin to use the Schedule resource, enable the Schedule Enablement Time and Date security setting and select the Schedule resource on an internet access rule.
Table of Contents
Prerequisites
- Full Admin user role. For more information, see Manage Accounts.
Procedure
View Schedules in Secure Access
-
Navigate to Resources > Settings > Enablement Schedule.

-
Navigate to a Schedule.
- Schedule Name—The name of the Schedule.
- Time Zone—The time zone applied to the date and time ranges configured in the Schedule.
- Dates—The range of dates when Secure Access applies the Schedule.
- Days—The days of the week when Secure Access applies the Schedule.
- Time—The configured time periods for the selected days of the week when Secure Access applies the Schedule.
- Associated Rules—The list of of the internet access rules that include the Schedule or No Rules if the Schedule is not included in any access rules.
-
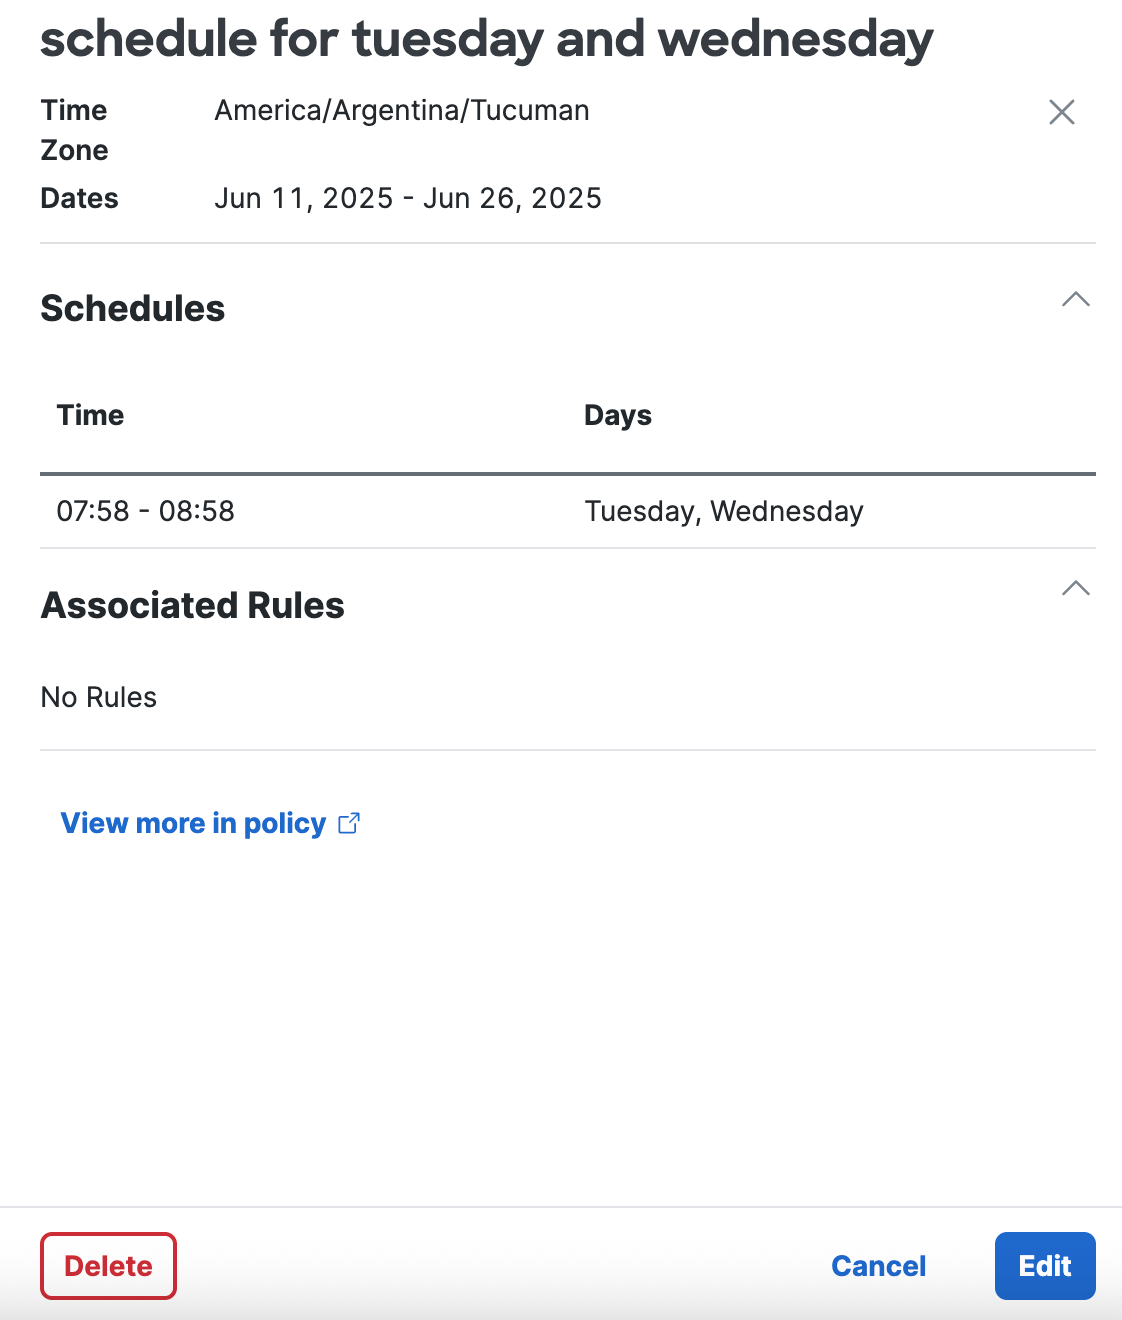
(Optional) Click on the name of a Schedule to view the configured times, time zone, and the internet access rules that include the Schedule.
a. General Schedule information.- Schedule Name—The name of the Schedule. The name is unique for the Schedules in the organization.
- Time Zone—The time zone where the traffic occurs.
- Dates—The range of dates when Secure Access applies the Schedule.
b. Time and days Schedule information.
- Time—The list of configured time periods when Secure Access applies the Schedule.
- Days—The specific days of the week when Secure Access applies the Schedule.
c. Associated Rules—The list of of the internet access rules where Secure Access applies the Schedule.
Click View more in Policy to navigate to the Access Policy in Secure Access.
Edit a Schedule
Edit a Schedule in Secure Access.
-
Navigate to Resources > Settings > Enablement Schedule.
-
Navigate to the Enablement Schedules table.
a. Navigate to a Schedule in the table, click on the ellipsis (...), and then choose Edit.
b. Navigate to the Schedule Name column, click on the name of a Schedule, and then click Edit. -
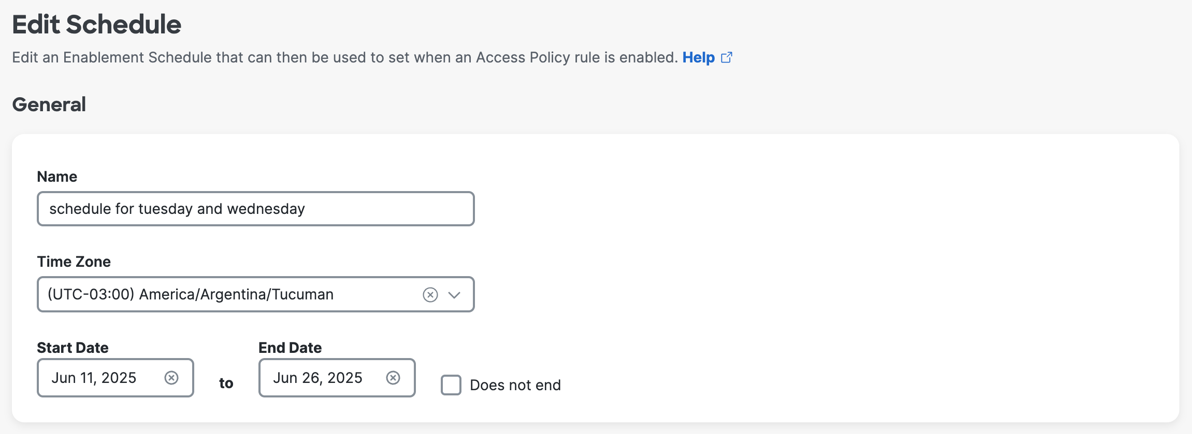
On Edit Schedule, navigate to General.
-
(Required) For Name, enter a unique name for the Schedule.
-
(Required) For Time Zone, choose the time zone that Secure Access will apply to the date and time configured in the Schedule.
-
(Required) For Start Date, choose the date when Secure Access will enable the internet access rule.
-
(Required) For End Date, choose the date when Secure Access will disable the internet access rule, or click Does not end to indicate that the Schedule does not expire and the access rule will remain enabled indefinitely.
-
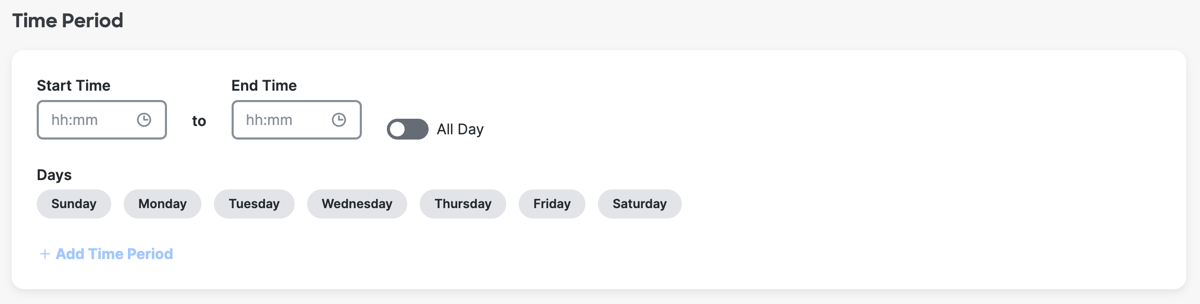
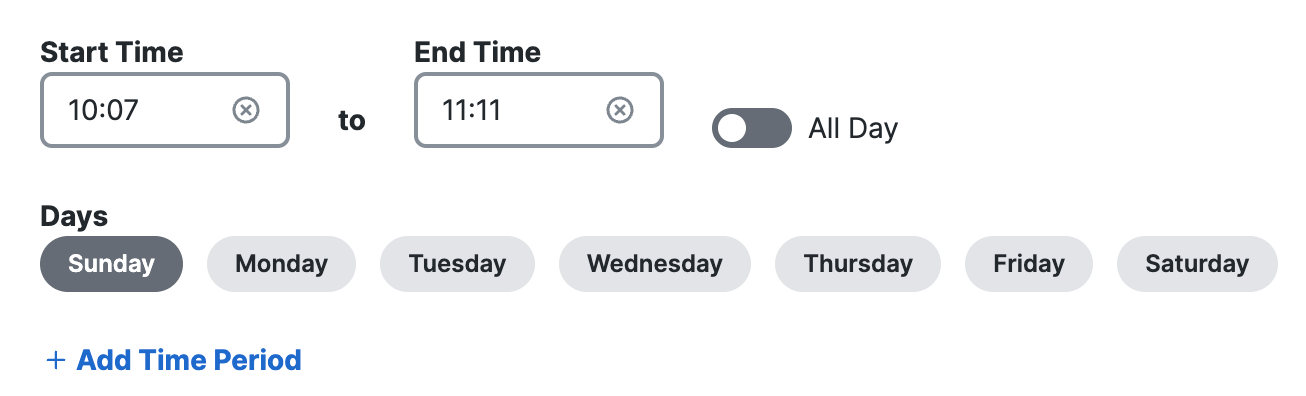
Navigate to Time Period.
-
Choose the time of day for the schedule or enable All Day.
a. (Required) For Start Time, choose the hour, minute, and AM or PM for the 24-hour time period when Secure Access will enable the internet access rule, and then click OK.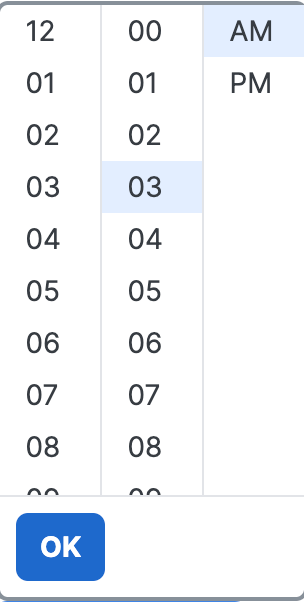
b. (Required) For End Time, choose the hour, minute, and AM or PM for the 24-hour time period when Secure Access will disable the internet access rule, and then click OK.
-
(Required) For Days, click on the days of the week when Secure Access will enable the internet access rule.
-
(Optional) Click Add Time Period to create another time period for the Schedule.
a. Repeat Steps 8–10 to add another time period to the Schedule.
-
(Optional) Click Remove to delete a configured time period.
-
Click Save.
Delete a Schedule
In Secure Access, you can remove a Schedule only if it is not associated with any access rules in the Access policy.
-
Navigate to Resources > Settings > Enablement Schedule.
-
Navigate to the Enablement Schedules table.
a. For Associated Rules, confirm that Secure Access displays No rules, which indicates that no access rules include the Schedule.
b. If the Schedule has associated rules, you must remove the Schedule from the access rules. For more information, see Schedule Enablement Time and Date. -
Remove the Schedule resource in the organization.
a. Navigate to a Schedule in the table, click on the ellipsis (...), and then choose Delete.
b. Navigate to the Schedule Name column, click on the name of a Schedule, and then click Delete.
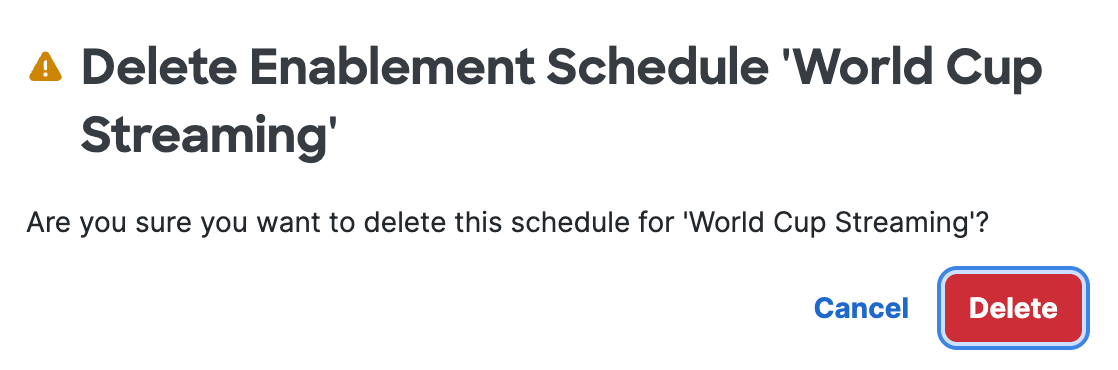
- Click Delete to confirm the removal of the Schedule in Secure Access.
Add a Schedule < View and Manage Schedules > Manage Internet and SaaS Resources
Updated 21 days ago