Add a Private Access Rule
Cisco Secure Access connects users, devices, both public and branch networks, and network tunnels to private resources in your enterprise. Private resources are applications and services that you deploy on your enterprise's infrastructure or private cloud. When you add a private resource to your organization, Secure Access enables Branch network connections to the resource.
Once you add your sources and private resources to Secure Access, you can create private access rules with these source and destination components. For more information, see Components for Private Access Rules.
In a private access rule, add the source or destination components that you configured for your organization. You can also enter sources and destinations directly into your rules. These single-use source and destination components are only available on an access rule, not shared by your policy.
The access rule defines the Action, Source, Security Controls, and Destinations for the rule. In your private access rule's Security Controls, Secure Access provides a default Intrusion Prevention System (IPS) profile. You can configure and apply other IPS profiles for your Branch networks to Private Resources rules. For more information, see Manage Private Access Rules.
Table of Contents
- Prerequisites
- Set Up the Private Access Rule
- Step 1 — Specify Access Options
- Step 2 — Configure Security Control Options
Prerequisites
-
Full Admin user role. For more information, see Manage Accounts.
-
Add sources to your organization. For more information, see Components for Private Access Rules.
-
Add Private Resources to your organization. For more information, see Add a Private Resource.
Set Up the Private Access Rule
- Navigate to Secure > Access Policy.

- Click Add Rule, and then choose Private Access.
At the top of the rule is a summary that describes the configured components of your rule.

Enable the Rule and Edit Your Logging Settings
- Toggle the rule to enable it. After you configure and save the rule to your policy, the rule is enabled.
You can toggle off the rule at any time to disable it.

-
Click Edit to manage your logging settings on the access rule.
a. For Log Request, toggle off or on to choose whether Secure Access logs the events for the traffic managed by the access rule.
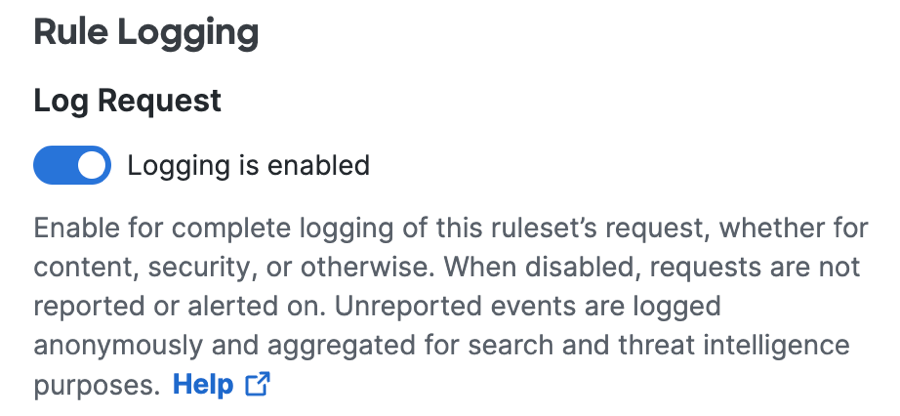
b. For Log Only Security Events, select whether Secure Access logs the events that match the security filters. For more information, see Manage Logging.

Add a Rule Name
- For Rule name, add a meaningful name for your access rule.
The Rule name is required. You must give your rule a name before you can continue to configure the Security Controls on the access rule.
Note: The Next button on the access rule is not available until you enter a name for the rule.

Choose a Rule Order
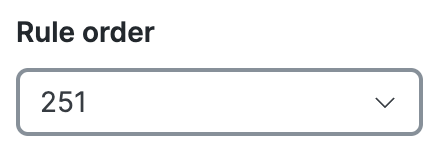
- For Rule order, choose a new priority for the rule, or keep the rule order assigned to the rule by Secure Access.
When you add a new rule, Secure Access assigns the next lowest priority to the rule. Secure Access applies the first rule in the list on the Access Policy page that matches the traffic. Order your rules so that more specific rules that might apply to the traffic are above more general rules. For more information, see Edit the Order of Rules on the Access Policy Page.
Step 1 — Specify Access Options
- Rule Action
- Pre-Configured Sources
- Composite Sources
- Pre-Configured Destinations
- Composite Destinations
- Endpoint Requirements
- User Authentication Requirements
Rule Action
- Choose Allow or Block to assign how Secure Access applies the configured components in the access rule. Note: Secure Access blocks the traffic in your organization to private destinations unless an access rule allows the connections.
Note: When the action is Allow and the traffic does not pass the security controls defined in the rule, Secure Access blocks the traffic.
If you assign Block to a rule that is destine for a private application and there is an HTTPS “Get” request for a downloadable file, the rule blocks matching traffic and actions appropriately but the event appears in Activity Search twice: one entry as the action is “blocked” and one entry as the action is “allow”. Activity Search does not currently condense events that generate multiple entries and thusly increases the hit counter as “2”.
Pre-Configured Sources
We recommend that you use your organization's reusable source components in your access rules. If you select Users or User Groups, you can choose destinations enabled for virtual private networks (VPNs) and Zero Trust Access connections, not Branch connections.
Note: The connection methods for a destination depend on the type of sources that you choose.
-
Navigate to Secure > Access Policy > Add Rule > Private Access.
-
Navigate to Specify Access and then click on the search bar under From.
-
For Select sources, click in the white space beside the default value ("Any") and choose the configured source components in your organization. When you finish choosing your sources, click Done.
For descriptions of the different types of sources, see Components for Private Access Rules: Sources.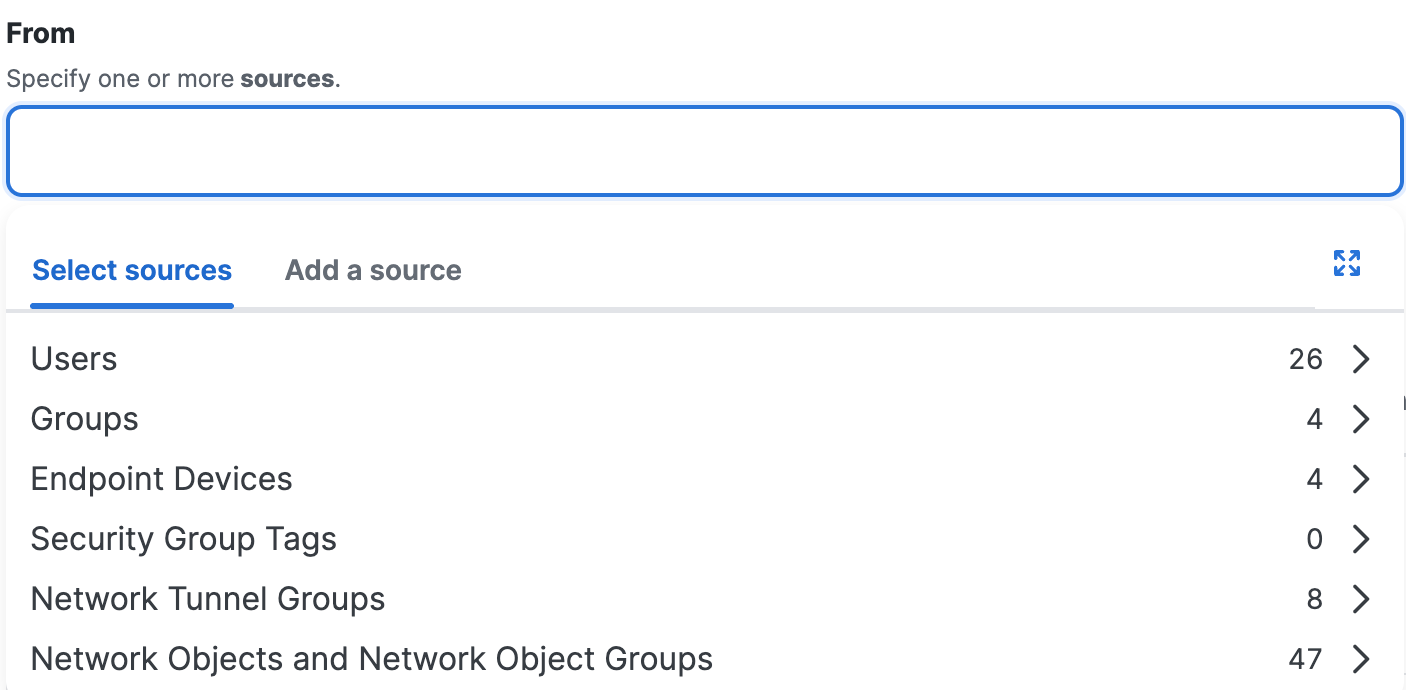
-
After you add a source component, click +More to view the list of sources that you added to the rule.

Composite Sources
You can add a network address as a source on a private access rule.
Note: The connection methods for a destination depend on the type of sources that you choose.
- Navigate to Secure > Access Policy > Add Rule > Private Access.
- Navigate to Specify Access and then click on the search bar under From.
- For Add a source, enter an IPv4 address, CIDR block, or IPv4 address with a wildcard mask.
This option is useful if you need to quickly address a specific issue that arises, for example to immediately block a particular user's access to an internet destination. For more information, see About Configuring Sources in Private Access Rules.
For example:- IPv4 address—1.2.3.4
- CIDR block—1.2.3.4/24
- Wildcard mask—1.2.3.4/255.255.255.255
For Wildcard Mask, use the format:<IP address>/<Wildcard Mask>.

-
Click Add.
-
After you add a composite source, click +More to view the list of sources that you added to the rule.

Pre-Configured Destinations
We recommend that you use your organization's configured destination components in your private access rules. For more information, see Components for Private Access Rules: Destinations.
-
Navigate to Secure > Access Policy > Add Rule > Private Access.
-
Navigate to Specify Access and then click on the search bar under To.
-
For Select destinations, click in the white space beside the default value ("Any") and choose the configured Private Resource Groups and Private Resources in your organization. When you finish choosing your private resources, click Done.
Note: The arrows out icon opens a window to configure the destinations in your rule.-
For each Private Resource, hover over the network connections icons.
Secure Access describes the type of network connections supported by the private destination.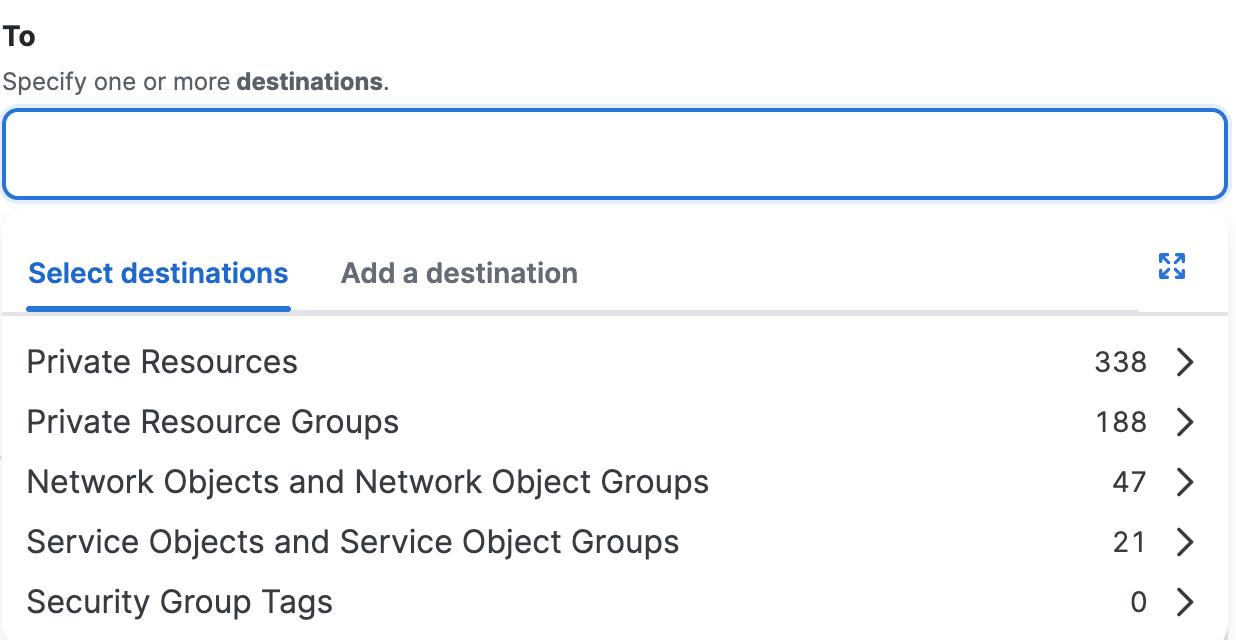
-
-
After you add a destination component, click +More to view the list of destinations that you added to the rule.
a. Click on the X to remove a previously added destination, then click Done.

For more information, see About Configuring Destinations in Private Access Rules.
Composite Destinations
You can add destinations directly on a private access rule. For more information, see About Configuring Destinations in Private Access Rules.
- Navigate to Secure > Access Policy > Add Rule > Private Access.
- Navigate to Specify Access and then click on the search bar under To.
- For Add a destination, enter or select the network components, then click Add.
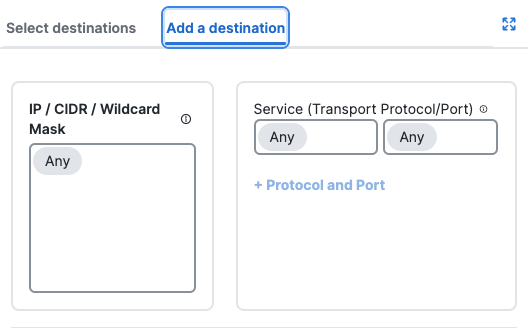
a. For IP, CIDR, or Wildcard Mask, enter an IPv4 or IPv6 address, CIDR block, or IPv4 address with a wildcard mask.
For example:
- IPv4 address—1.2.3.4
- IPv6 address—2001:DB8::/32
- CIDR block—1.2.3.4/24
- Wildcard mask—1.2.3.4/255.255.255.255
For Wildcard Mask, use the format:
<IP address>/<Wildcard Mask>.b. For Protocol, choose from one of the supported protocols: ANY, TCP, UDP, or ICMP.
c. For Port/Port Range, enter a port or range of ports.
-
After you add a composite destination, click +More to view the list of destinations that you added to the rule.
a. Click on the X to remove a previously added destination, then click Done.
To allow VPN access to a private resource, specify its IP, CIDR, or Wildcard mask, port, or protocol with the Add a destination option.
Note: You might use this option to allow users from one branch to access private applications in another branch.
Destinations that you enter manually are not reusable in another access rule.
For more information, see About Configuring Destinations in Private Access Rules.
Endpoint Requirements
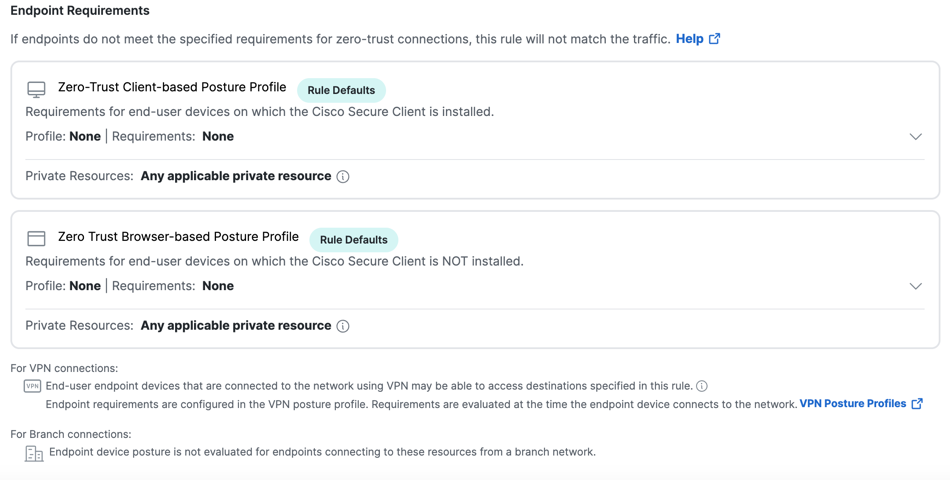
Branch connections to private destinations do not require additional configuration. For important information about endpoint requirements and traffic handling, see About Endpoint Requirements in Access Rules.
For general information about posture profiles, see Manage Endpoint Security.
User Authentication Requirements
For Zero Trust Access: User Authentication Interval, toggle on or off whether Secure Access prompts users to authenticate before connecting to private destinations.
When Zero Trust Access: User Authentication Interval is enabled, you can set the interval when Secure Access requests that you authenticate.
This setting determines how often users must sign in to the network in order to make a Zero Trust connection to a private resource specified as a destination in this rule. Users are prompted to sign in only once per interval if they try to connect to a resource during that time, regardless of the private resources they access.
This option appears only if destinations include at least one private resource.
In access rules that apply to iOS devices, User Authentication Interval must be disabled or iOS device users will be unable to access resources that are enabled for zero trust access.
You can use the default interval as configured on the Rule Defaults page or specify a different interval.
For more information, see Network Authentication for Zero Trust Access.
Step 2 — Configure Security Control Options
Security control options for traffic to private destinations include the following:
Intrusion Prevention (IPS)
- Use the default IPS profile as specified on the Rule Defaults page, or choose a different IPS profile that includes the threat detection settings that you want applied to traffic that matches this rule.
- Click Save.
Note: We recommend that you do not disable your IPS Profiles. For more information, see Manage IPS Profiles.
Security Profile
The security profile for private access specifies file inspection and file type controls for uploaded and downloaded files in private traffic.
Use the default security profile for private access as specified on the Rule Defaults page, or choose a different security profile to apply to traffic that matches this rule.
For details, see Security Profiles for Private Access.
Summary
After you add a rule to your policy, you can edit the rule and then view the rule summary.
- Navigate to Secure > Access Policy.
- Navigate to a rule, and then click on the horizontal elipsis (...) to expand the rule menu.
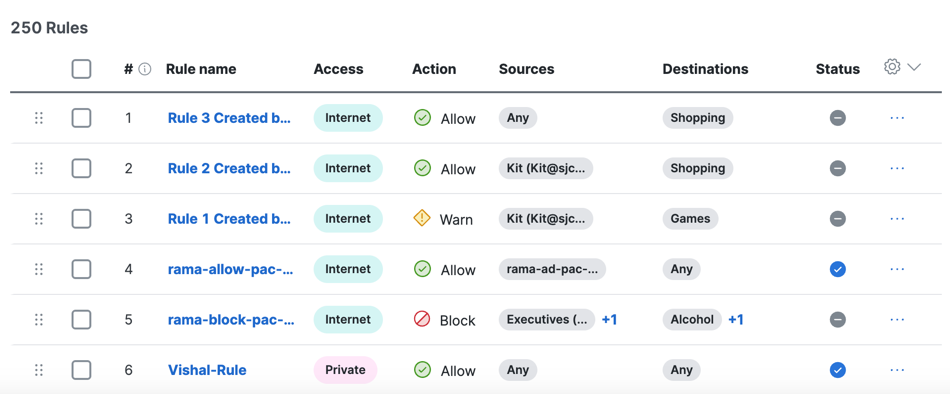
- Click Edit to open the rule and view the rule summary.

The summary contains the components that you configured on the access rule:
- Sources
- Action
- Security Controls
- Destinations
If you see an Upgrade button, this means that your organization has an opportunity to upgrade to a subscription that offers additional functionality. For more information, see Contact Cisco Secure Access Support.
Default Settings for Private Access Rules < Add a Private Access Rule > About Configuring Sources in Private Access Rules
Updated about 1 month ago
