Edit an SSO Authentication Profile
After you add an SSO authentication profile in Cisco Secure Access, you can modify the name and settings of the profile. The user authentication profile describes the settings that are required to integrate a single sign-on (SSO) authentication identity provider (IdP) with Secure Access. An integrated SSO IdP authenticates user requests for destinations through the Secure Access Secure Web Gateway (SWG) and connections to private destinations with Zero Trust Access.
Table of Contents
Prerequisites
- Full Admin user role. For more information, see Manage Accounts.
(OIDC Only) Get Metadata for OIDC Configuration URL
- For the integration of Microsoft Entra ID SSO authentication, see Get Entra ID OIDC Configuration URL.
- For the integration of Okta SSO authentication, see Get Okta OIDC Configuration URL.
Procedure
You can modify the name and settings of an SSO authentication profile.
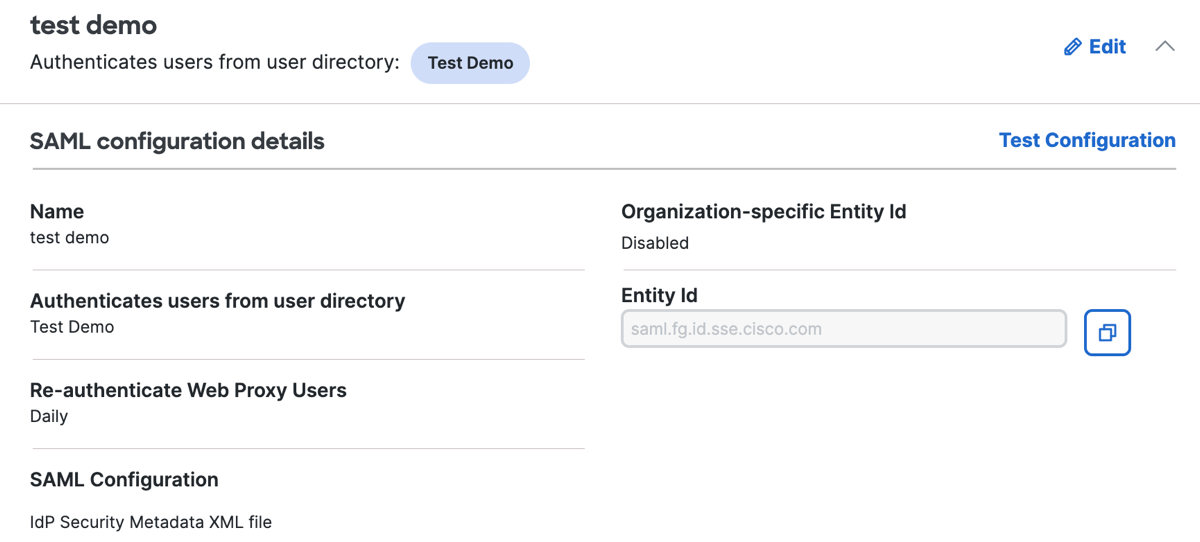
Edit SAML User Authentication Profile
Update the settings for the SAML user authentication profile.
-
Navigate to Connect > Users and User Groups, and then click Configuration management.

-
Navigate to SSO authentication, and then expand an SAML user authentication profile.
-
Click Edit.
-
For Name, update the name of the profile.
-
For Authenticates users from user directory, choose the name of an integrated user directory for the provisioning IdP.
-
For Re-authenticate Web Proxy Users, choose the frequency that Secure Access requires SSO authentication.
-
For SAML Configuration, select the type of the configuration.
a. For IdP Security Metadata XMl file, upload the SAML Metadata XML file.
b. For Manual Input, enter the SAML Metadata attributes. -
Click Save.
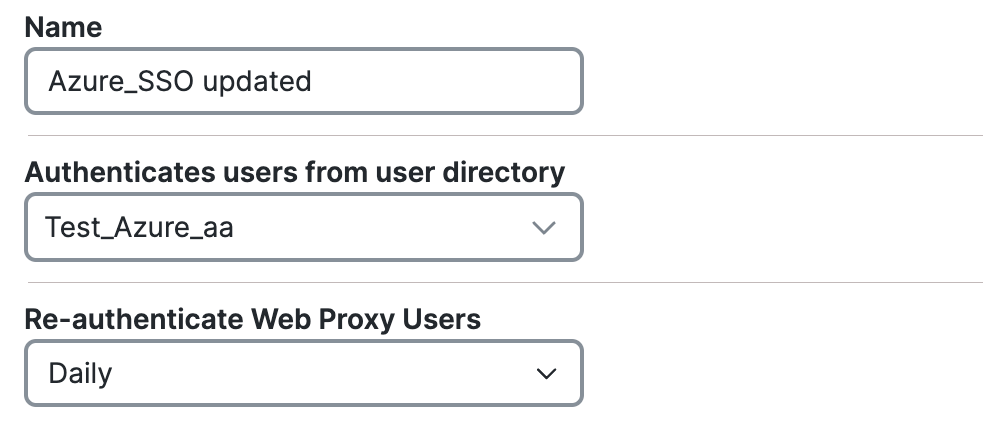
Edit OIDC User Authentication Profile
Update the settings for the OIDC user authentication profile.
-
Navigate to Connect > Users and User Groups, and then click Configuration management.

-
Navigate to SSO authentication, and then expand an OIDC user authentication profile.

-
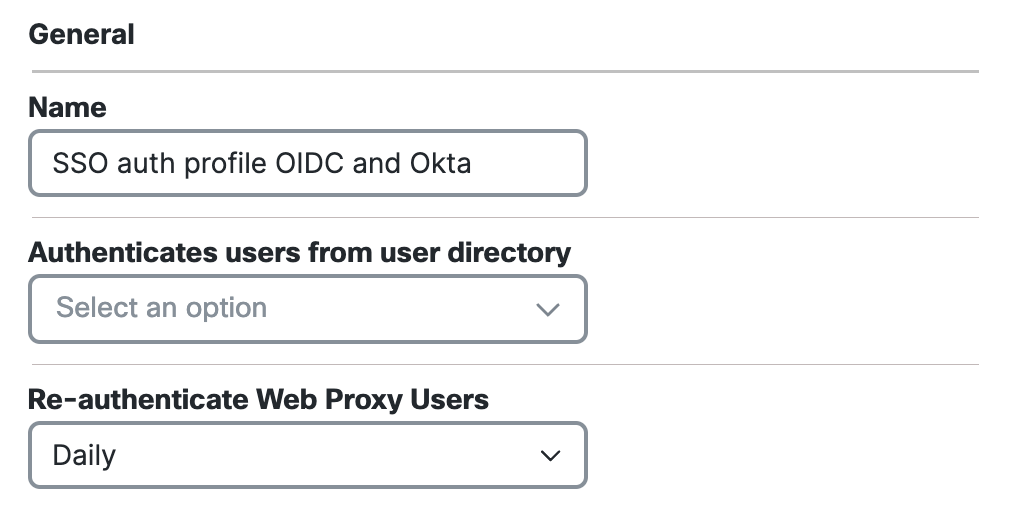
Click Edit.
-
For Name, update the name of the profile.
-
For Authenticates users from user directory, choose the name of an integrated user directory for the provisioning IdP.
-
For Re-authenticate Web Proxy Users, choose the frequency that Secure Access requires SSO authentication.
-
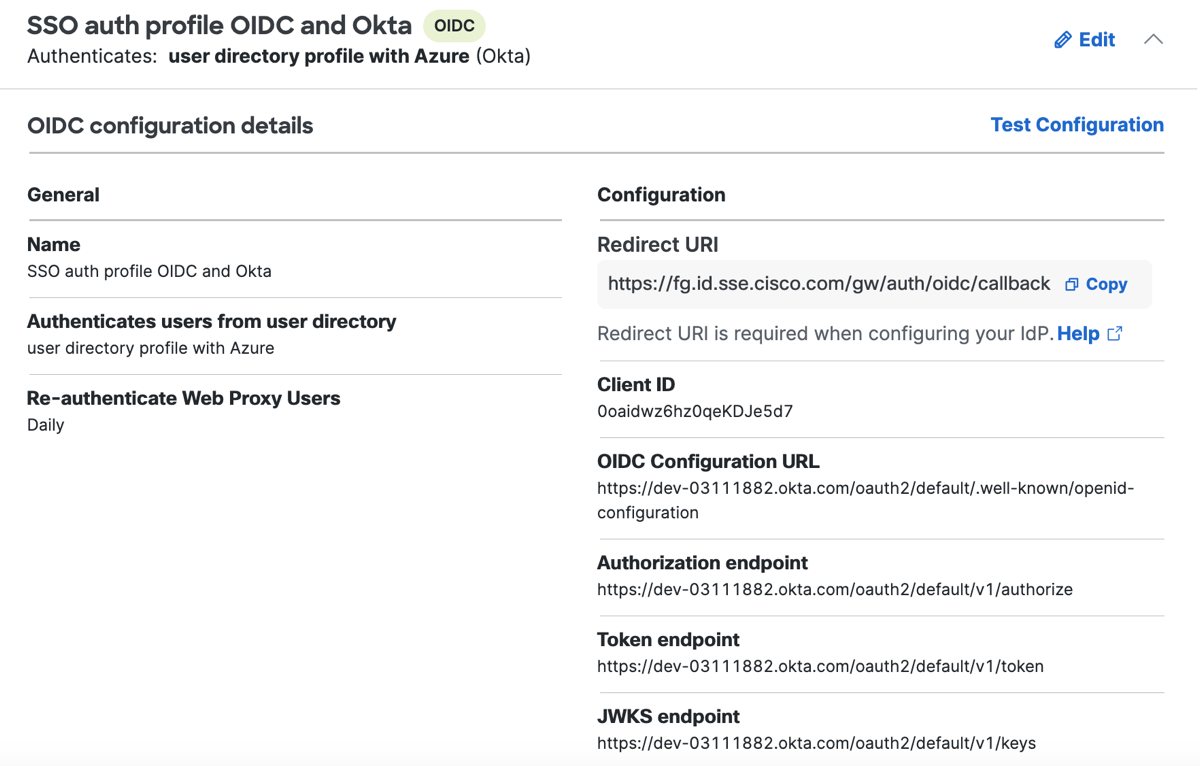
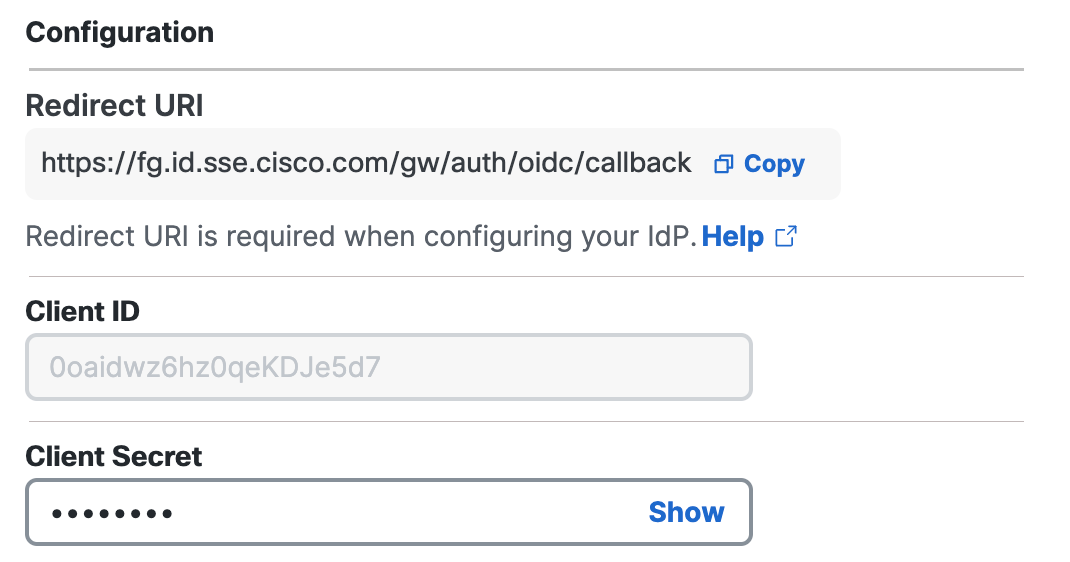
For Client Secret, enter the new client secret that you generated in your instance of the SSO authentication IdP.
-
For OIDC Configuration URL, enter the configuration URL for the SSO authentication IdP.
-
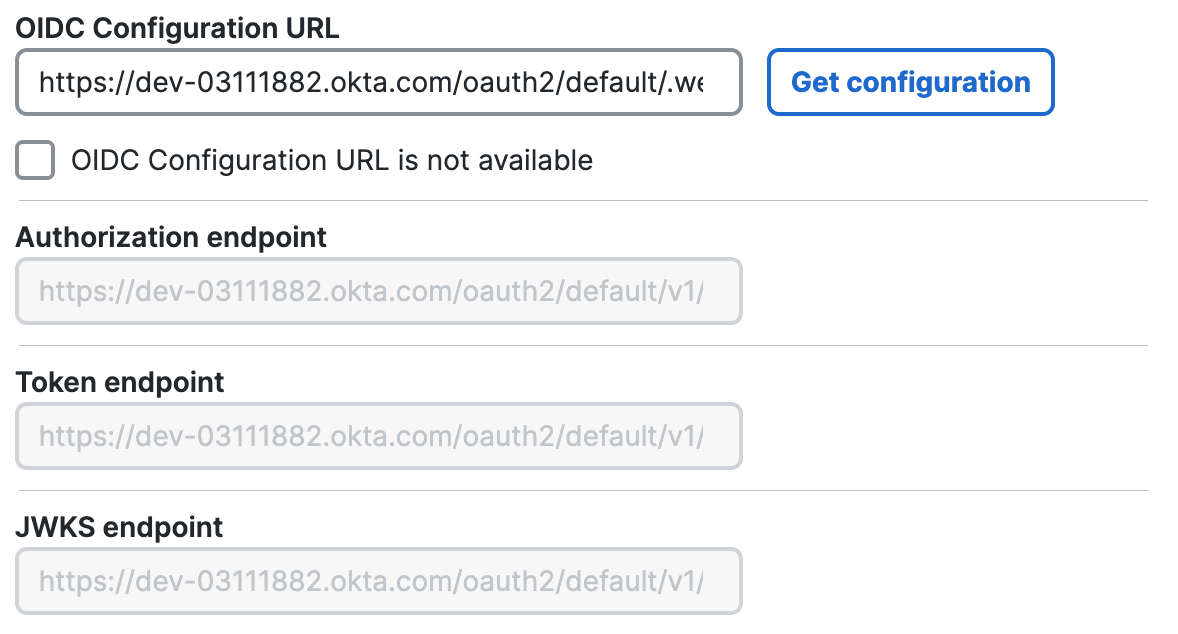
Complete the configuration of the Authorization endpoint, Token endpoint, JWKS endpoint fields.
a. Click Get configuration.
Secure Access uses the OIDC Configuration URL to populate the settings for the integration's endpoint-related fields.b. Check OIDC Configuration URL is not available, and then enter the authorization endpoint fields manually.
- Click Save.
About Single Sign-On for Users > Edit an SSO Authentication Integration < Delete SSO Authentication Profile
Updated 6 months ago