[ARCHIVE] Configure Tunnels with Catalyst SD-WAN cEdge and vEdge
Private Preview
Follow these steps to add a tunnel to connect a Cisco Catalyst SD-WAN (formerly known as Viptela) cEdge or vEdge device to Cisco Secure Access security services.
For more information about Cisco Catalyst SD-WAN cEdge and vEdge devices and related topics, see Cisco's SD-WAN product documentation.
Table of Contents
- Prerequisites
- Configure Tunnel in Secure Access
- Configure Cisco Catalyst SD-WAN Templates
- Configure Static Routes
- Verify Tunnel Status
Prerequisites
- You must enable NAT in the feature template that faces the internet.
- You can access the Cisco Catalyst SD-WAN (vManage) console with a web browser. By default, the HTTPS port is 8443, but this may vary based on how your Cisco Catalyst SD-WAN (vManage) is configured.
Note: If you get a "Not Secure" warning when accessing the link, you can ignore it. When the Cisco Catalyst SD-WAN (vManage) login screen appears, enter your credentials.
Configure Tunnel in Secure Access
Before you configure the tunnel in the Cisco Catalyst SD-WAN (vManage) template for the device, add a network tunnel group to Secure Access. A tunnel group configuration includes: tunnel ID, tunnel passphrase, and optionally IP address ranges. When you add a network tunnel group, choose a tunnel ID and create a pre-shared key (PSK). Use the tunnel ID and passphrase to define the tunnel configuration in the feature template for the cEdge or vEdge device.
For more information, see Add Network Tunnel Group.
Configure Cisco Catalyst SD-WAN Templates
In Cisco Catalyst SD-WAN (vManage), all the features are configured through templates. Once the Cisco Catalyst SD-WAN cEdge or vEdge devices are registered with Cisco Catalyst SD-WAN (vManage), you cannot configure anything through the CLI.
You can use the Cisco Catalyst SD-WAN (vManage) Device and Feature Templates to establish a tunnel from the device. First define the device template and then the feature template.
Define the Feature Template
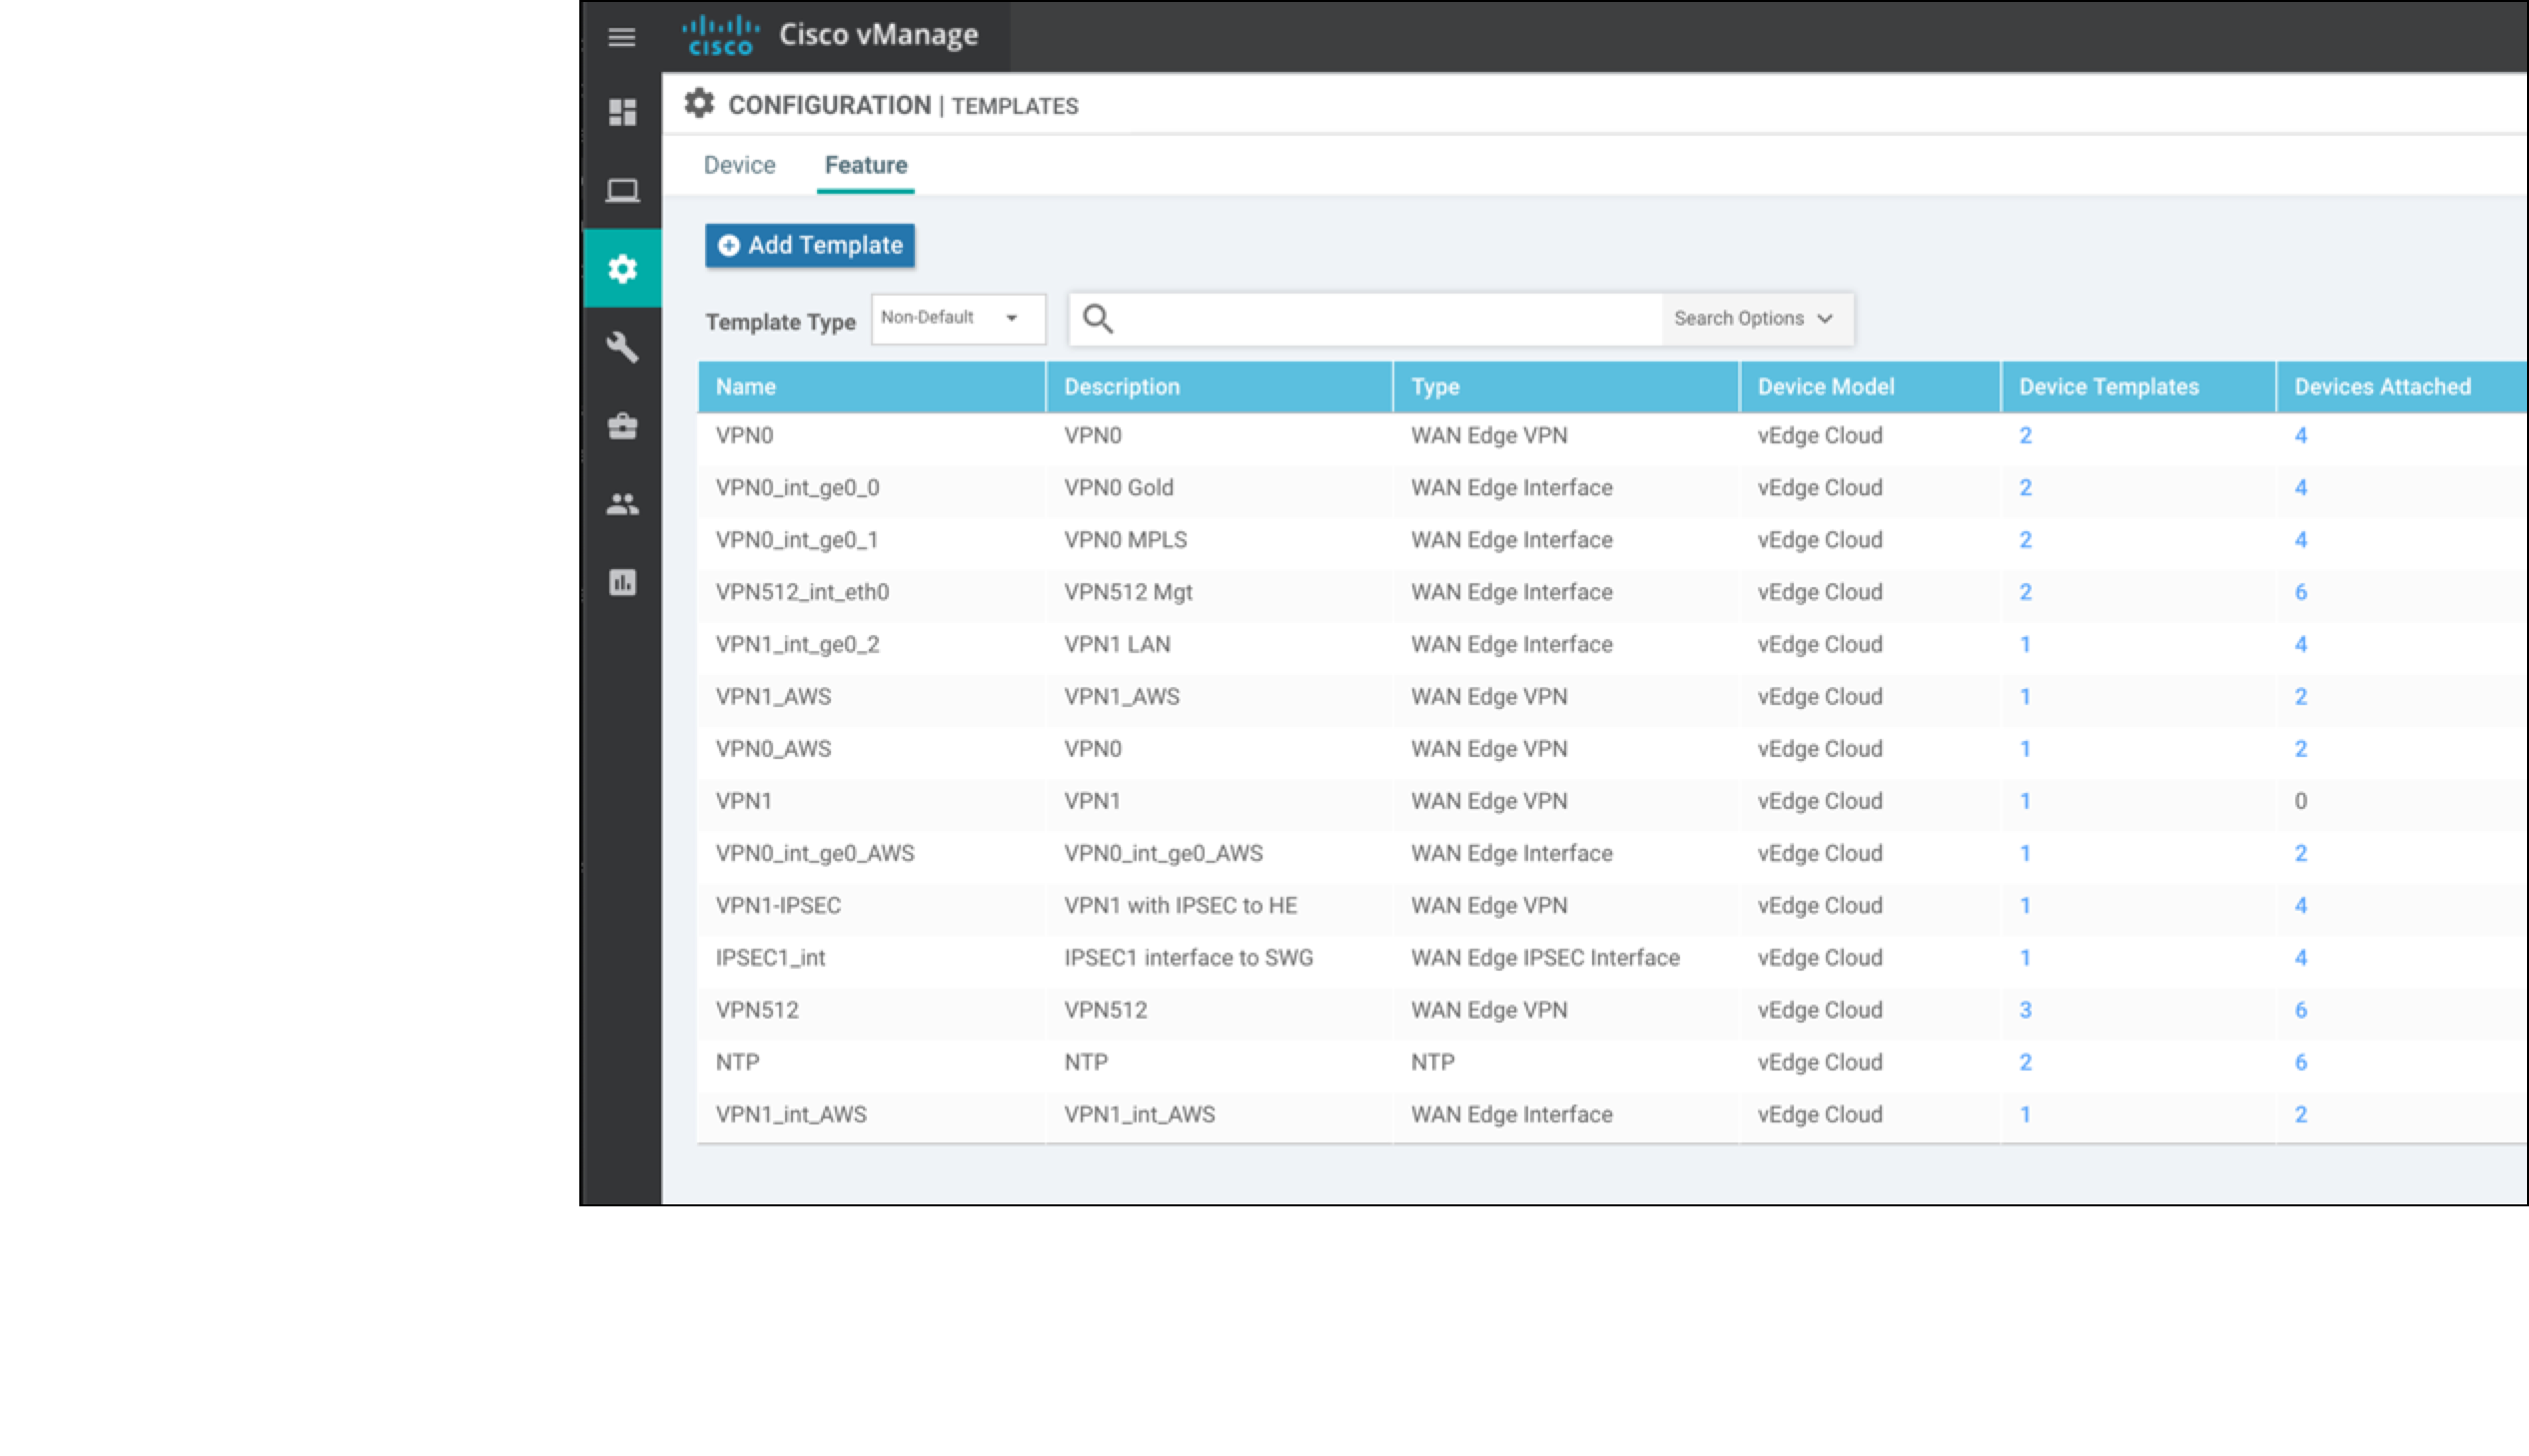
- Log into the Cisco Catalyst SD-WAN (vManage) console and navigate to Configuration > Templates.
- Confirm that the Feature Templates tab is selected, then click Add Template.
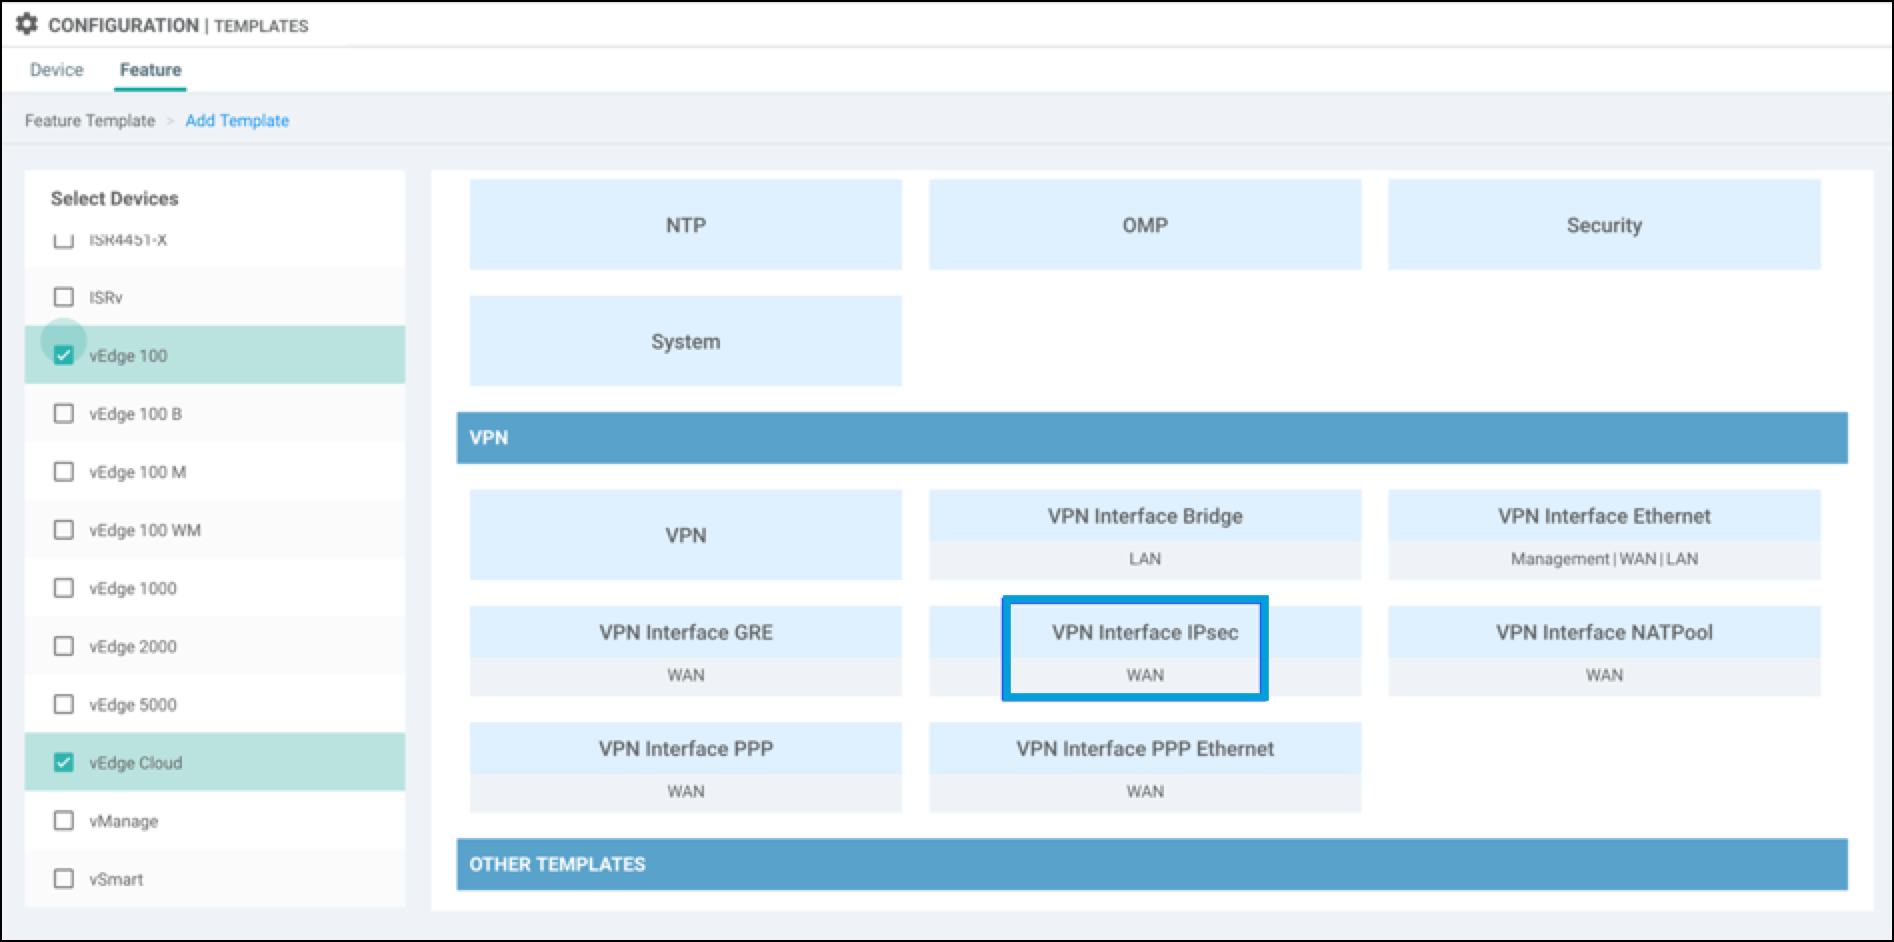
- Under Select Services select device types, then choose VPN Interface IPSec WAN.
- Configure Tunnel Parameters:
a. Choose a template name and description for the Tunnel interface.
b. Under Basic Configuration, set Shutdown to the global option and choose NO.
c. Choose the Interface Name from 1 to 255. For example,ipsec1.
d. Configure the IPv4 address by selecting the Global attribute and set the IP.
e. Set the IPSec Source Interface toge0/0. This must be the WAN interface in VPN 0, which has the internet connectivity.
f. Set the IPSec Destination to the closest data center).
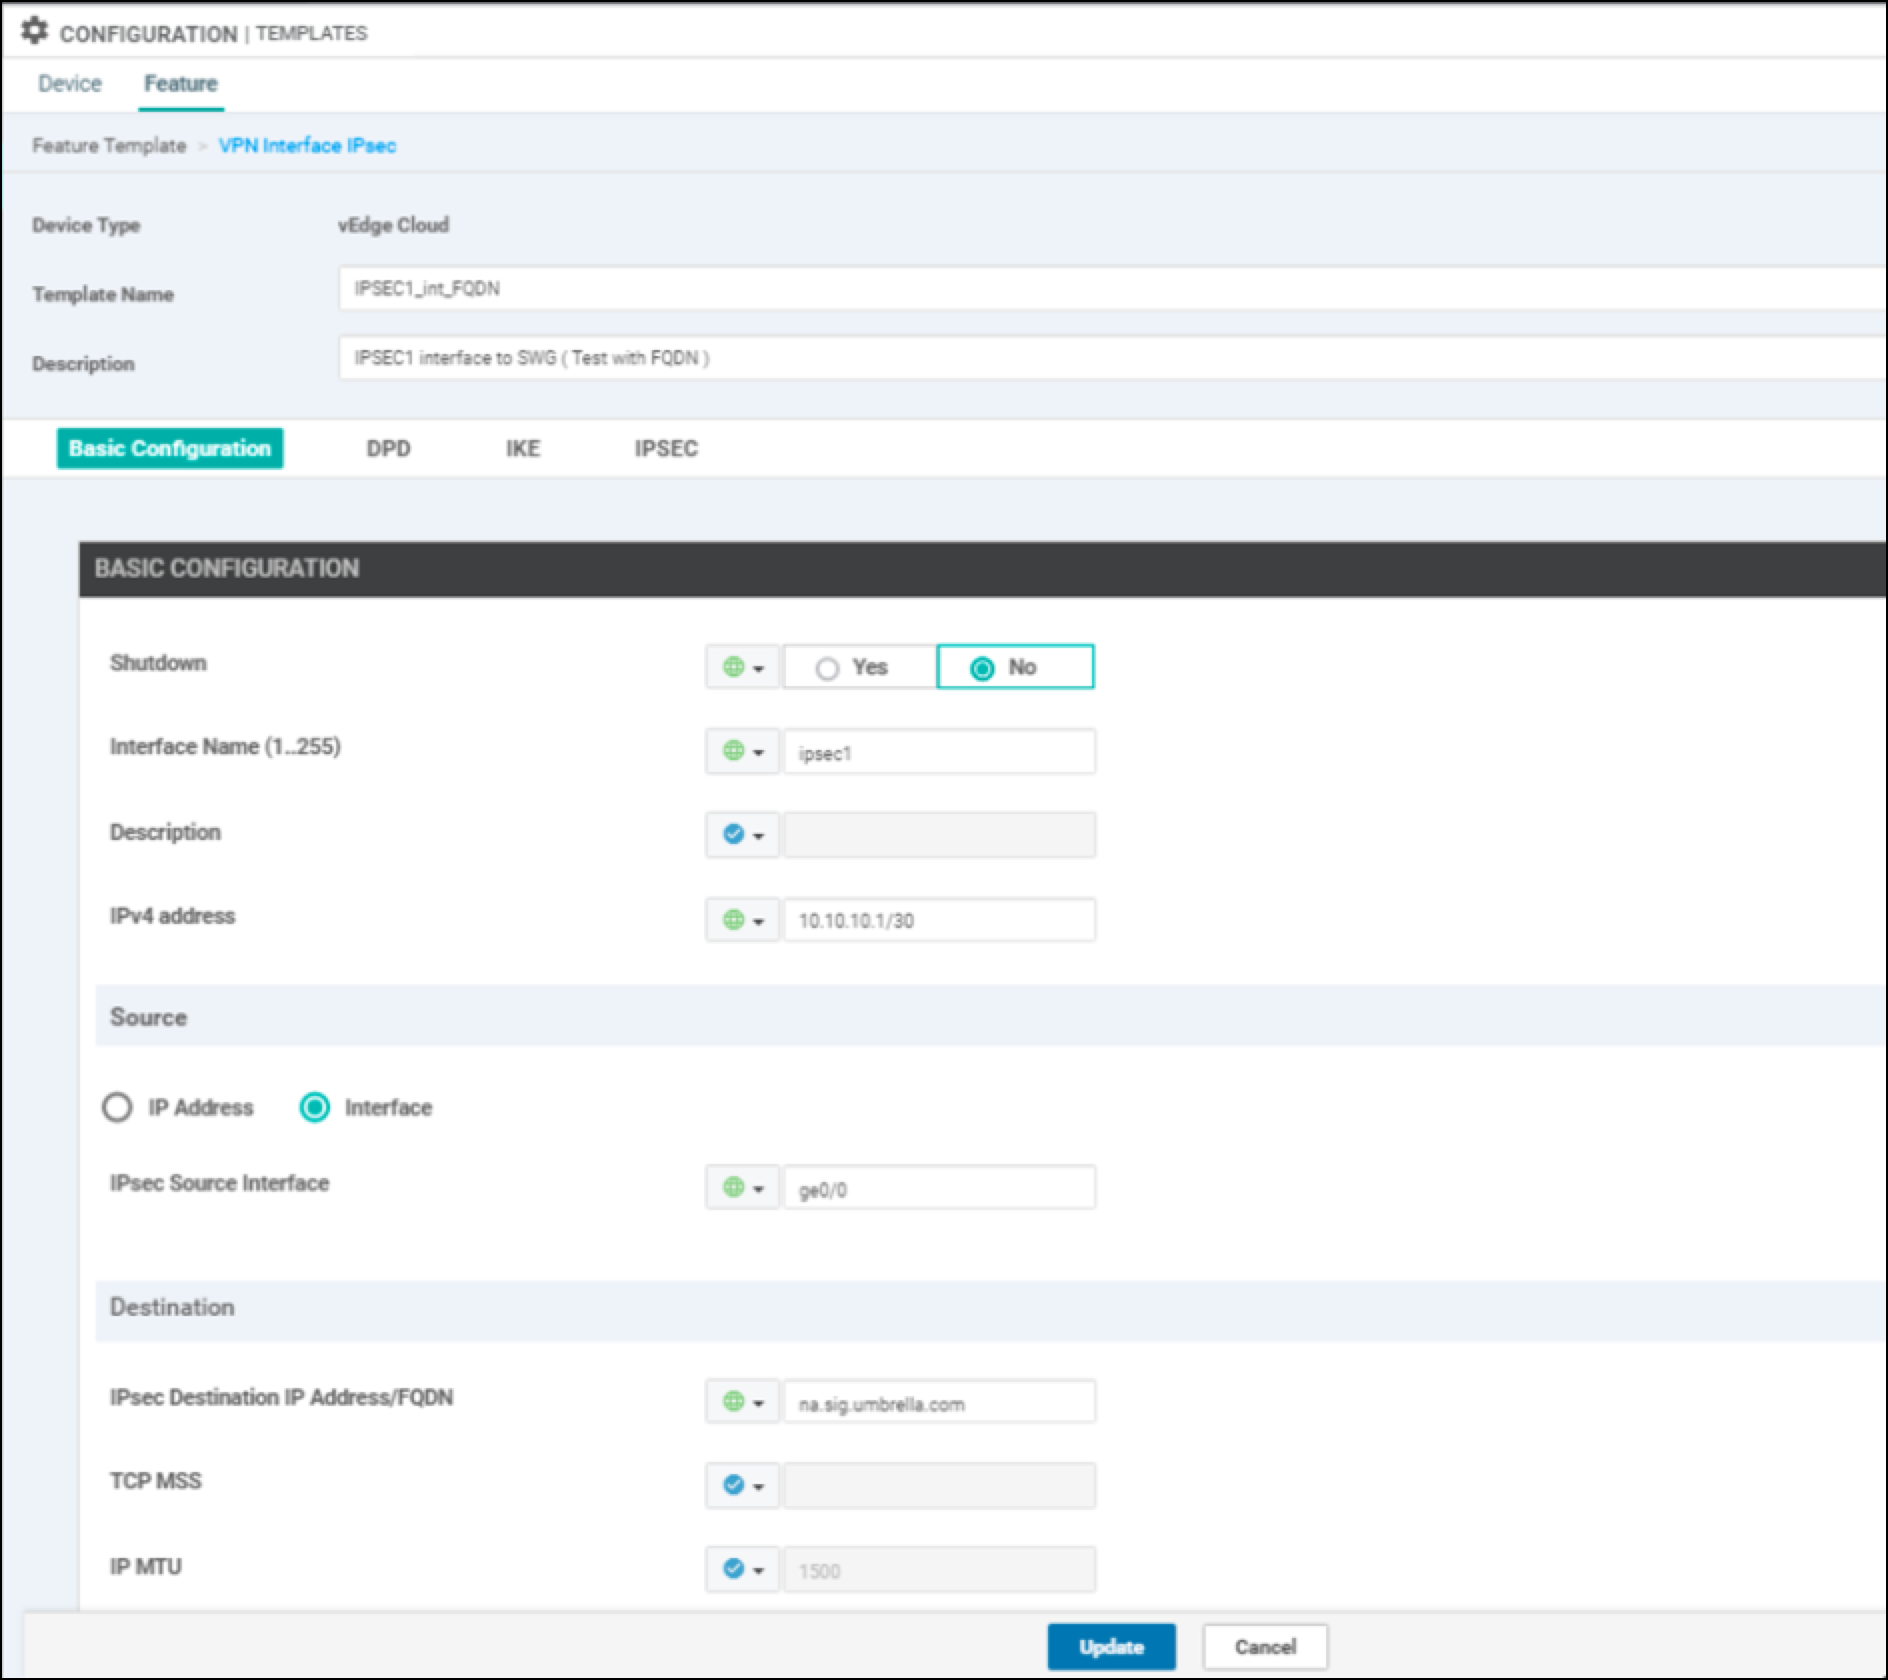
g. Dead Peer Detection Value: Leave this at the default setting unless you have a specific requirement otherwise.
- Choose the Global Attribute to change any IKE and IPSec defaults:
IKE Settings
- Set the IKE Version to 2.
- Set the IKE Rekey Interval to 28800.
- Leave the default Cipher Suite, which is AES-256-CBC-SHA1.
- Set the IKE DH Group to 14 2048-bit Modulus.

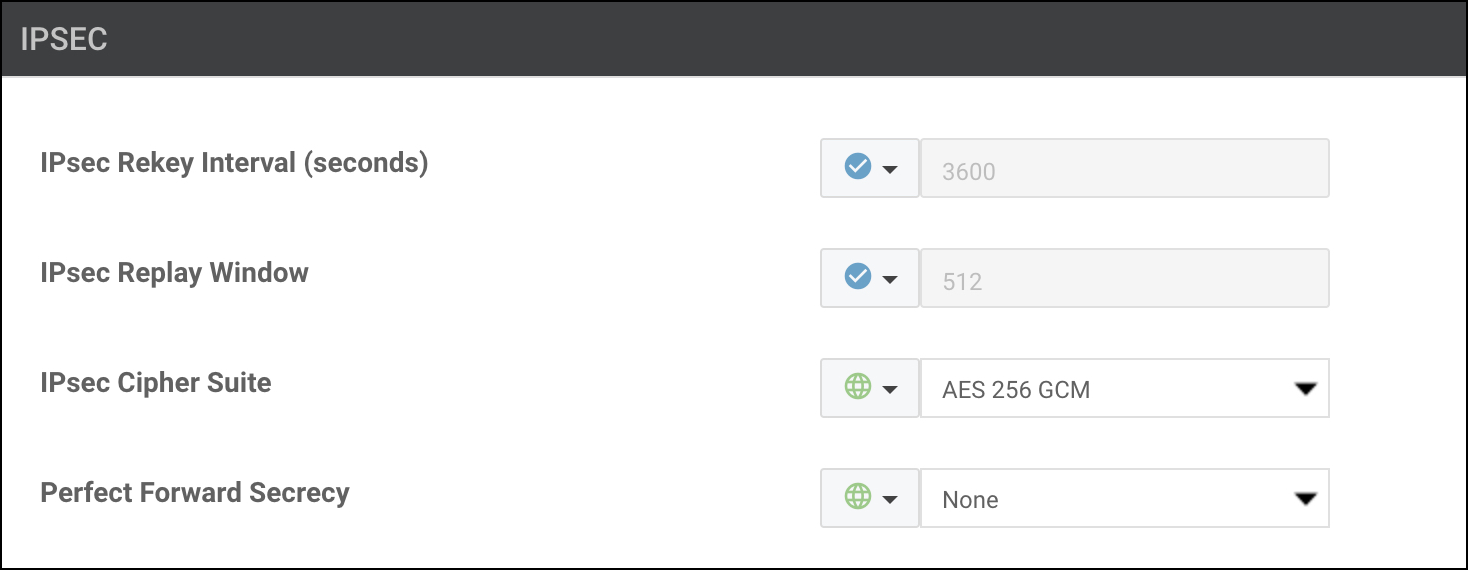
IPsec Settings
- Leave the IPsec Rekey Interval & Replay Window values at their defaults.
- Use the default Cipher Suite
AES 256 GCM. - Set the Perfect Forward Secrecy value to "NONE".
Cipher Suite Encryption
If performance is an issue with the default cipher, both
AES 256 CBC SHA1andNull SHA1are also supported. You can test these to determine whether one offers better performance for a particular platform. Note thatNull SHA1isn't necessarily faster than the defaultAES 256 GCMbecause of the cost of the SHA1 hashing. In addition,Null SHA1is not recommended due to security concerns of unencrypted transport.
- Click Update to save the configuration template.
Add the IPsec Interface Template
- Navigate to Configuration > Templates > Device and then choose the device template for the CDFW tunnel.
- Select Edit from the rightmost dropdown menu.
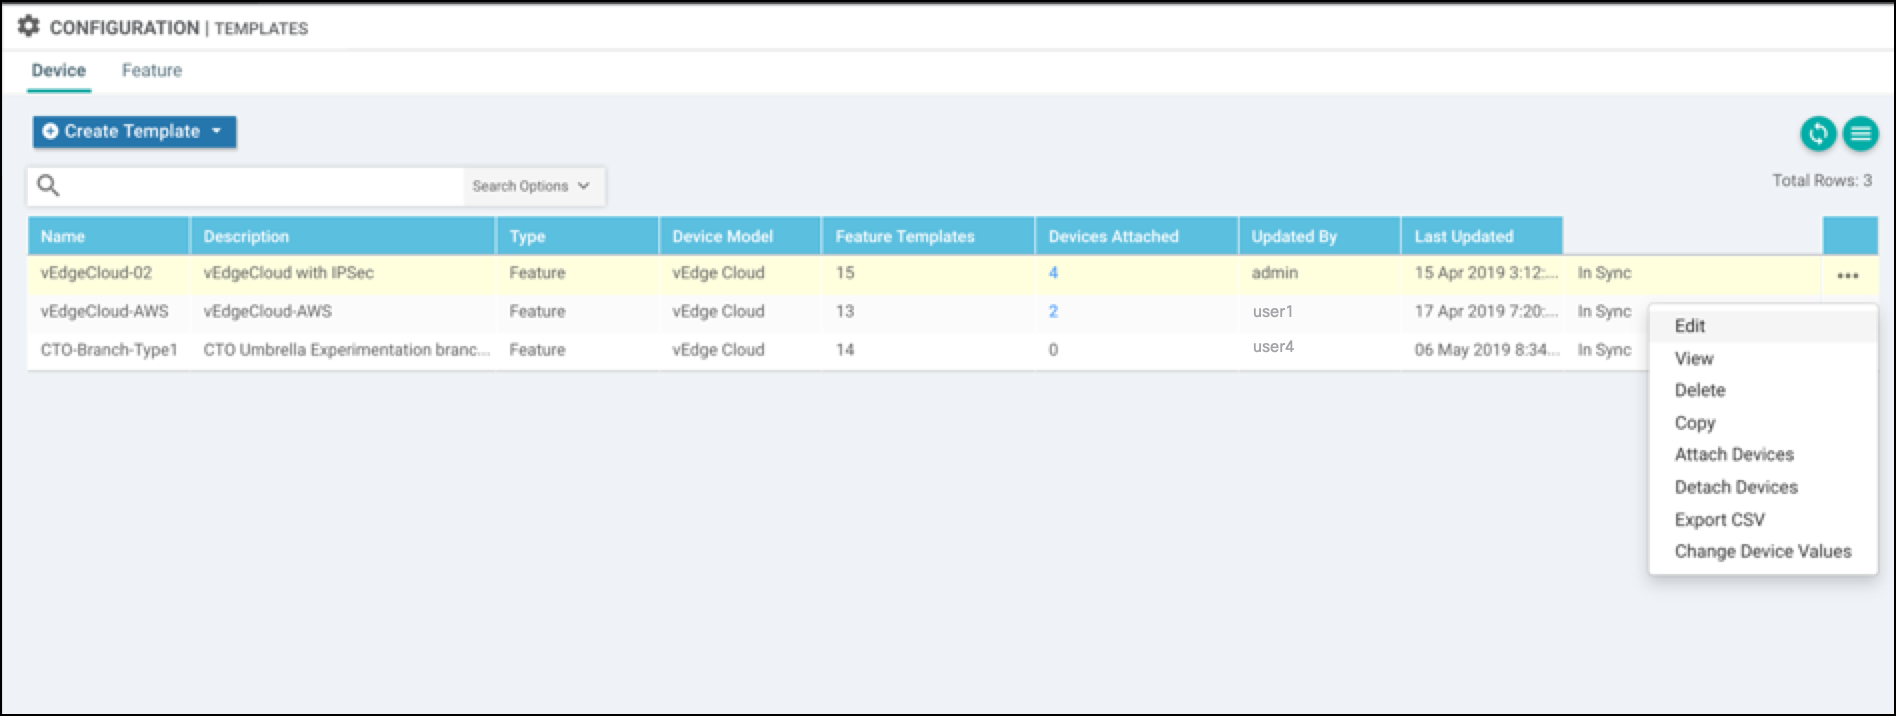
- Add the VPN IPSec tunnel interface in the VPN 0 Transport & Management VPN section.
Choose the VPN Interface IPSec that you added as part of the feature template.
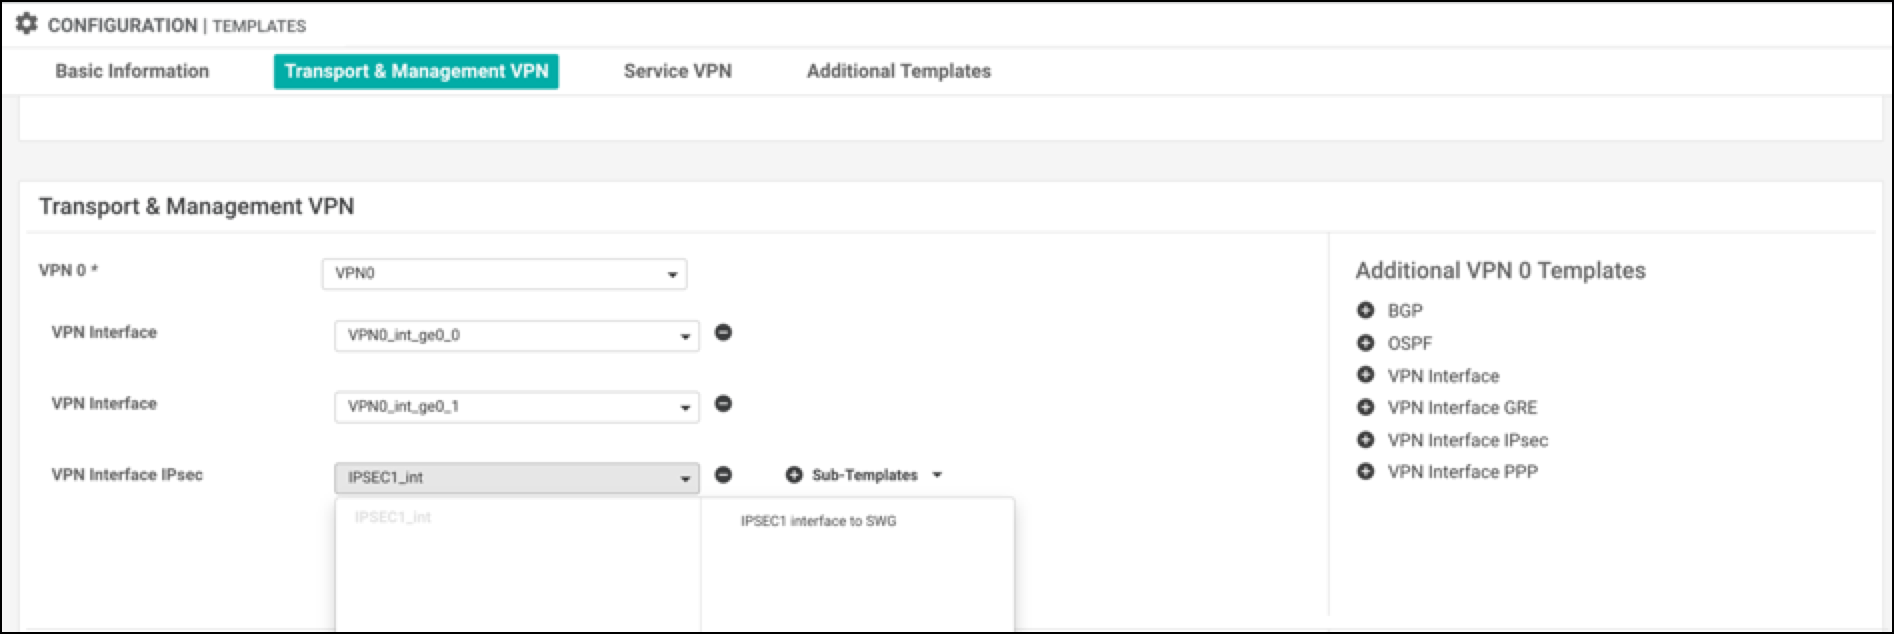
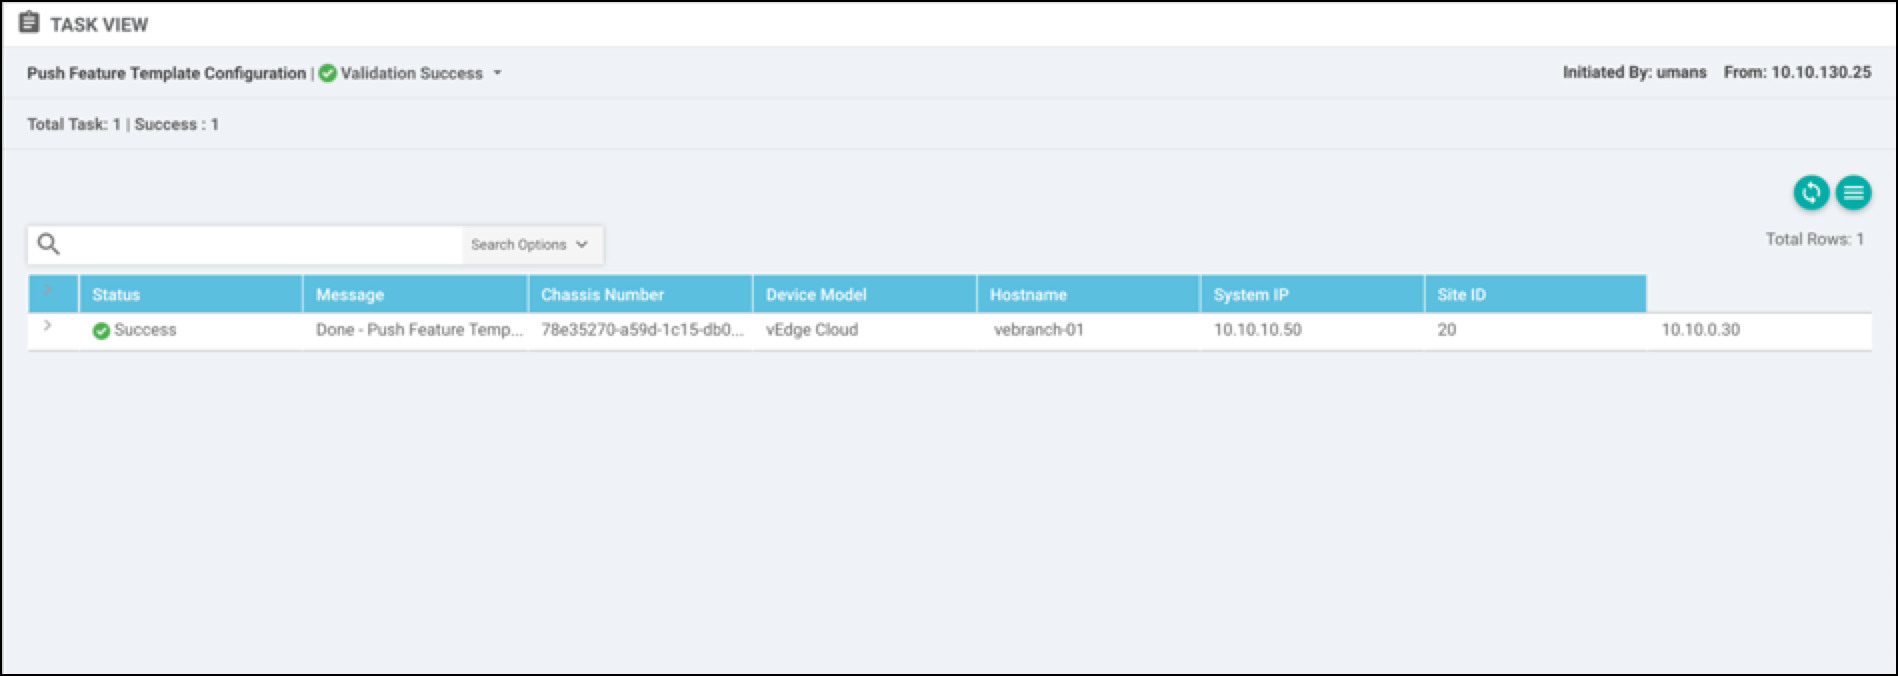
- Click Update. A success message appears.
Configure Static Routes
After configuring a template, you need to add static routes from the service VPN to redirect the traffic through the IPSec tunnel to CDFW headend.
- Navigate to Configuration > Templates > Feature.
- Right-click the right most column, then edit the template to add IPSec route 0.0.0.0/0 via IPSec1 Tunnel interface.
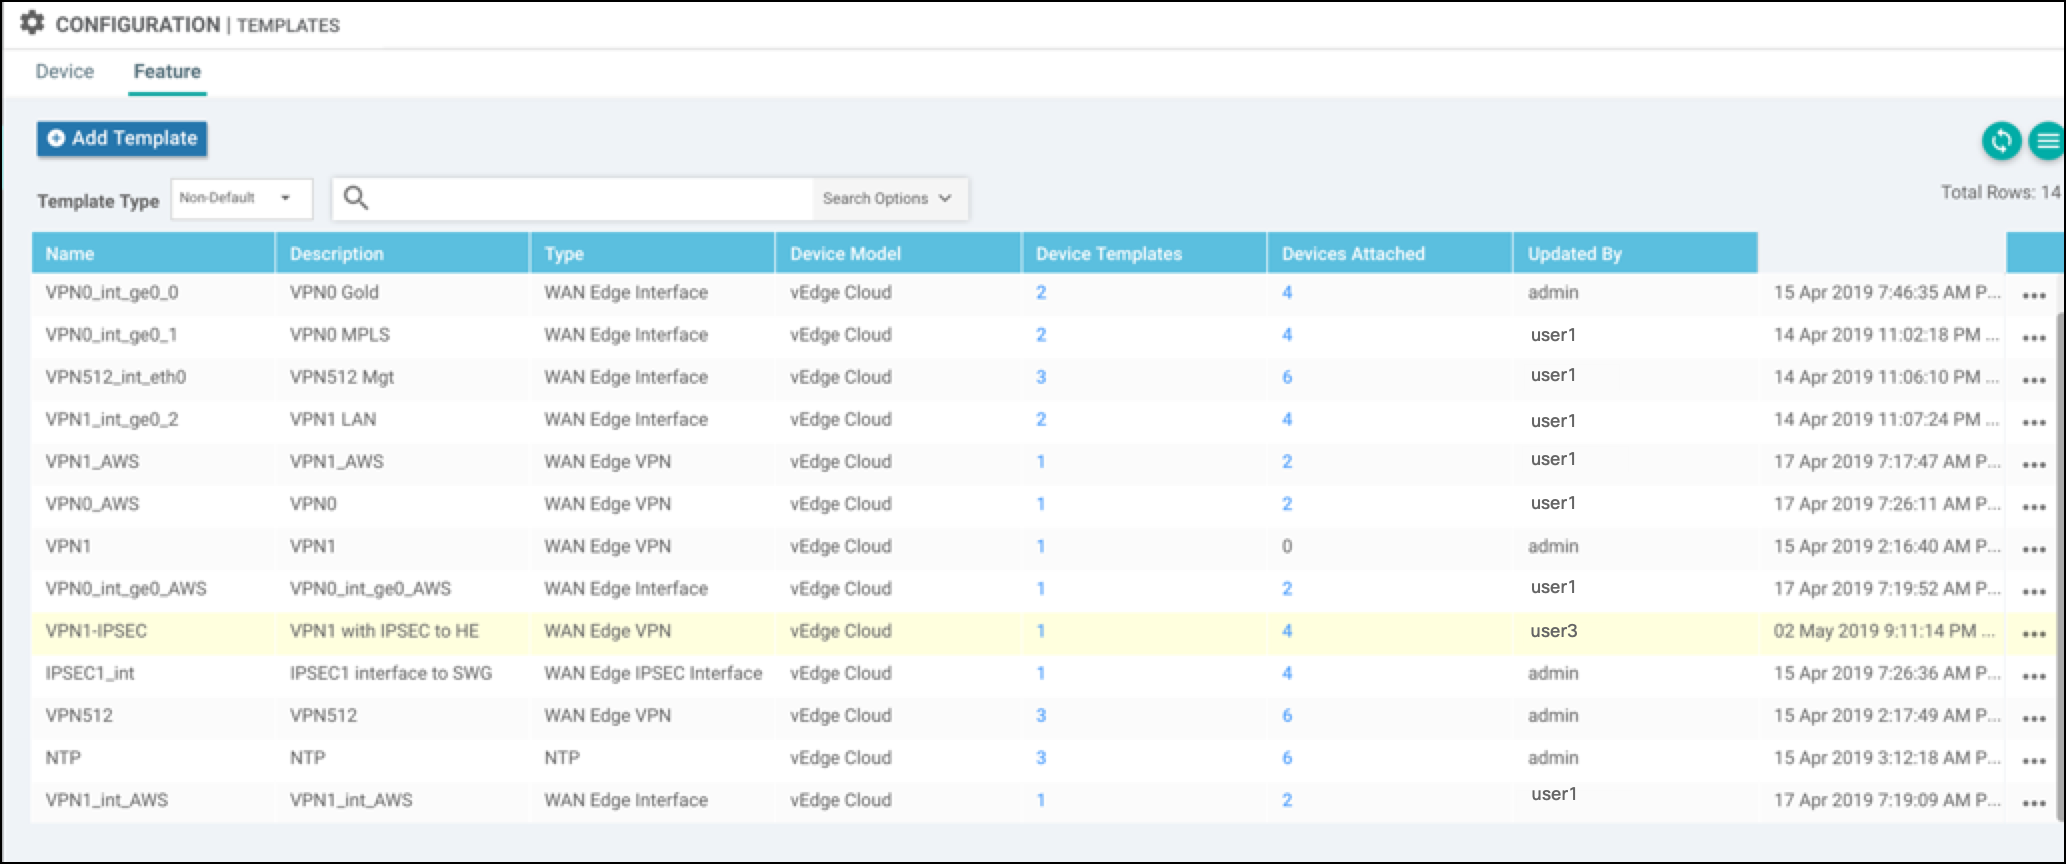
- Add one more IPsec Tunnel interface (for example, IPSec2), and set that as the secondary tunnel interface.
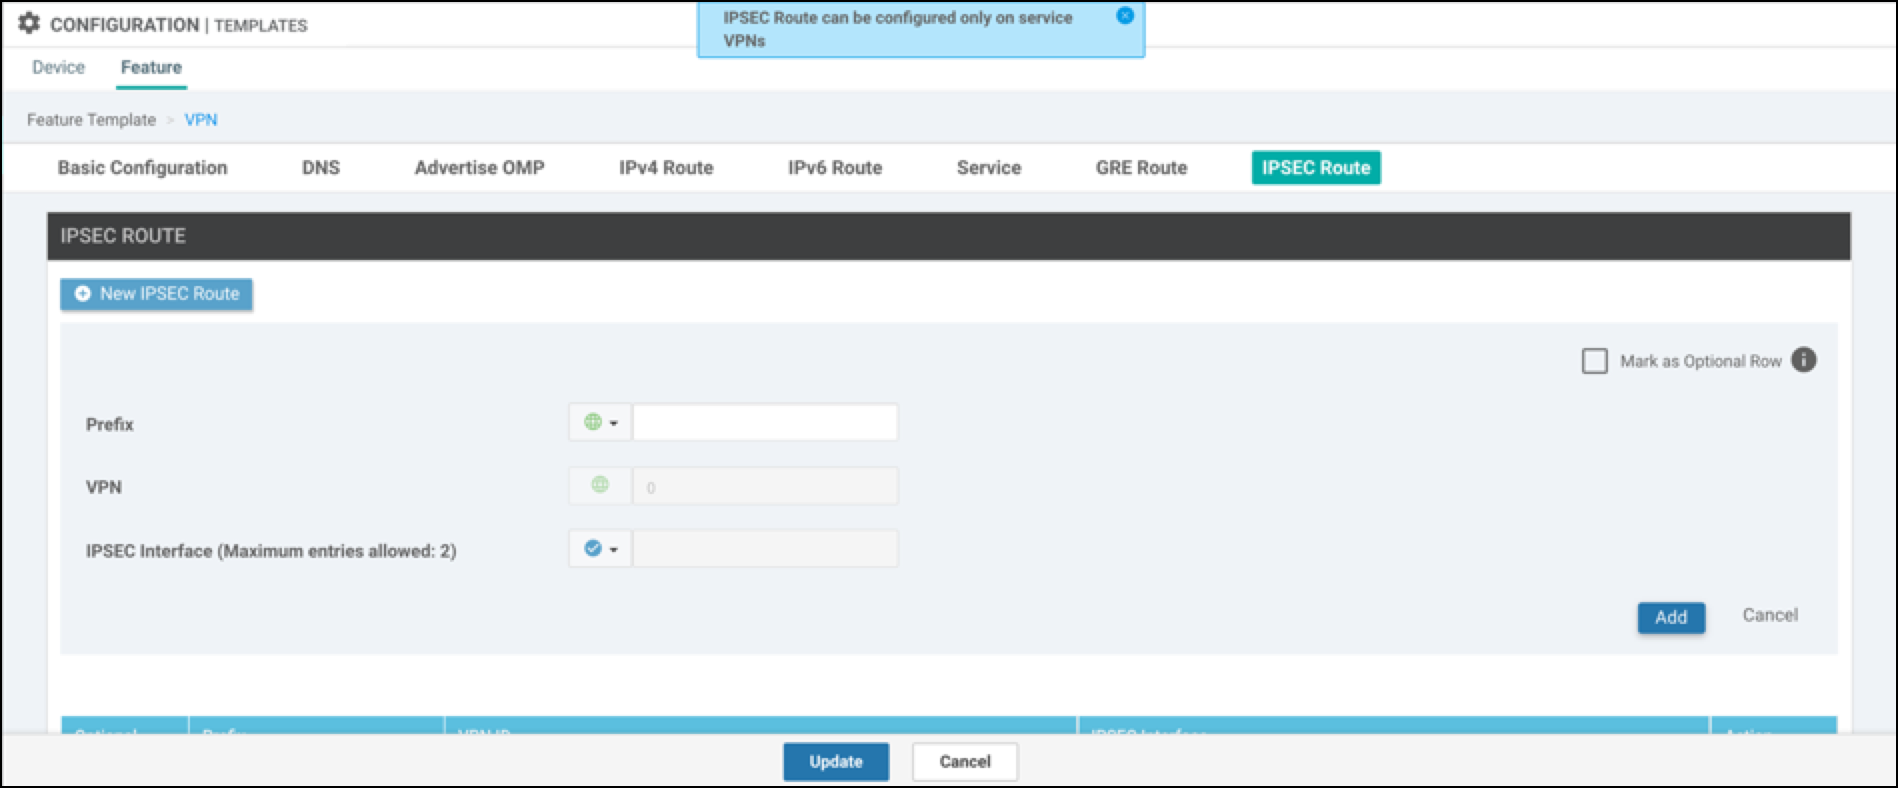
In this example, the default IPsec route is set to the ipsec1 tunnel interface.
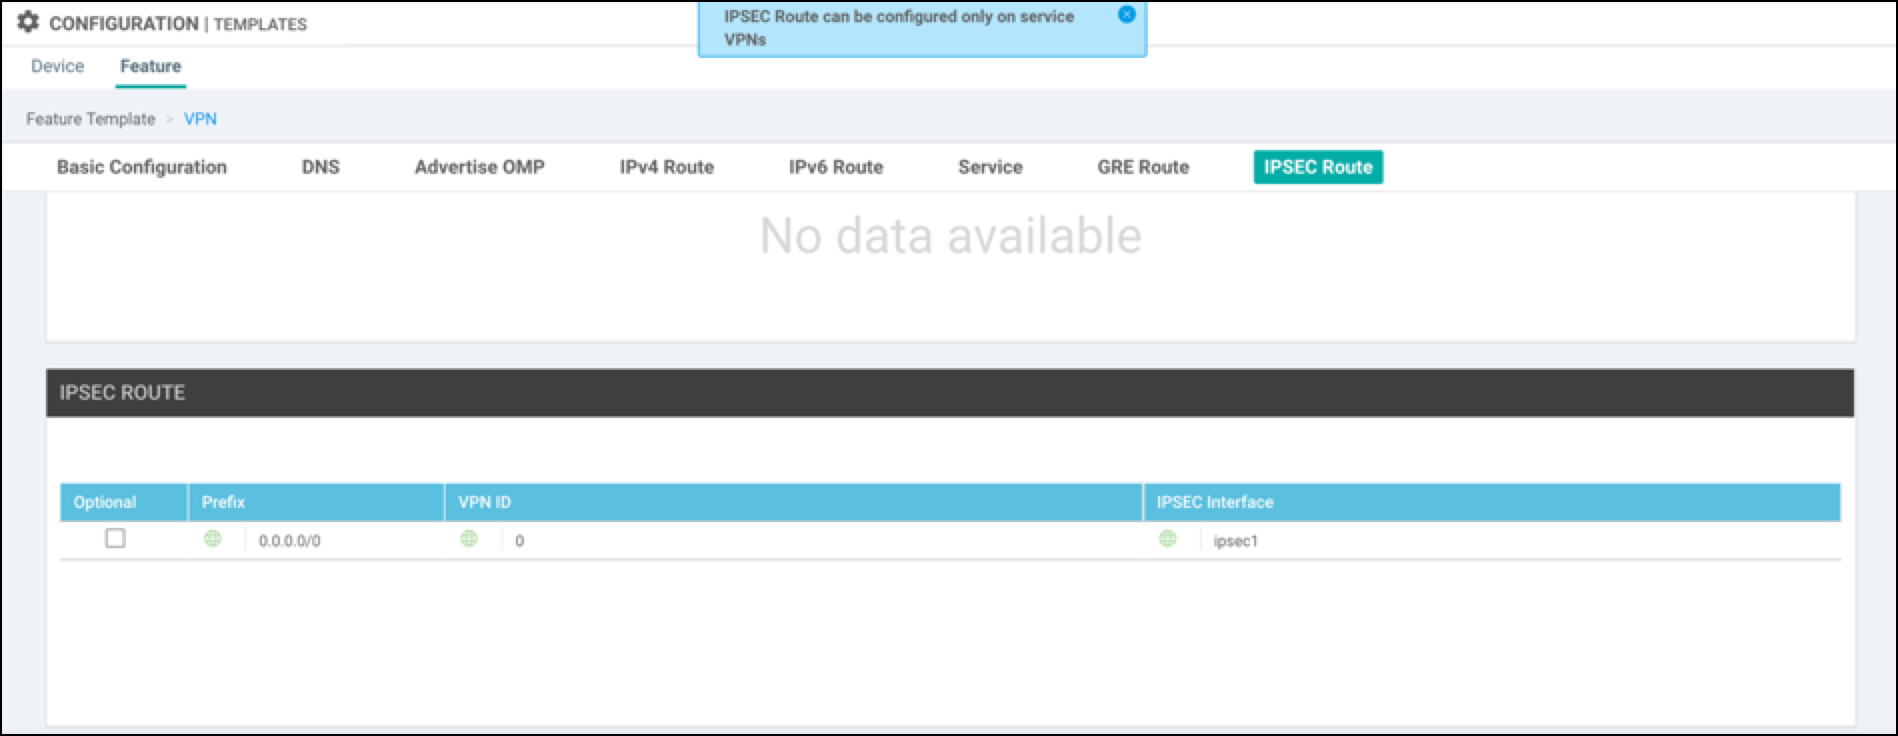
- Save configuration changes.
Verify Tunnel Status
- Log into the Cisco Catalyst SD-WAN (vManage) console and navigate to Monitor > Network > vEdge > Device.
- Choose a device, then choose Interface to check the status of the IPSec tunnel for ipsec1.
Alternatively, the following is an example of checking the tunnel status through the CLI.

Network Tunnels Configuration < Configure Tunnels with Catalyst SD-WAN cEdge and vEdge > Configure Tunnels with Cisco ISR
Updated about 1 month ago
