Provision Users and Groups from Azure AD
Secure Access supports the provisioning of users and groups from Azure Active Directory (Azure AD).
With your Secure Access System for Cross-domain Identity Management (SCIM) token, configure the Cisco User Management for Secure Access app on the Azure portal. When you add users and groups in the app, Azure exchanges user and group information with Secure Access.
Note: You do not need to deploy an on-premises Secure Access Active Directory (AD) Connector.
Table of Contents
- Prerequisites
- Limitations
- Procedure
- View Provisioned Users and Groups in Secure Access
- Refresh SCIM Token
Prerequisites
- Full Admin user role. For more information, see Manage Accounts.
- A valid Azure AD subscription with a premium Azure AD license.
- No concurrent provisioning of the same user or group identities from on-premises AD and Azure AD. If you are using the on-premises Secure Access AD Connector to import users and groups and choose to import the same users and groups from Azure, ensure that the on-premises Secure Access AD connector is switched off or that the OpenDNS Connector service on the connector machine is stopped.
- For IP-to-user mapping deployments, you must use an on-premises Secure Access AD connector. Azure does not store the private IP to Active AD user mappings.
- Import the
ObjectGUIDattribute from Azure AD to Secure Access. The on-premises Secure Access AD Connector and Cisco Secure Client rely on theObjectGUIDattribute for user identification. If all of your endpoints are running the Cisco Secure Client, you do not have to import theObjectGUIDattribute from Azure.- Before you set up the import of the
ObjectGUIDattribute, ensure that the on-premises Secure Access AD Connector that is synchronizing these identities is switched off or that the OpenDNS Connector service on the connector machine is stopped. - To ensure that the
ObjectGUIDattribute for users is synchronized from Azure AD to Secure Access, your endpoints must authenticate against on-premises AD and run the Cisco Secure Client. For more information about importing theObjectGUIDattribute for users, see Tutorial: Configure Cisco Secure Access User Management for automatic user provisioning.
- Before you set up the import of the
- If you previously configured a policy against groups imported from on-premises AD, and then choose to import the same groups from Azure, you must reconfigure the policy to map it to the Azure groups instead of the on-premises AD groups. In a policy, on-premises AD group names are displayed with the domain name preceding the group name, for example: Domain1\ADGroup1. For Azure, only group names are displayed on the policy page, for example: ADGroup1.
Limitations
- You can provision no more than 200 groups from Azure to Secure Access. Secure Access supports the provisioning of an unlimited number of users from Azure.
- Concurrent synchronization of the same users and groups from the Secure Access AD Connector and the Cisco Secure Access Azure app is not supported and leads to inconsistent policy enforcement.
- To ensure that all users are provisioned, create a dynamic All Users group and assign this group to the Cisco Secure Access app. For more information, see Dynamic Membership Rules for Groups in Azure Active Directory. You can assign additional groups as required for group-based policy rule enforcement.
- Provisioning large numbers of users and groups to Secure Access may take several hours.
- Azure does not support nested group memberships for group-based assignment to any SaaS application.
- After the initial provisioning of users and groups, Azure synchronizes changes to Secure Access once every 40 minutes. Synchronization of updates to identities from Azure to Secure Access may take up to one hour.
Procedure
Configure the Cisco User Management for Secure Access App
With your Secure Access SCIM token and API Identity URL, set up the Cisco Secure Access app in Azure AD and provision users and groups. For more information, see Tutorial: Configure Cisco Secure Access User Management for automatic user provisioning.
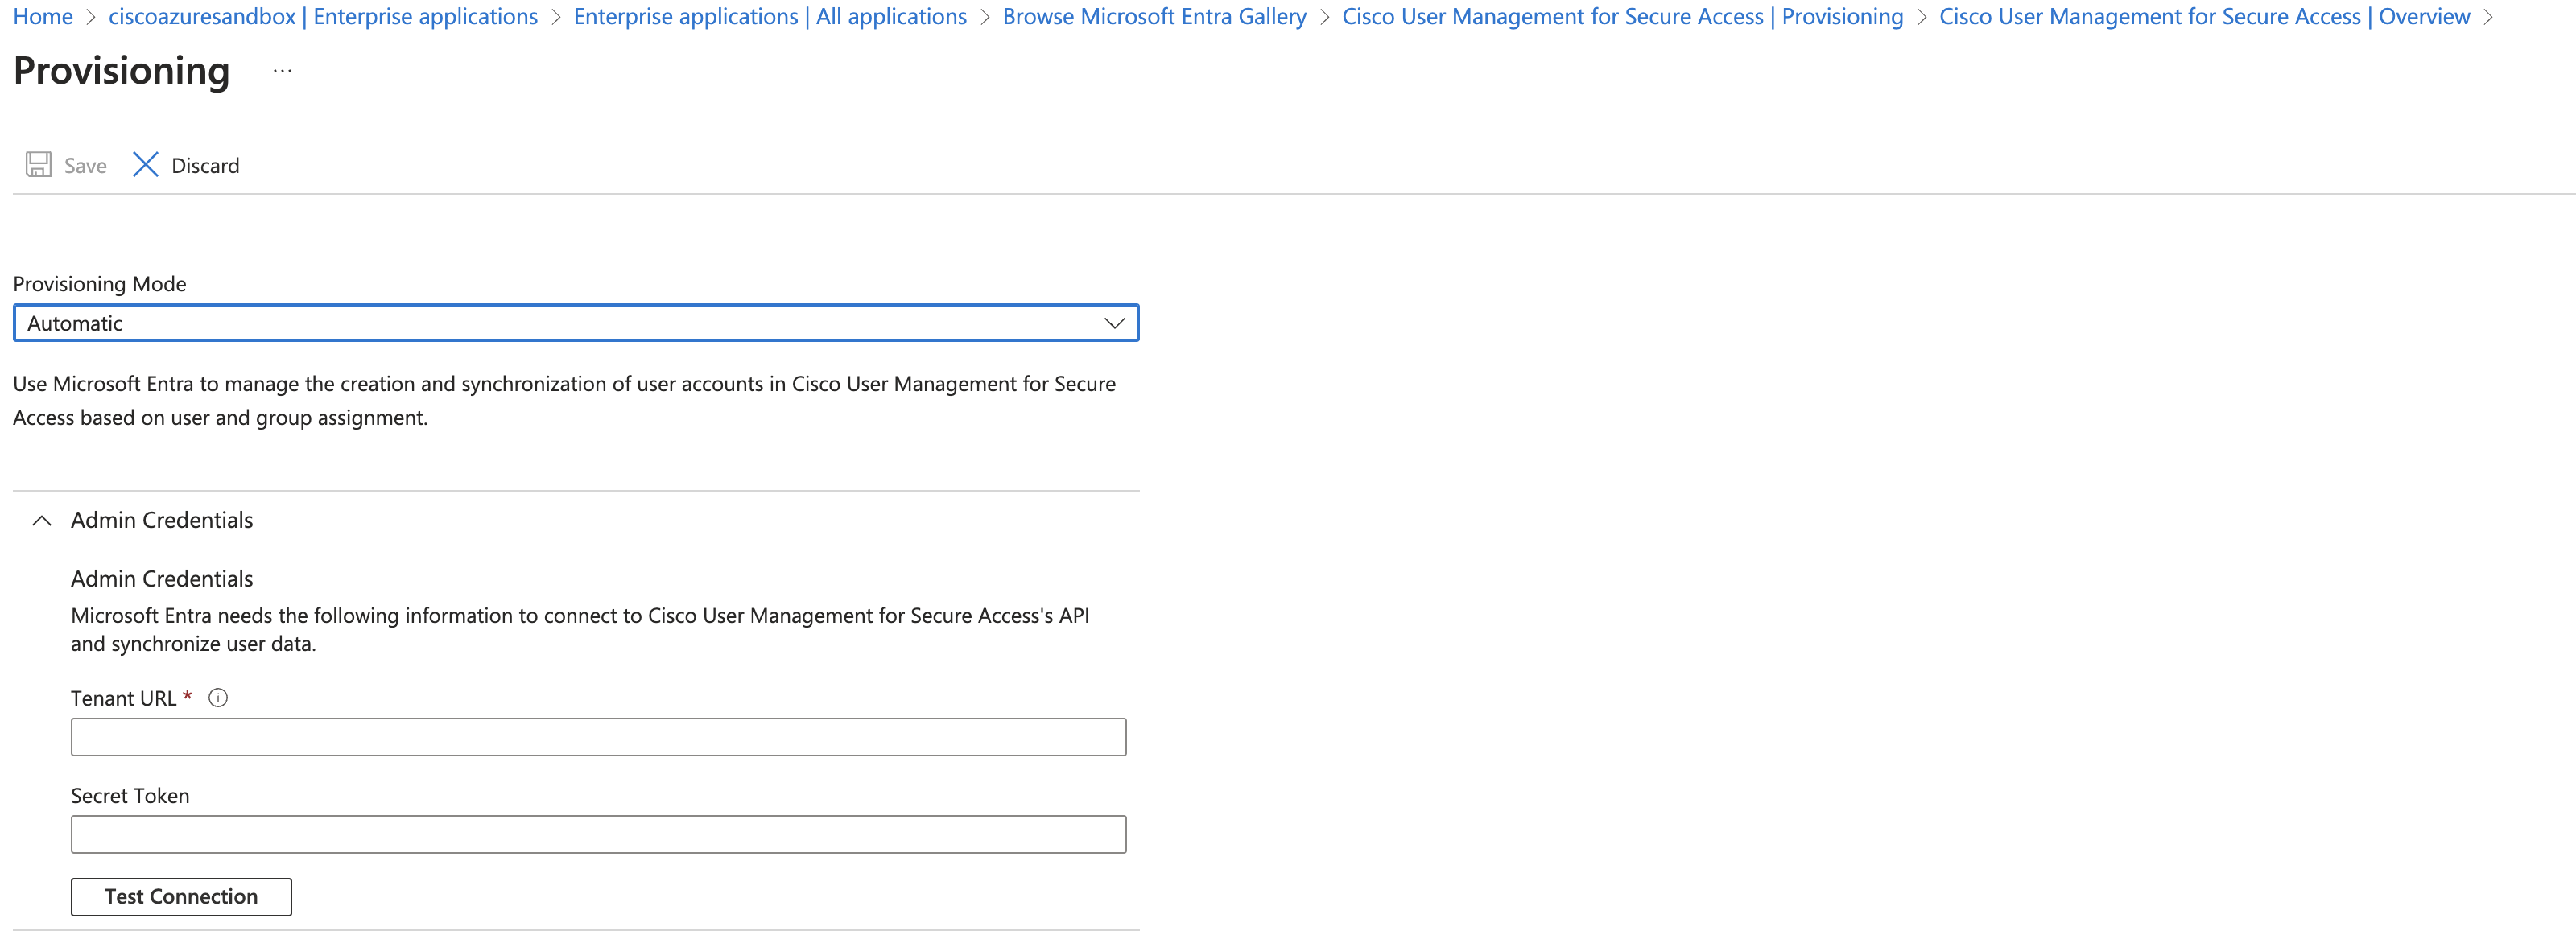
- In Azure AD, navigate to the Cisco User Management for Secure Access app.
- Add your Secure Access SCIM API token to the Secret Token field.
- Add the Secure Access API Identity URL to the Tenant URL field.
- Click Test Connection to confirm that you can use your Secure Access SCIM token to connect the Secure Access API with Azure AD.
Optional: Provision authName Attribute to Authenticate Users
To use an attribute to authenticate users in addition to the user principle name (UPN) attribute, customize the authName attribute and map it to a user profile (such as employee email or ID).
Prerequisite
- Authorize the use of the authName attribute. See Authorize the Use of authName Attribute to Authenticate Users.
Procedure
- Navigate to: https://portal.azure.com/?Microsoft_AAD_Connect_Provisioning_forceSchemaEditorEnabled=true
- Go to the Cisco User Management for Secure Access application.
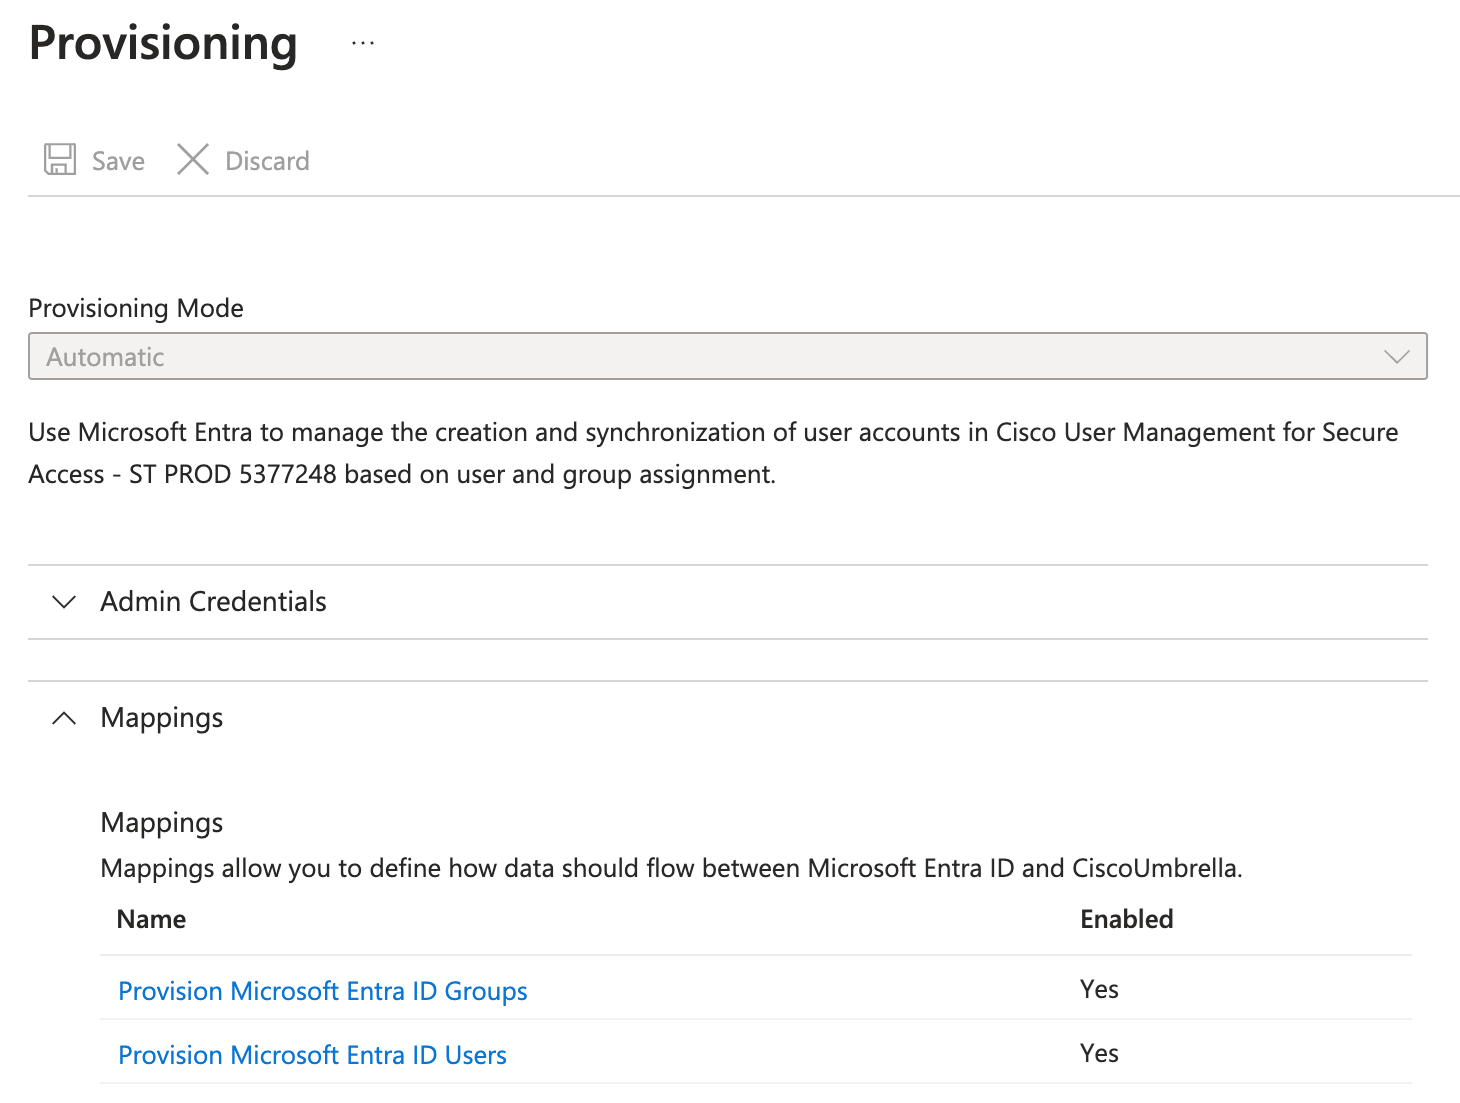
- Go to the Provisioning page.
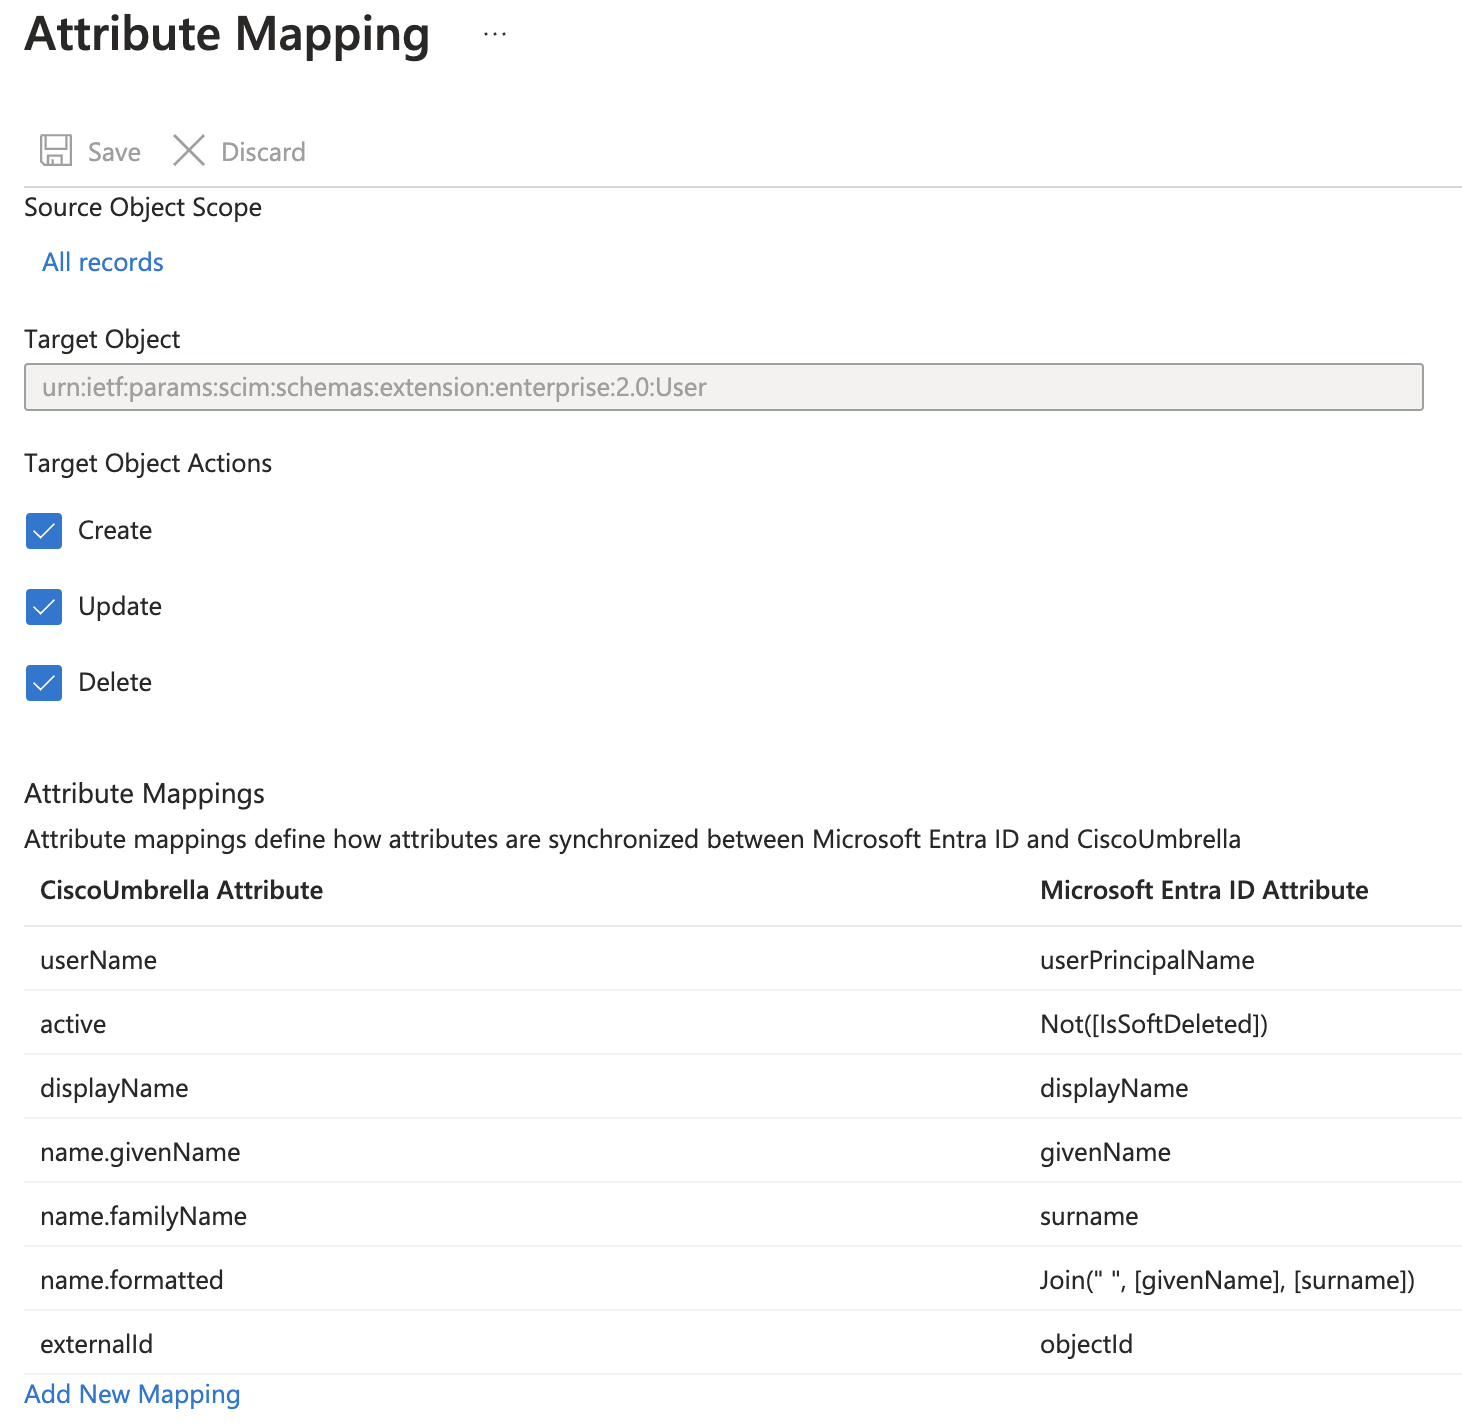
- On the Provisioning page, expand the Mappings section and click Provision Microsoft Entra ID Users.
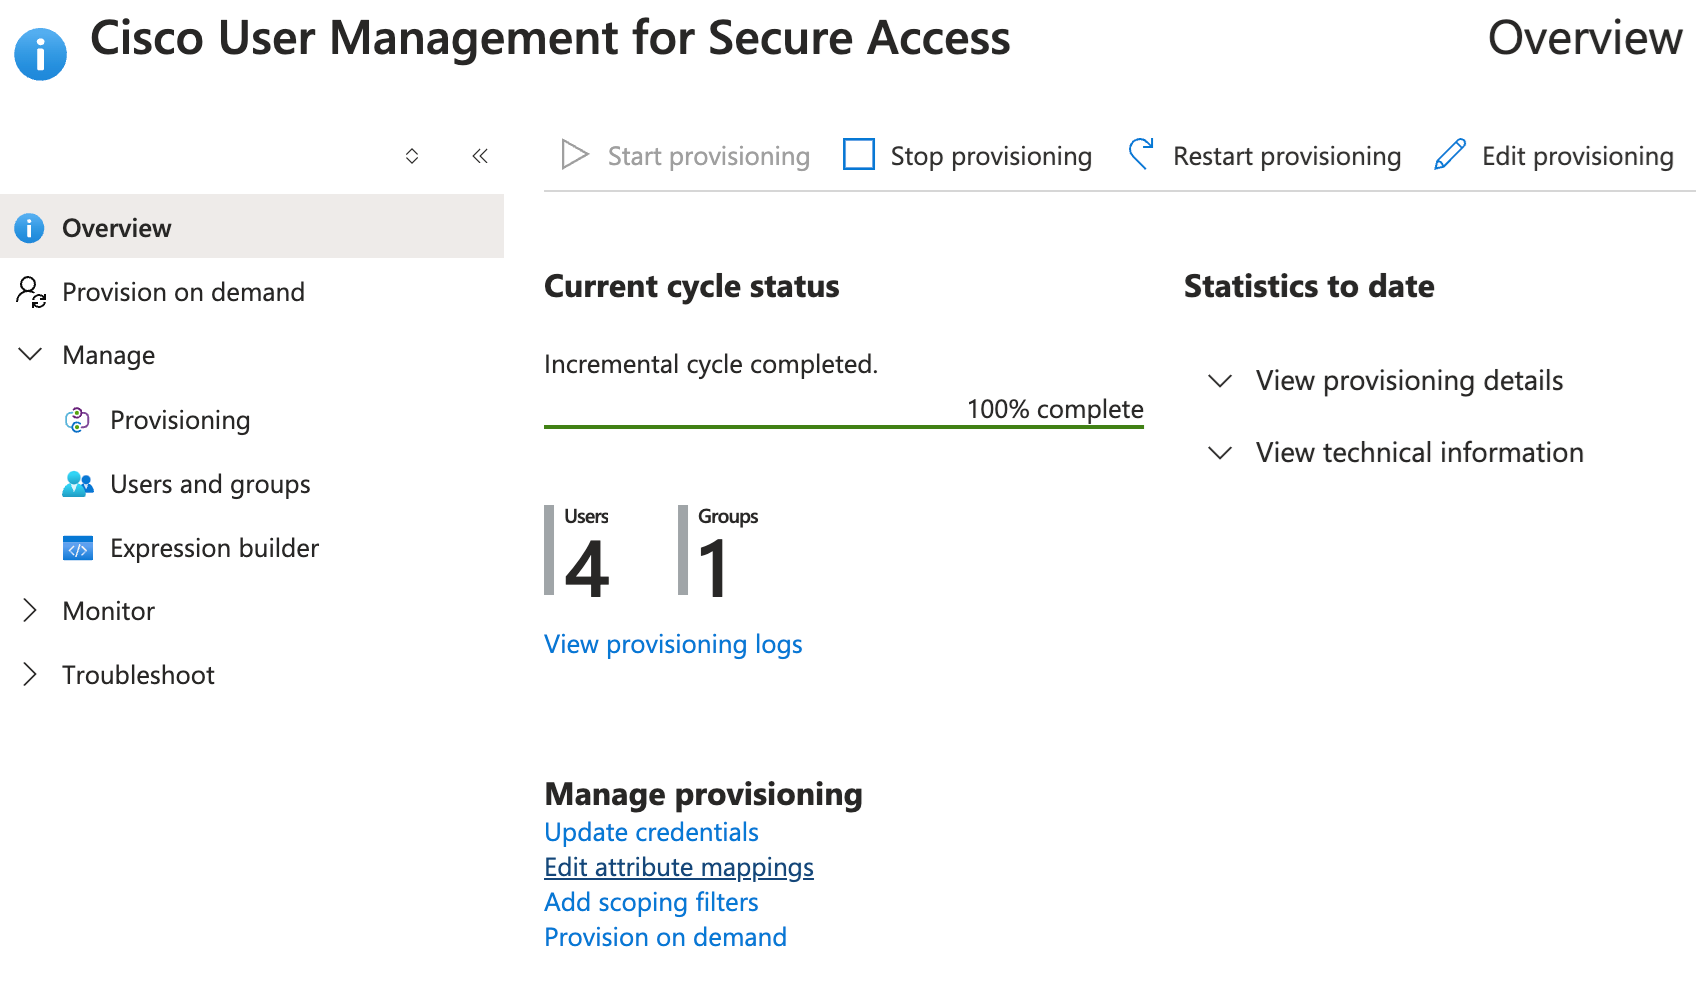
- In the left pane, select Manage > Provisioning.
- In the Manage provisioning section, click Edit attribute mappings.
- On the Attribute Mappings page, in the Supported Attributes section, click Edit attribute list for CiscoUmbrella.
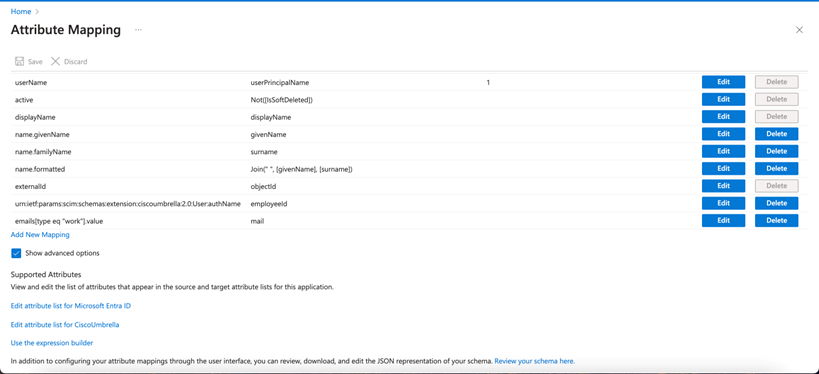
- On the Edit attribute list for Cisco Umbrella page, complete the following fields:
- Name: Select urn:ietf:params:scim:schemas:extension:ciscoumbrella:2.0:User:authName
- Type: Select string
- Primary Key: Leave blank
- Required: Leave blank
- Multi Value: Leave blank
- Exact Case: Leave blank
- API expression: Leave blank
- Referenced object Attribute: Leave blank
- Note: If there is an error in saving attributes, make sure that you stop provisioning and then re-start.
- On the Attribute Mapping page, scroll down and click Add New Mapping.
- On the Edit Attribute page, complete the following fields:
- Mapping type: Select Direct
- Source attribute: Select a user attribute that you want to map against the custom target authName attribute. Examples: employee email or ID.
- Default value if null (optional): Leave the field blank.
- Target attribute: Select urn:ietf:params:scim:schemas:extension:ciscoumbrella:2.0:User:authName
- Match objects using this attribute: Select No
- Apply this mapping: Select Always
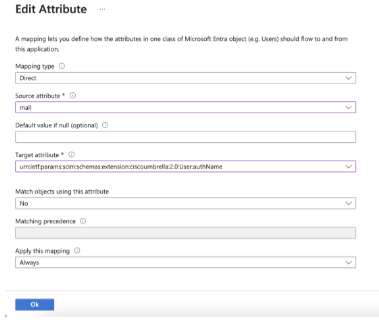
- Click Ok.
Result: New users sync with the target authName attribute automatically. Existing users will sync in a new Microsoft Entra ID cycle.
Force-Sync Existing Users
If you don't want to wait to sync existing users until a new Microsoft Entra ID cycle, you can force-sync existing users.
- In Azure AD, navigate to the Cisco User Management for Secure Access app.
- Navigate to the Cisco User Management for Secure Access Overview page.
- Click the Restart provisioning tab.

View Provisioned Users and Groups in Secure Access
- Navigate to Connect > Users and Groups.
- See View User Details
- See View Group Details
Refresh SCIM Token
Refreshing the SCIM token is the responsibility of the administrator. Secure Access does not perform this action. We recommend that you refresh the SCIM token at least once every 180 days. Each time you do, copy the new token immediately to the Cisco Secure Access app on Azure so that provisioning is not impacted.
Provision Users and Groups from Okta < Provision Users and Groups from Azure AD > View User Details
Updated 8 days ago