Jamf Registration
By downloading an XML file from Secure Access, optionally updating it, and then pasting part of its contents into your Jamf system, Jamf is able to push configuration information to both the Cisco Security Connector (CSC) and Secure Access so that your iOS device is registered with Secure Access. The result is that your iOS device is protected by Secure Access.
For information about configuring Jamf, see Jamf's documentation.
Table of Contents
Prerequisites
- The Cisco Security Connector requirements.
- Jamf Pro 10.2.0 or higher.
- You must first configure your Jamf MDM system. Configure Jamf as required so that it is able to push configuration information to both CSC and Secure Access. For information about configuring Jamf, see Jamf documentation. For support, contact Jamf support.
Procedure
Note: You must log into your Secure Access dashboard as an administrator.
Step 1: Add an Organization Administrator’s Email Address
The administrator email address is the email address that your end-user can use to send diagnostic reports from the app by clicking the I (vertical line) icon from within the iOS device. These reports can then be passed onto Cisco support. Once set, this email address is automatically added when managing an MDM.
- Navigate to Resources > Sources and destinations > Mobile Devices and click Settings.

- In Mobile Device Settings, add an email address, select operation mode (fail open or fail closed), select a notifications level (Protection failure notifications only or notify on all state changes), choose a device identification method, and click Save.

Step 2: Add a Mobile Device
- In Secure Access, navigate to Resources > Sources and destinations > Mobile Devices and click Manage.

- Under Deployment Type, click the Managed by MDM radio button, and then click Next.

- In the Managed Mobile Clients modal, click iOS.

- Click Jamf Config.
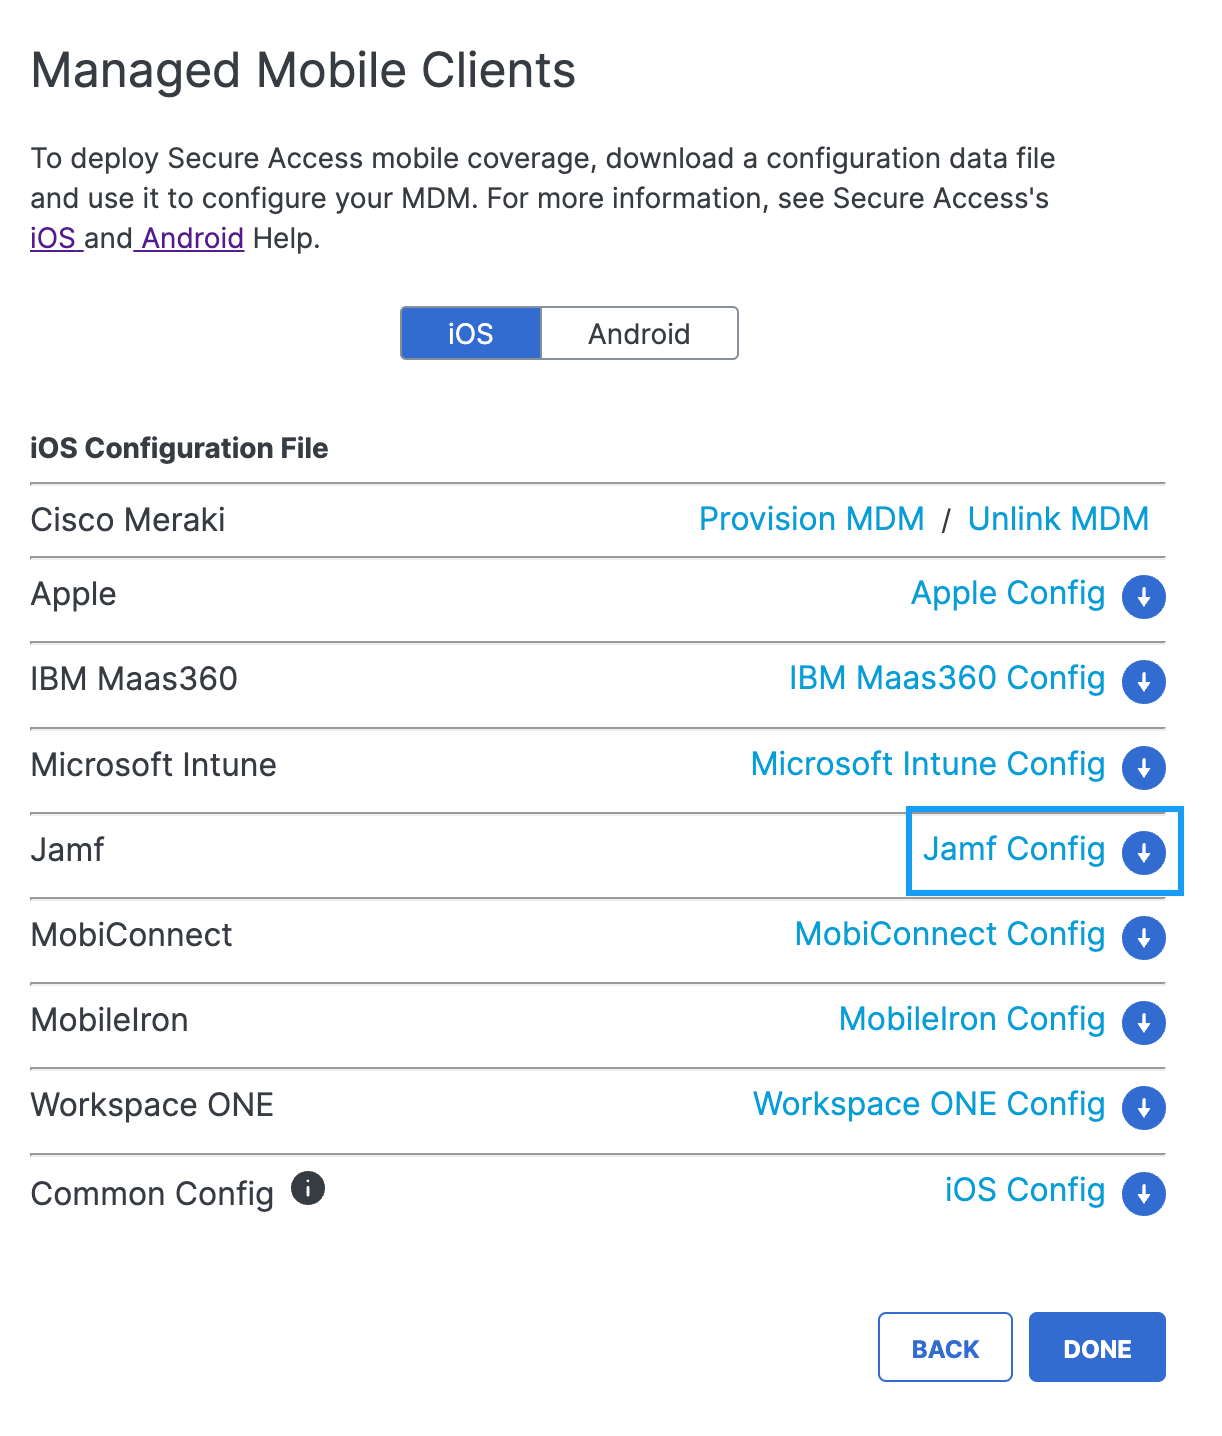
- In the opened dialog, click Download.
This email address is where diagnostic reports are sent when a user clicks the I (vertical line) icon from within the iOS device. Once set, this email address is automatically added when managing an MDM.

- Copy and paste the XML code between the comments into your MDM profile.
<?xml version="1.0" encoding="UTF-8"?>
<!DOCTYPE plist PUBLIC "-//Apple//DTD PLIST 1.0//EN" "http://www.apple.com/DTDs/PropertyList-1.0.dtd">
<plist version="1.0">
    <dict>
        <key>PayloadContent</key>
        <array>
<!-- Jamf - copy from here to paste into the Jamf UI to provision a DNS proxy -->
    <dict>

 .....

    </dict>
<!-- Jamf - end copy -->
- In your new profile, applied for the CSC group, choose Custom Settings and then Configure. Paste the edited XML here.
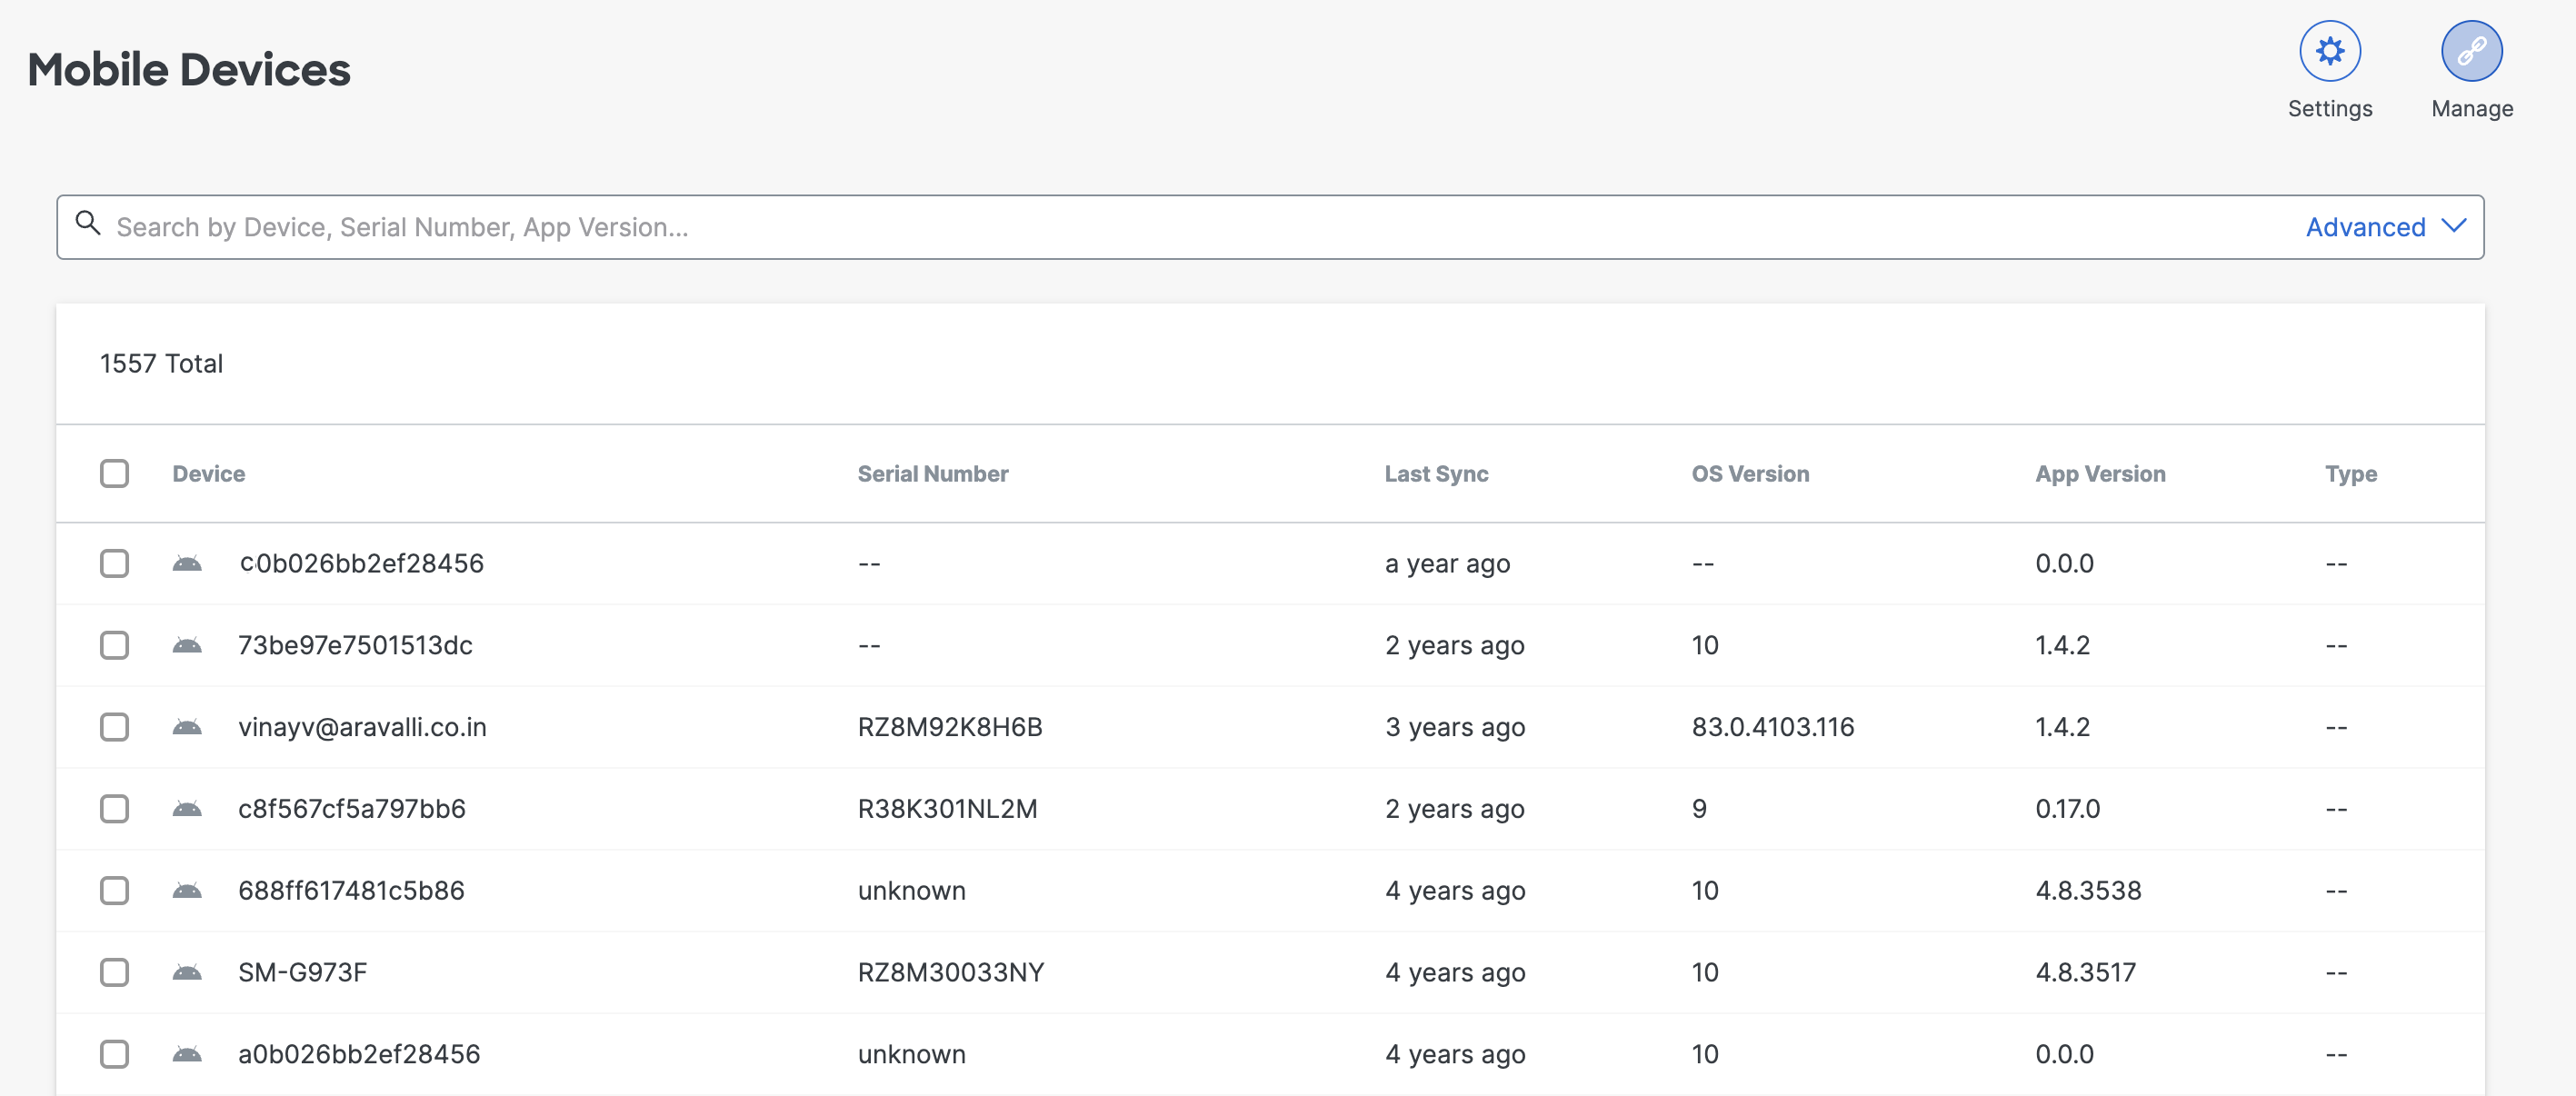
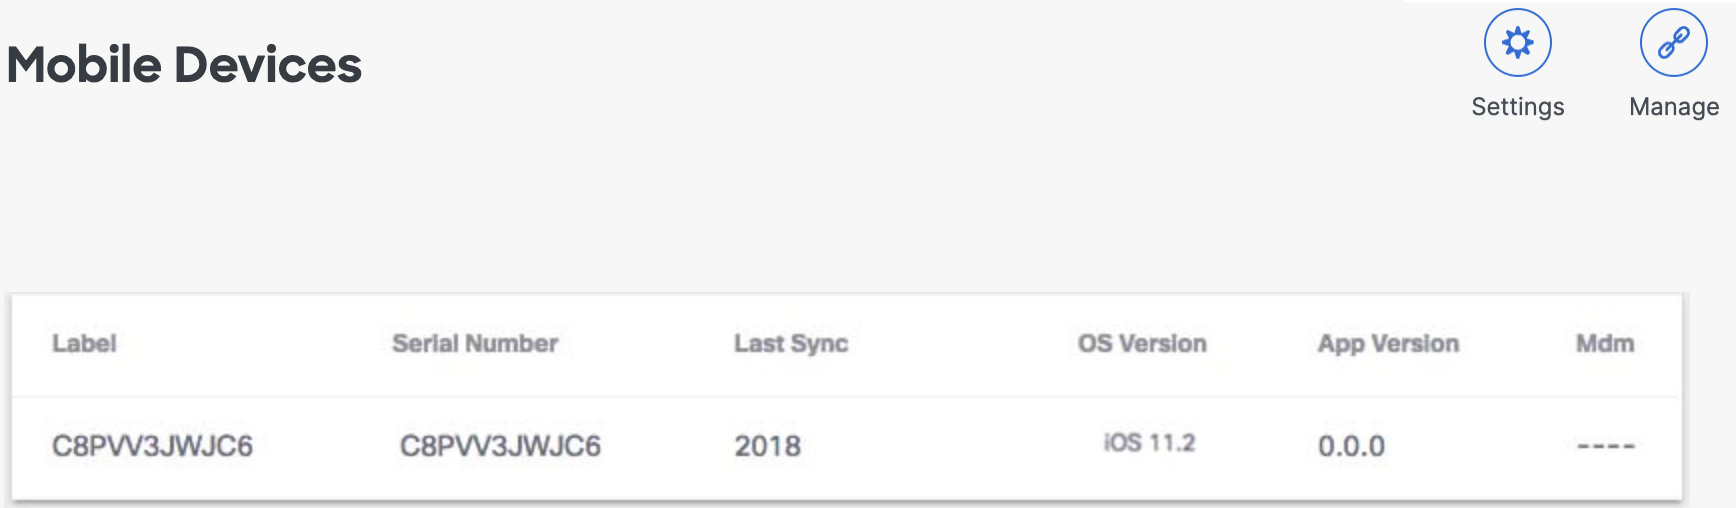
If successful, your mobile device registers with Secure Access and is listed at Resources > Sources and destinations > Mobile Devices. CSC on your mobile device updates to connect to Secure Access so that your iOS device is protected by Secure Access.
Alternate Configuration
Alternatively, instead of copying and pasting the XML code (as in steps 4 and 5 above), you can upload the config file directly to JAMF. In JAMF, navigate to Devices > Configuration Profiles > Upload and upload the .mobileconfig file.
Anonymization
Secure Access provides you with the option of anonymizing mobile devices for reporting and administration purposes. When you anonymize a mobile device, its label is hidden and replaced by your device's serial number. The label name is anonymized in both the Secure Access dashboard and in the CSC app UI. For information about how to anonymize your device, see Anonymize Devices.
Existing active devices anonymize with 24 hours. New devices anonymize immediately.
As no changes can be made in Secure Access to the actual provisioned device, these mobile devices are simply listed in Secure Access as identities; however, you can now use Secure Access to apply policies to these mobile device identities. For more information, see Apply Secure Access Policies.
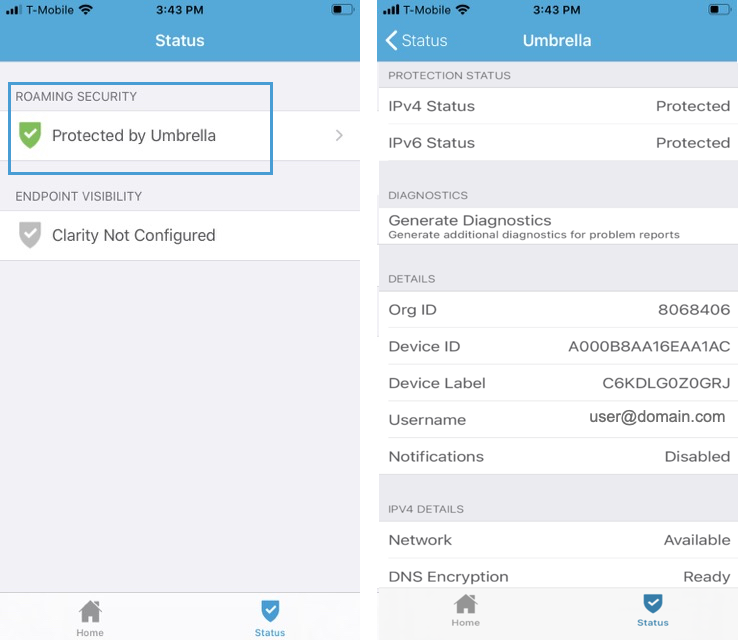
Verify Secure Access on Your iOS Device
- In the CSC app, tap the Status icon and confirm that it shows Protected by Umbrella.
- For protection details, tap Protected by Umbrella.
Install Root Certificate
The intelligent proxy can inspect web traffic sent from a mobile device to Secure Access. If you enable the intelligent proxy with SSL decryption in your DNS policy and apply the policy to your mobile device, you must install the Umbrella Root Certificate Authority (CA) certificate on the mobile device. Download the Umbrella Root CA certificate from the DNS policy or from Secure > Settings > Certificates.
- For information about configuring the intelligent proxy in the DNS policy, see Enable the Intelligent Proxy.
- For information about how to install the Umbrella Root CA certificate on iOS devices, see Push the Umbrella Certificate to Devices.
Intune Registration < Jamf Registration > MobiConnect Registration
Updated 6 months ago